home
>
Blog
>
Photography
>
How to take professional photos ?: Become a pro with these tips
How to take professional photos …
Every day we take dozens of photographs to save moments, events and memories, so every year we accumulate thousands of images. However, despite the advanced digital cameras on the market, one detail persists: the cameras don’t take good pictures on their own. They do what we tell them, this seems very obvious, but having a great camera is not enough if you don’t know how to handle it.
Why does this happen? Simply because, no matter how sophisticated the camera is, most people don’t know the basic principles that make the amateur photographer a professional. For this reason, we have prepared a note, where you will learn how to take professional photos to stand out in the field.
Download our photography resources for free
1. The three basic concepts of photography
Learn the three basic concepts that every photography lover should know:
Opening
Controls the amount of light that passes through the lens.
Shutter speed
Controls the time of light entry through the lens.
ISO
Controls the camera’s sensitivity to light.

2. The rule of thirds
Where should the subject be in our photography? To the center? On the left? On the right? The truth is that, if we place the subject in the center, the image could be uncreative. Therefore, it is recommended to place the protagonist of your photo shifted to one side, so you will achieve two things: highlight him and make the image more fun.
The best way to make a stunning photo composition is to apply the rule of thirds. This means the following: divide your image with two vertical and two horizontal lines, creating a 3 x 3 grid. Then place what you want to highlight on one of the points where the lines intersect (not inside the rectangle but at the linear intersections) .
These points are known as impact points. Did you know that people unconsciously focus their gaze towards these points of an image? Use it to your advantage.
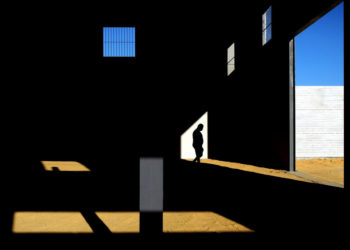
3. Photography is the domain of light
Many professional photographers conceive photography as the study of light. They are always looking for the best light, they even study it, because without it, there would be no forms, colors or details in an image.
In photography, we identify two types of light:
– Hard light: generates greater depth, offers more contrast to the image; therefore, it is more dramatic.
– Soft light: it is flatter, creates very subtle shadows between objects and is less dramatic.
In that sense, soft light favors anyone, thanks to fewer shadows. On the other hand, if you are looking for a more emotional effect, your best option will be hard light.
4. Adjust the image resolution
Keep in mind that images taken in low resolution are the most difficult to modify in post production. In general, these photographs do not allow obtaining a better result than a higher resolution would. Check your camera and discover the types of image resolution it offers. Which one should I choose?
Before, it is essential to acquire a memory card with greater capacity. Now yes, change your camera settings to take photos in RAW format. This is the native or “raw” format with the highest image quality, since the data that compose it is not compressed.
Learn how to take photos with your smartphone, sign up.
5. Choose the lowest ISO
The ISO is one of the main concepts that you must know to know how to take professional photos. Often, the digital cameras you use will allow you to choose the ISO value. Some may not know it, but shooting at the default setting can lead to noise-filled images.
Therefore, we recommend that, before photographing, take the time to check the ISO of your camera. It is best to lower the ISO as low as possible (the actual sensitivity of the sensor usually matches the lowest ISO value). This change will ensure you noise-free images and much more vivid colors.
6. Understand the Manual mode of your camera
Slowly leaving Auto Camera mode is the first step in experiencing professional photography. Dare yourself. In addition, there are two quick ways to learn how to take control of our images:
If the image is overexposed:
– Increase shutter speed
– Choose a larger diaphragm, a larger diaphragm less light and vice versa.
– Decrease the ISO
If you are underexposed:
– Decreases shutter speed
– Choose a smaller diaphragm or aperture.
– Increase the ISO
7. Opening and Depth of Field
Did you know that the opening of the diaphragm (also known as the f number) alters the depth of field? Yes, it is about how much the entire scene or object is in focus.
If you want to keep most of the scene in focus, like when taking landscapes, you should use an “f” with the largest number (for example, 8, 11, 16). On the other hand, if you want to focus on a specific object, you must use an “f” smaller numbers (2.8, 4, 5.6).
8. Look for the “Magic hours”
Maybe you have heard of this term when sunset comes and you see someone taking photos. Why are these hours so special? Well, for everything. Mainly, because the colors have a special tone. You start to see everything more pink, yellow, purple, blue or red. Colors are transformed with light and somehow everything takes on a new dimension.
The magic hours are two:
Golden light
It is the time when the colors become redder and the light becomes soft, you can even tell people to look at the sun and no, they are not going to be dazzled! It really is something magical.
– AM: when the sun rises
– PM: when the sun goes down
Blue Light (Twilight)
It is the time when the car lights are already on, but you can still distinguish well between the objects, because there is enough light to see properly. This is the light mostly used for landscapes, portraits and photographs of the moon. Colors become bluer and shadows are more diffuse.
– AM: before the sun rises
– PM: after the sun goes down

9. The tripod and the flash, two good friends
Within the entire set of accessories that photography requires, there are two pieces on which you must lean. The first of these is the tripod. Always use it, as it will improve the stability of the camera, which is particularly beneficial in low-light settings. Thanks to the use of the tripod, the sharpness of your images will be assured, as well as the focus in times of long exposure.
Your second best ally is the flash, especially when looking to make portraits. Even on a very sunny day, the flash will help prevent shadows from appearing on the lens’ face. Remember that the “fill flash” is not intended to illuminate the darkness, but to fill the face of the light subject so that it is uniform with everything around it.

10. Something very important: tell a story
Your photos should “speak” for themselves. If your photography manages to have a narrative, you will make the person who sees the image identify with it in a special way. Many times we believe that a “pretty photo” is enough, but in reality there must always be something else behind it.
The narrative can be related in a single image or in a series of them. For this, we recommend the following:
– Don’t see, watch.
– It’s all about capturing the moment.
– It can be a change of light, a gesture, an emotion, a scene.
– Go with your eyes, not with the camera.

And you, what kind of photos do you like to take? Do you have any additional tip or recommendation to take good photos?
Remember that in Crehana you can go deeper into photography and become a professional. You can start by enrolling in the Fundamentals of Digital Photography Course where you will learn how to properly handle a digital camera and its accessories. What do you think? We read soon.


Discussion about this post