
home
>
Blog
>
Photography
>
How to make a home photo studio for product photography?
How to do a study …
Hello, I’m Luis Felipe, designer and art director. I currently belong to the Crehana team and in this note I am going to show you how to take a product photograph with objects that you can find at home. In other words: I will give you several tips to Assembling a Home Photo Studio for Product Photography.
We are going to unleash our creativity by composing a still life. We will photograph it and play with natural light and some flashlights. Finally, I will explain how to give it a touch-up in lighting and contrasts to achieve an advertising finish.
As a result, you will have a product photograph that you can show in your next venture or use it for a future client.
At the end of the note, you can download the file for free in Photoshop with all my retouching process. Lightroom presets will also be available to help you correct the color and lighting in your photographs.
Let’s get started!
Access all our courses with a Premium Membership
Objects at home that you can use to take product photography
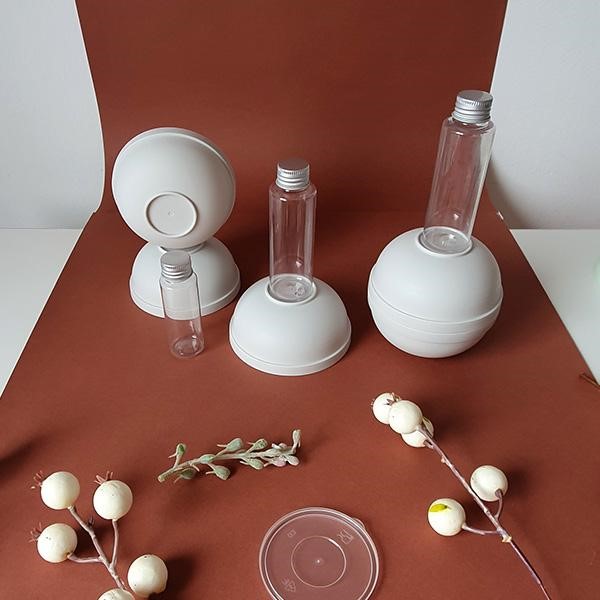
Next, I will show you the objects that I found at home for this photo shoot:
- Cardboard sheets
- Liquid soap
- Celofan paper
- Artificial flowers (you can also use real flowers, but it is optional)
- Decorative stones
- Plastic bottles
- Plastic containers. You can use different colors (optional)
- Flashlights, lamps or luminaires.
- Kraft paper (optional)
- Equipment: cell camera with good focus and brightness option (in my case, I used a Samsung S10) or photographic camera (I used a Sony A7iii camera with Sony FE 50mm F1.8 lens)
The photographs can be taken with a cell phone that has good focus and allows you to modify the brightness. If it is a camera, make sure you can modify the aspects in ISO, aperture and exposure.
Learn about all the photography courses we have for you
Steps to build a photo studio at home
1. Choose the space for your study
Let’s consider setting up our home photo studio near a window, in this way we will get natural light from the side and we can manipulate the lighting when taking photos.

2. Place a background
To start putting together our home photo studio, we must place a background to our liking. In my case, I used a sheet of brown cardboard.
The next step is to generate a curve joining two sheets of cardboard, thus we will achieve an infinite background.

3. Start composing
It is time to compose our home photo studio always thinking about the depth of the elements: an object in front and another in the back.

4. Intervene the objects
To achieve creative compositions, we can use a rubber or cleaner to help us join the containers. This will help us create striking organic shapes.
We can also fill our containers with some colored liquid. I chose liquid hand soap.

My next recommendation is to cut the artificial plants, to obtain different sizes. In this way we will have dynamism with our objects.

5. Observe the textures and choose what to highlight in your photos
Now, let’s take a closer look at the details that objects give us: textures in the bubbles, shadows, and highlights. These will help us understand what we want to highlight when taking our product photography.

6. Prepare the trigger!
We already have our still life ready! Let’s start with the photos.

Keys for taking product photography
1. Take photos from different angles
Once you are comfortable with your composition, you will start taking photos from different angles. For example: I chose the front angle of the still life. I invite you to test distances, that is, get closer and further away with the camera.

Don’t be afraid to take too many photos, then you will have time to select the ones you like best.
2. Time to check the lighting
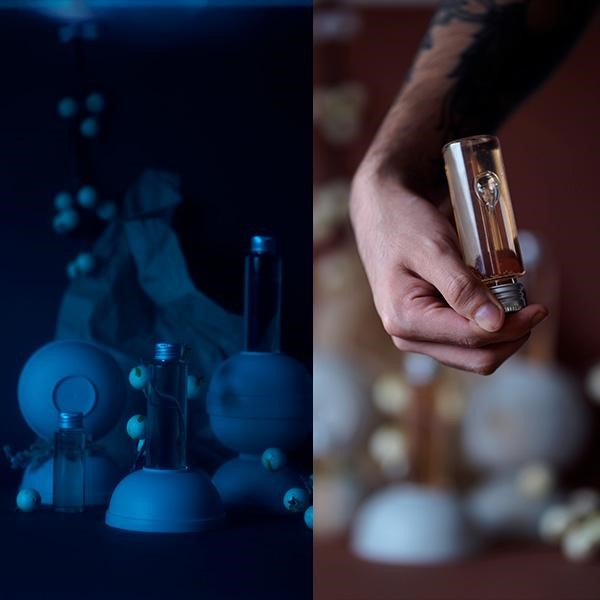
Now let’s try playing with the highlights!
Ask someone to help you hold the flashlights or cover the window with some sheet.

Try lighting the still life using a flashlight behind plastic. Try different angles, the idea is that you have fun discovering and generating new textures from light.
See how the light affects your still life, giving it new shadows and colored highlights. With this result you will achieve a different atmosphere.

3. Light up with different colors
Use cellophane in the same way. Place the flashlight behind the cellophane or in front of your lens.


4. Test the ISO, aperture and exposure
Next, play around with the ISO, aperture, and exposure (if you’re shooting from a camera). In this case, these were some of my settings:

This was the result combining both lights. Here I played with the entry of light from the window and created shadows by placing the flashlight from the side.

Retouching process for product photography
For the retouching process, download this free Lightroom presets pack and use them to correct the color balance, lighting, and contrast in your product photos.
Download them now
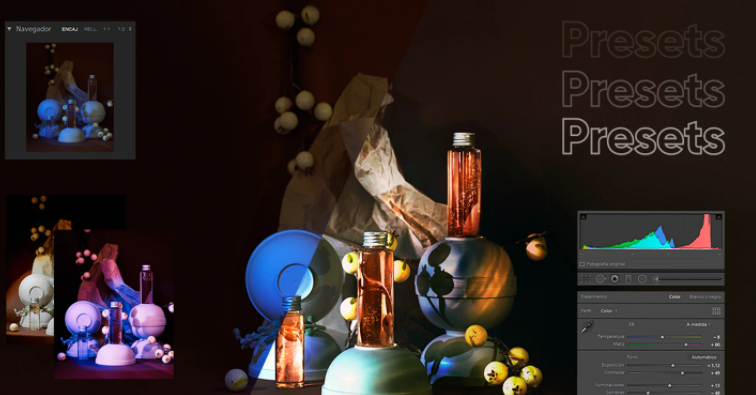
As a result, you will have a better finished photograph ready for your next project.
These are the three presets for lightroom that you can download and apply to your product photographs:
Preset 1: Orange Dream (for warm photos)

Before after
Preset 2: Blue highlight (For photographs with blue colors)
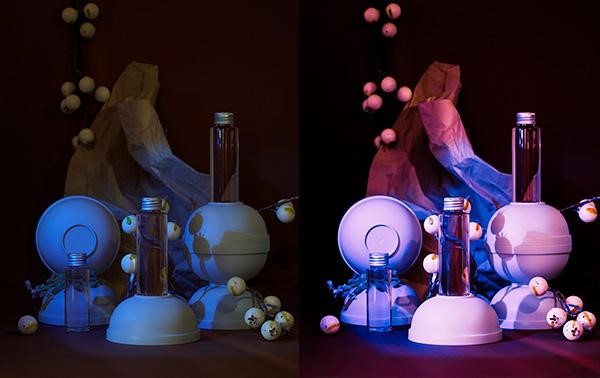
Before after
Preset 3: Shiny day (For lifestyle photos)

Before after
Final poster

What if we try placing a headline and some graphic elements?

Finally, I leave you the video of the retouching process:
I hope that after reading this note, you have encouraged to put together your home photo studio. Now you know that it is possible to take a low cost product photograph with household objects and obtain a good finish.


Discussion about this post