Do you sometimes feel the need to light the scene you are going to photograph without always having your flash with you? Your studio lighting kit? They are too bulky, heavy, expensive, complex to adjust? Read this Lumecube test if you are looking for a simple solution.
The Lumecube range at Miss Digital …
The Lumecube range at Camara …
I have the same needs and constraints as you, so when I discovered the Lumecube portable and autonomous lighting system, I wanted to test it.
A few weeks later I was seduced by the Lumecube, an autonomous and portable light cube that solves many problems in photography and video.
When I started talking about the Lumecube, I received a lot of questions, all of which boil down to these: ” What’s Lumecube?« . It is quite normal, the system is not very well known or disseminated yet, and yet it deserves it.
The Lumecube adventure began as a Kickstarter project that met with such success that the company behind the idea has now structured itself and is developing a range of several models.
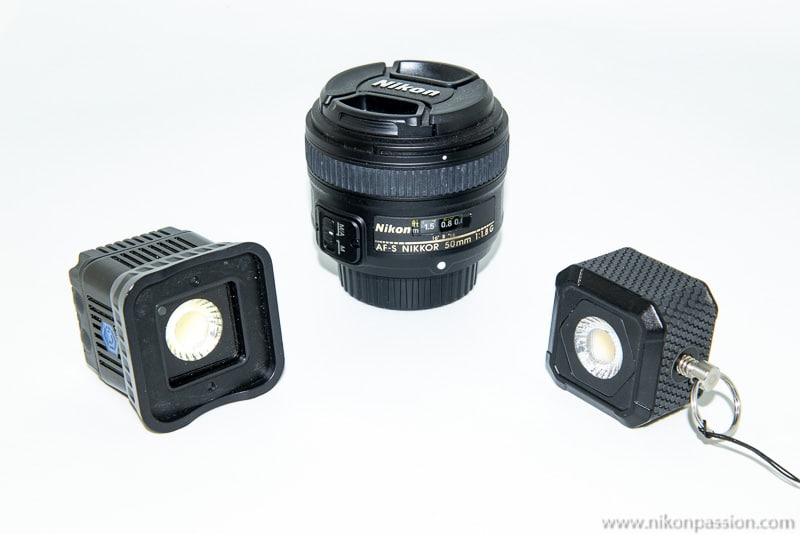
The “classic” Lumecube on the left, the Lumecube Air version on the right
for the scale one AF-S Nikkor 50 mm f/1.8
A Lumecube is:
- a self-contained, rechargeable and portable continuous-light lighting accessory,
- a cubic block of 4 cm on each side (barely 2 for the Lumecube Air version),
- integrating a 1500 lumen LED lighting system (750 LUX at 1 meter, 400 for the Air version),
- capable of receiving lighting accessories with magnetic fixing (barn door, honeycomb, coloured gelatins, dome, …)
- Powered by an integrated rechargeable battery through a Micro USB port,
- controlled by two on-off and power buttons (on-off only on the Air version),
- remotely controllable in expert mode thanks to a smartphone application (5 Lumecubes per application, Bluetooth, iOS and Android).
The Lumecube is not intended to replace a flash (it is continuous light) although it is capable of operating in flash mode. Nor is it intended to replace continuous studio lighting (less power and range). The Lumecube brings light where it is needed when it is needed. And – most importantly – the Lumecube is discreet and fits in your pocket.
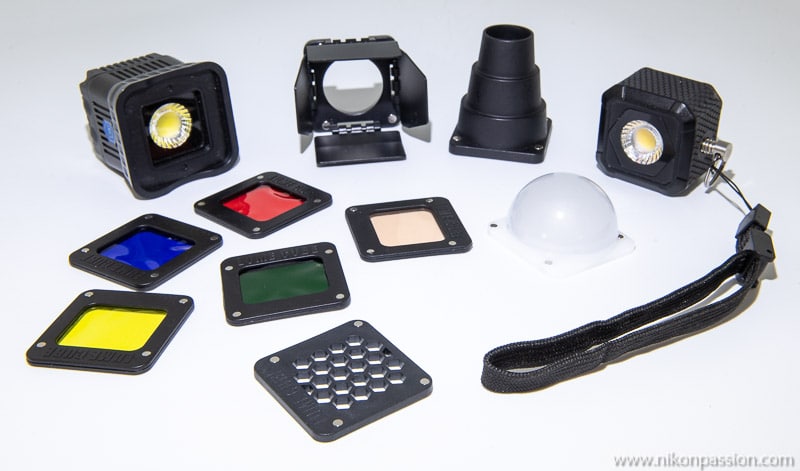
The contents of the Lumecube Professional Lighting Kit
The Lumecube Air is sold separately, the second classic Lumecube included in the kit and absent from the picture was used to light it.
The other advantage of the Lumecube is that it can be coupled with other Lumecubes thanks to a dedicated mobile application. This can drive up to 5 cubes at the same time:
- separate on/off switch for each cube,
- separate adjustment of the light intensity,
- separate adjustment of the operating mode (continuous light, strobe light, flashing light, …).
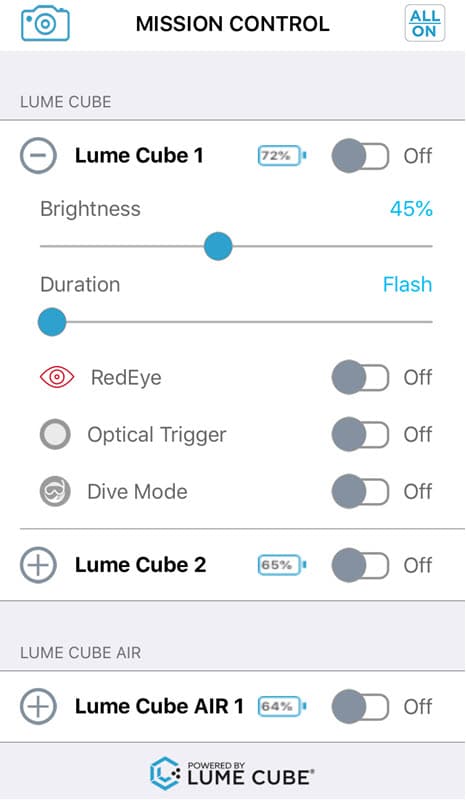
Overview of the Lumecube application (here with 3 cubes)
While the package may seem modest on the surface, just use it for a few days to see how effective and simple it is to use.
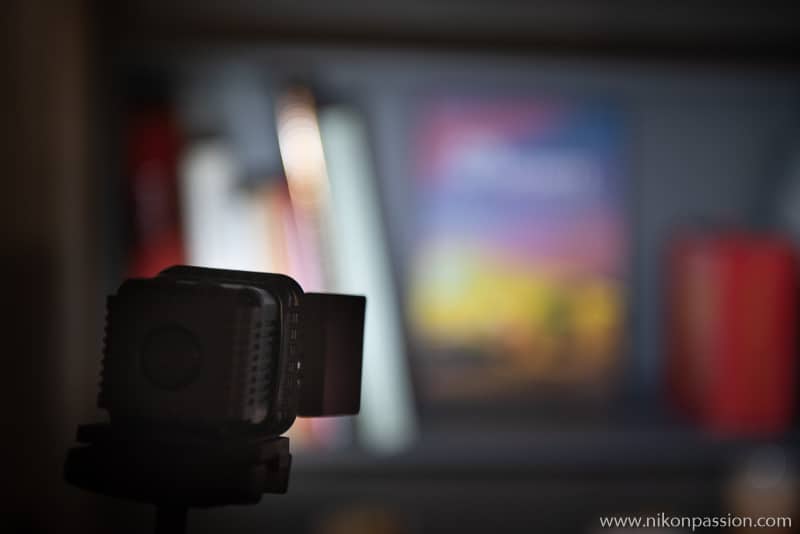
Lumecube test: fixed on my tripod with barn door accessory indoors
Instead of having to set up and adjust one or more cobras flashes, whether or not they can be controlled remotely, you simply place the Lumecube, or Lumecubes, as you wish and then adjust them remotely with your fingertip on your smartphone.
If you feel the need, you install one of the accessories supplied with the professional kit and you have at your disposal the equivalent of a studio light, all things considered.
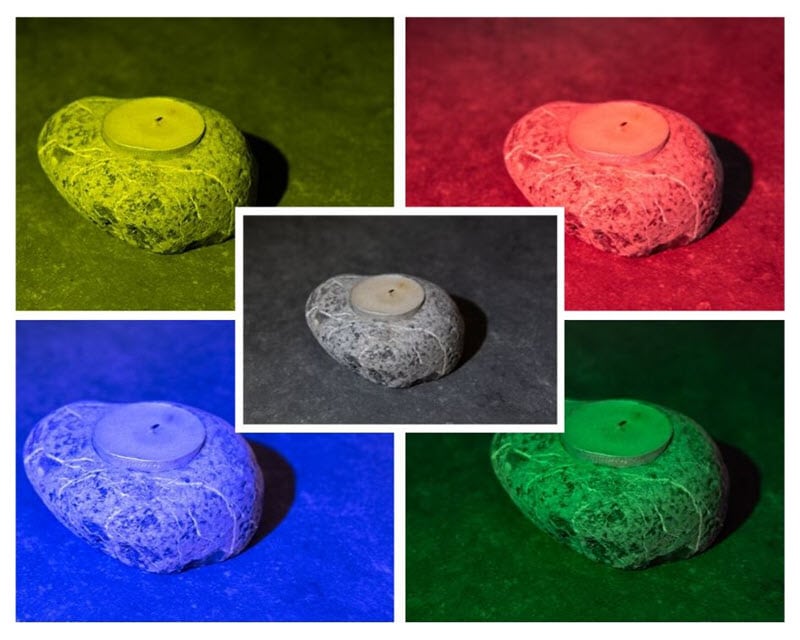
Lumecube test: one cube, 4 colours of light using magnetically fixed gelatins
The advantage of continuous light is to show you the final result immediately when the flash requires a modeling light which is not very practical outdoors and at a distance.
Another advantage of the Lumecube is that it is waterproof to 30 metres, which means that you can use it in the rain and also use it for creative new lighting applications (underwater or out of the water for example).
Example of underwater photo (C) Woj.Dop
I never carry a flash with me because I don’t use it in urban photography, it’s too aggressive. I also don’t want to weigh down my camera bag and it takes me a long time to set up a flash. Setting two of them to work together is even more complicated.
With the Lumecube, it’s totally different: I put the two cubes in my bag (only one fits but I tested a pro kit with two cubes), they are discreet and light (340 gr.). If I feel the need to light a scene, I take them out, position them where I want and adjust my lighting in a few seconds with my smartphone.
That’s what I did for this street portrait, done at dusk holding a Lumecube in my right hand while triggering. Needless to say, a flash would have been unwelcome and I wouldn’t have been able to take the picture. The small size of the Lumecube does not intimidate my subjects who would have difficulty accepting the flash. The continuous light is also less aggressive.
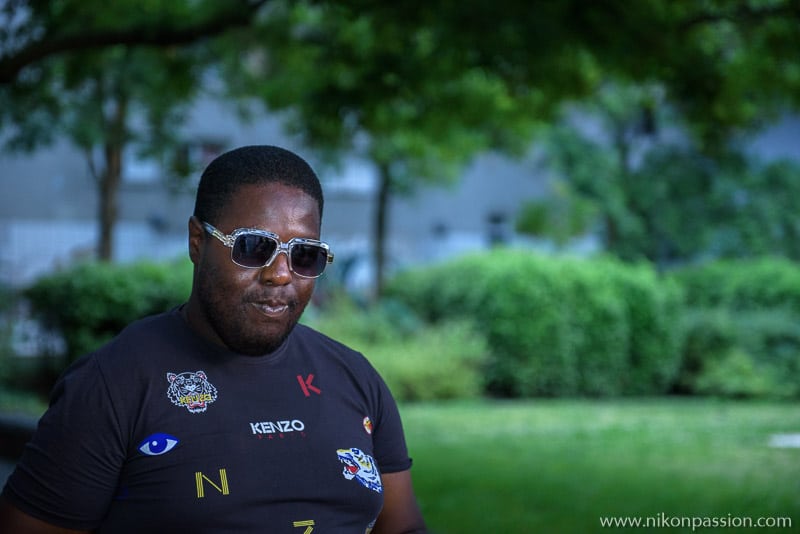
Nikon D750 + AF-S Nikkor 24-70 mm f/2.8
70 mm – f/2.8 – 1/100 sec. – ISO 2.000
There is nothing like a demonstration to show you what can be done with the Lumecube lighting system. I have used for each of the images below or two cubes, and made pictures with and without to illustrate the interest of using this lighting system.
Studio Packshot
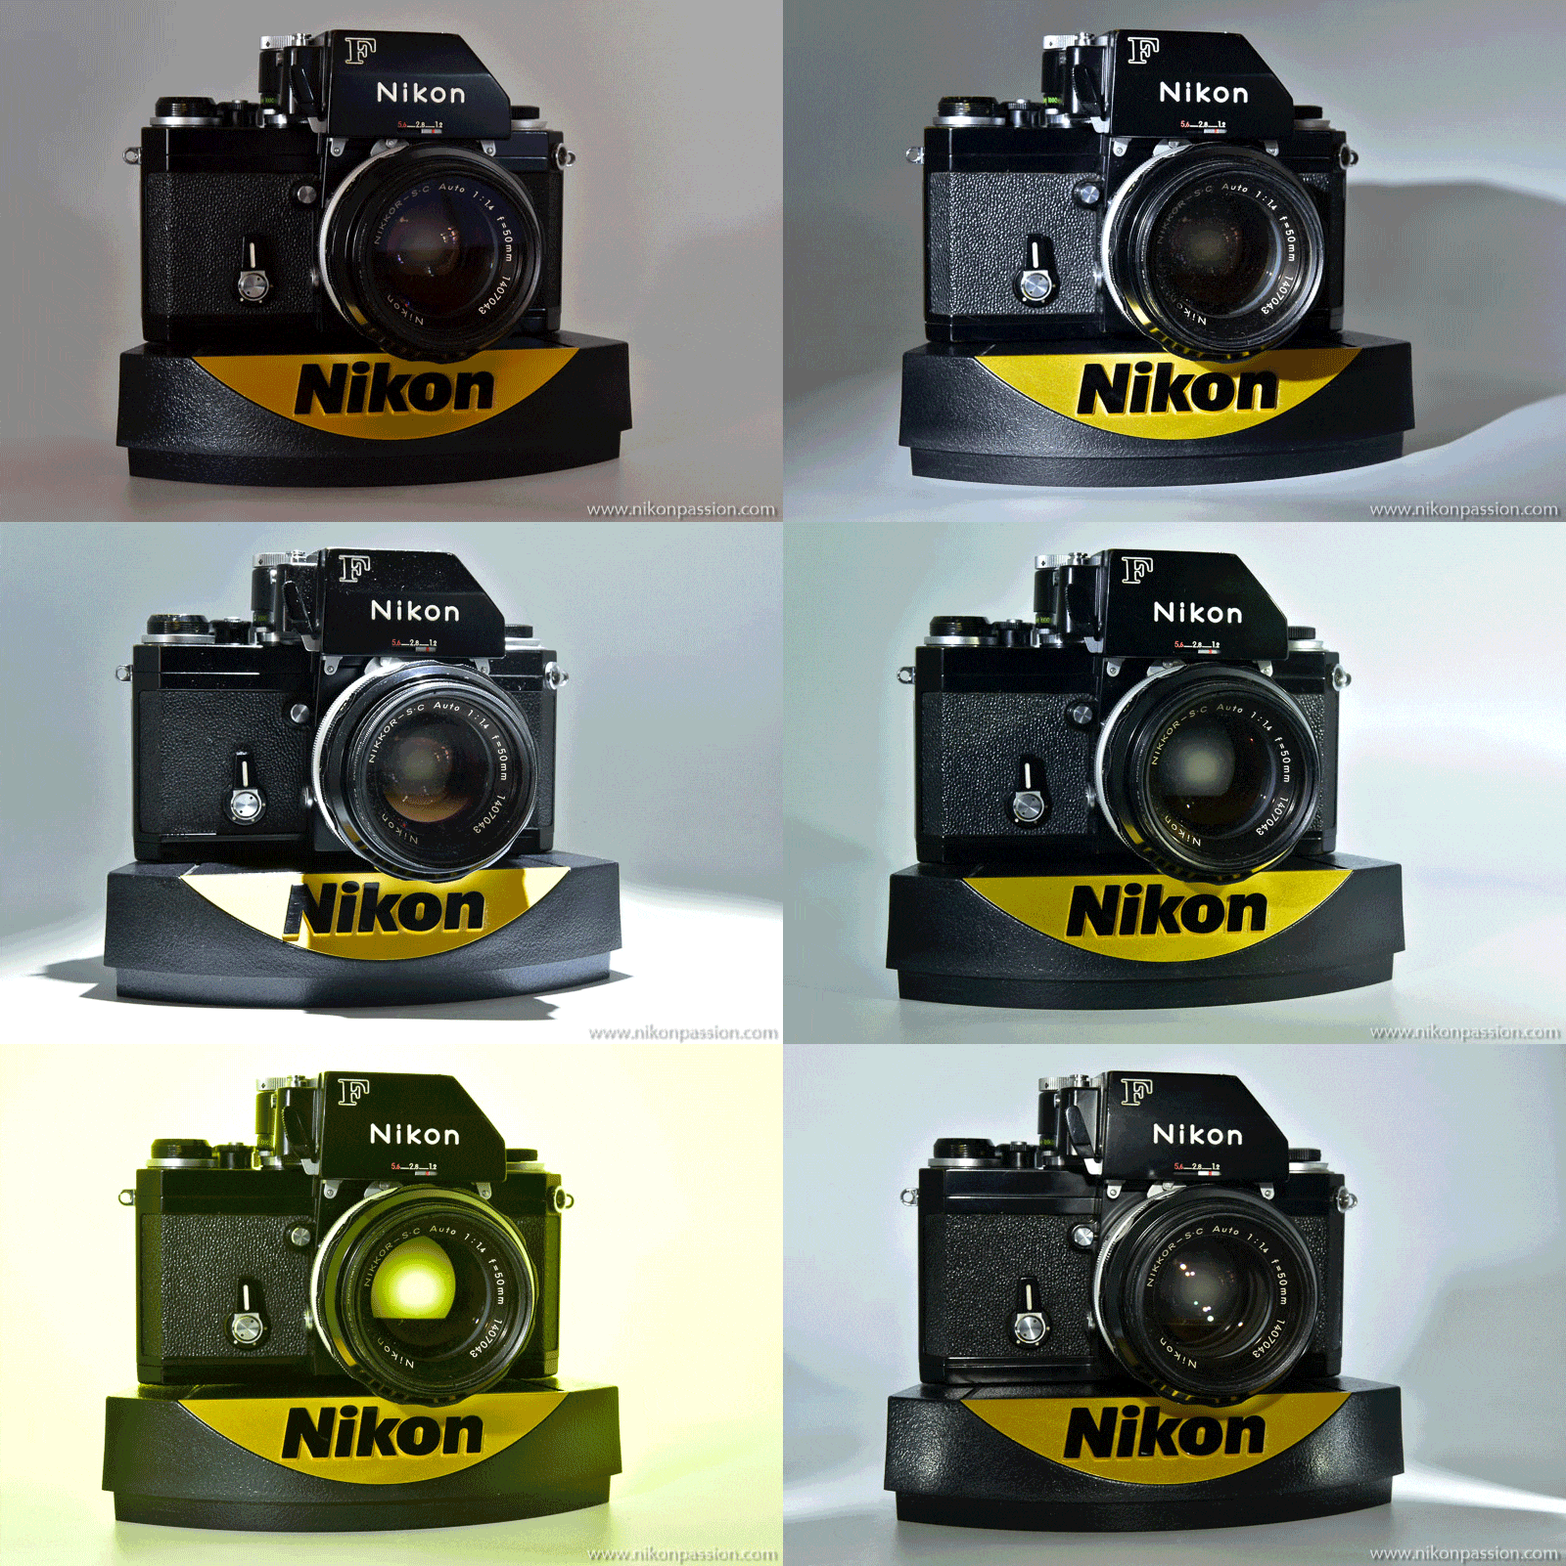
This first illustration photo (see the Packshot tutorial) is the one of my Nikon F Apollo (for the experts), taken in my portable studio. I voluntarily turned off all the lights to make this Lumecube test.
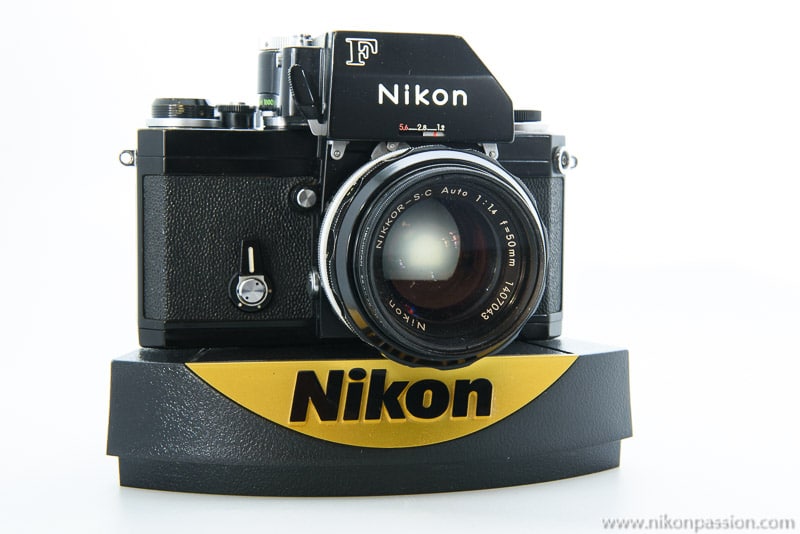
Nikon D750 + AF-S Nikkor 24-70 mm f/2.8
60 mm – f/16 – 0.4 sec. – ISO 800
The left side lighting comes from a first Lumecube equipped with the diffusion dome to avoid too obvious reflections on the reflective parts of the housing.
The second Lumecube illuminates the right part of the photo to balance the lighting on the right and the background. This image lends itself easily to object selection in Photoshop if I need to remove the background to insert the box in another setting.
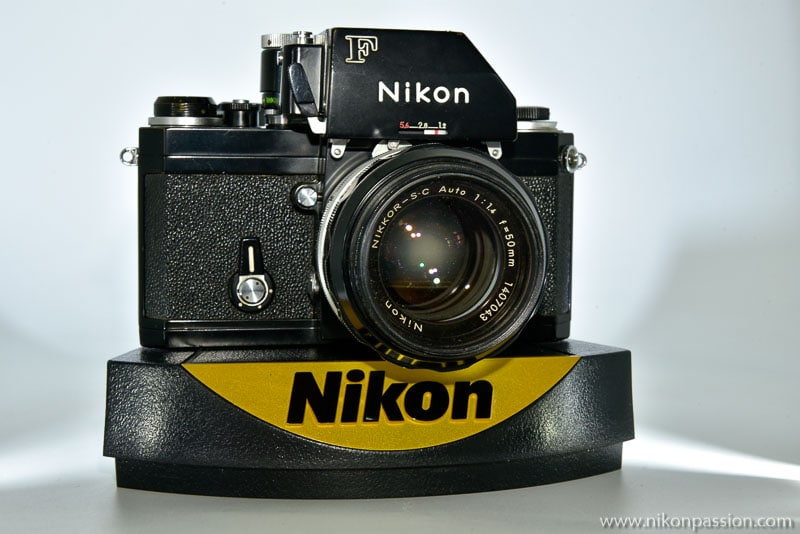
Nikon D750 + AF-S Nikkor 24-70 mm f/2.8
60 mm – f/16 – 1/10 sec. – ISO 800
Here is another lighting combination for which I used a Lumecube on the left with the cone that allows me to generate this light trail. Same scheme on the right with another Lumecube and its cone, I pushed the intensity of this one to accentuate the effect of the light trail.
A third cube, the Lumecube Air under test, illuminates the frontal housing, I hold it in my hand during the shooting to easily manage parasitic reflections.
This image could be used to illustrate a catalogue, it highlights the body while bringing relief in the photo and some reflections in the lens.
Here are some other lighting combinations made in a few minutes for this Lumecube test (image degradation is specific to GIF animation) :
Evening street scene
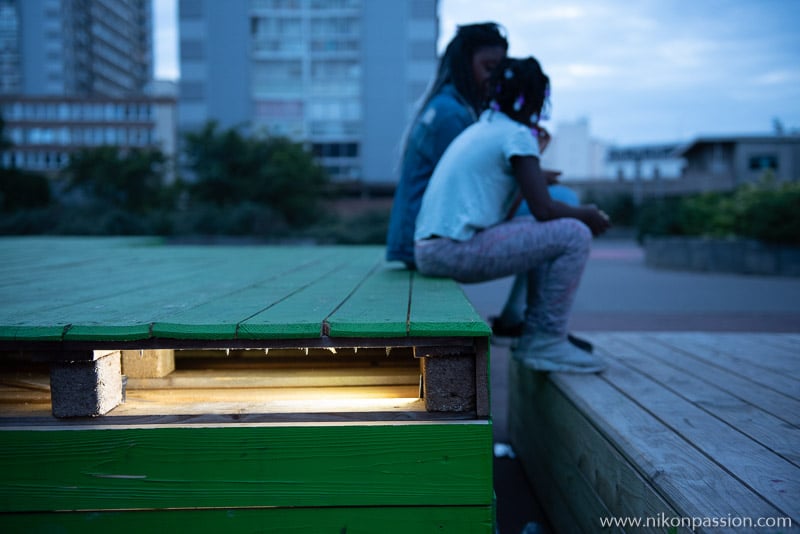
Nikon D750 + AF-S Nikkor 24-70 mm f/2.8
40 mm – f/2.8 – 1/250 sec. – ISO 2.000
This photo was taken during an urban outing at dusk. I used a Lumecube placed on the right in the palette that serves as a seat. My subjects are illuminated in the background by the little daylight left, I set the exposure to balance artificial and natural light.
Note that the two people in the background didn’t feel bothered at all by this quick setup, they didn’t even turn their heads while a flash would have alerted everyone at 50m!
Urban landscape in the evening
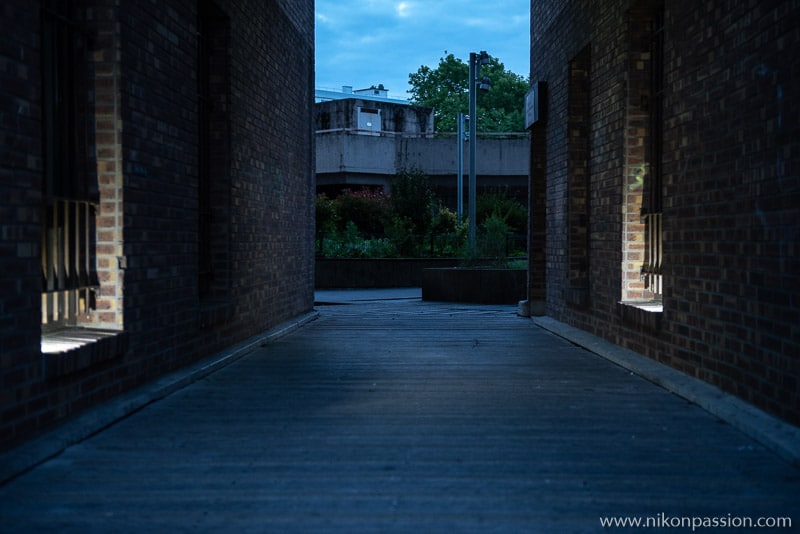
For this evening street scene I chose to light the two side openings with my two Lumecubes. This artificial lighting simulates an interior lighting that could come from the premises. The background is exposed for natural light.
Nikon D750 + AF-S Nikkor 24-70 mm f/2.8
48 mm – f/2.8 – 1/125 sec. – ISO 2.000 – compensation -1.7 Ev
Night graphics
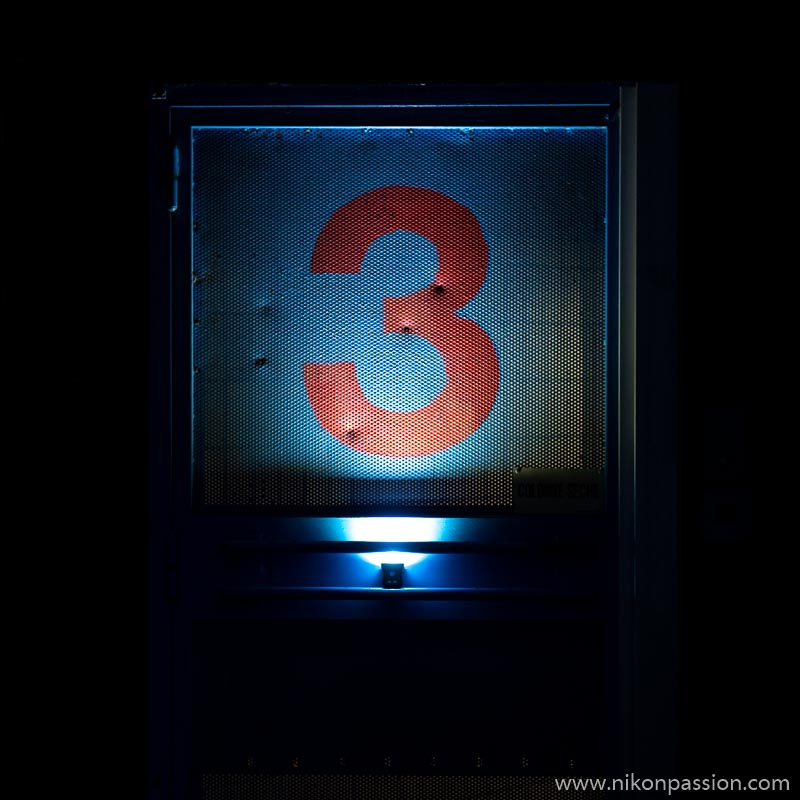
Curious to see what the Lumecube could do for me when there is no natural light at all, I took this night photo by placing the Lumecube under this panel (you can see the cube). This configuration allows all possible combinations if you take the time to play with it.
Nikon D750 + AF-S Nikkor 24-70 mm f/2.8
56 mm – f/2.8 – 1/250 sec. – ISO 2.000 – compensation -1.7 Ev
Plants
The Lumecube can be used to illuminate your macro photos when light is lacking. Although I am not a macro enthusiast, I took this photo to illustrate the contribution of the Lumecube.
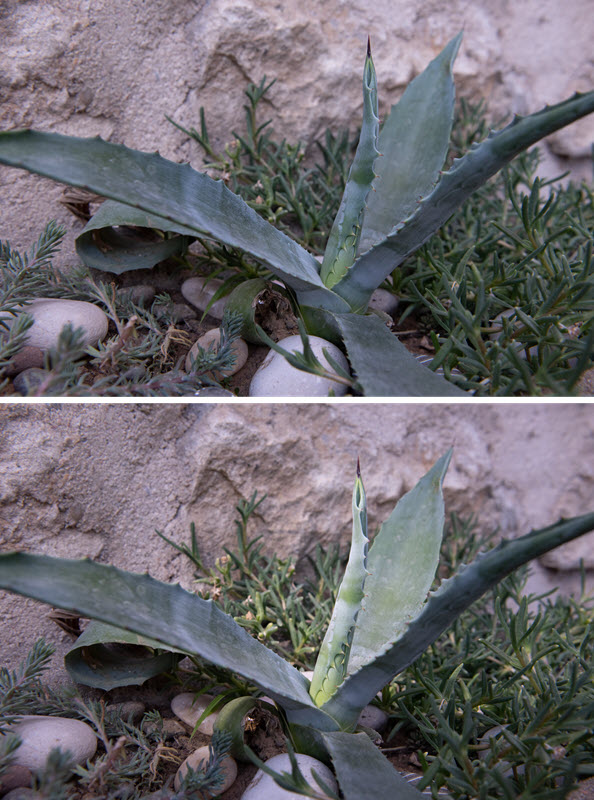
The top photo is taken in natural light, freehand, at the end of a sunny day. The lighting is flat, the whole lacks relief but the light is sufficient to ensure a great depth of field.
The bottom photo benefits from a light input on the plant stems with the help of a Lumecube. The overall balance of the photo is not altered but the plant is highlighted, as well as the smaller stems in the background.
Nikon D750 + AF-S Nikkor 24-70 mm f/2.8
40 mm – f/8 – 1/100 sec. – ISO 1.600 up
40 mm – f/8 – 1/125 sec. – ISO 1.600 down
Without attempting to reproduce the entire technical data sheet (you will find it on the distributor’s website), here are the main characteristics of the Lumecube :
- aluminium body, the Lumecube is heavier than it looks and more resistant too (I tested the resistance to falling from my involuntary height …),
- Waterproof to 30 m, the USB charging port is protected by a screw and a gasket,
- Charging via the Micro USB port, a full charge takes less than two hours,
- Light intensity adjustable from 0 to 100% on 10 levels using the dedicated button or continuously with the application,
- remote control by the application via Bluetooth,
- colour temperature set to daylight,
- 60° open beam,
- beam intensity reaches 750 LUX at 1 meter,
- Optical flash function with sync at 1./250 sec..,
- screw thread 1/4″ 20 for tripod mounting.
The Lumecube is very practical to use as it stands alone on any flat or slightly sloping surface: wall, floor, post, border, … The screw thread allows you to fix the Lumecube on a tripod, which I have done in the studio for example.
The aluminium construction allows the Lumecube to withstand the vagaries of outdoor photography. Waterproofing is a plus if you like to shoot underwater. You can also immerse the Lumecube in water to photograph a subject out of the water, it’s up to you to be creative!
I liked the magnetic attachment system of the accessories, it’s quick and easy. Installing the dome to diffuse the light or a cone to direct it is done in a few seconds.
Autonomy is around 20 minutes per charge at full power, it exceeds one hour continuously at reduced power. Each charge allowed me to use the Lumecube for two to three hours since I turn it off between shots.
Note that the principle of recharging by Micro USB port allows you to use a portable battery as a backup if you need more autonomy. The percentage of battery remaining is shown on the mobile application for each Lumecube connected.
After this Lumecube test, which took place over many weeks, I am seduced by the system. As I don’t have a permanent studio, I don’t need a more powerful, bulky and expensive lighting system. Nor do I need the power of a large outdoor flash. The Lumecube is therefore an interesting alternative, light, compact and powerful enough.
However, Lumecube cannot meet all expectations, due to its autonomy, power and the range of possibilities it offers.
The price of the Professional Lighting kit (see below) reserves it for frequent use if you want to make your investment profitable.
The versatility of this self-contained light source may limit you in your practice if you plan to use it intensively in the studio.
Nature photographers who love macro photography will find a way to give relief to their photos without getting bogged down in the field.
For who, for what?
The Lumecube portable lighting system will interest you if :
- you appreciate being able to have light where it is lacking, both indoors and outdoors, without having to invest/carry a traditional lighting system,
- you have trouble adjusting your flash settings, visualizing the final rendering and prefer to use continuous light,
- you want to travel light without depriving yourself of additional lighting available at all times,
- you have an iOS or Android smartphone,
- you like to test different lighting configurations without spending too much time on it.
The Lumecube system will be of less interest to you if :
- you’re looking for a lighting system as powerful as the one you use in the studio,
- you are looking for the greatest possible autonomy,
- you do not like to carry a light support (small tripod or Gorillapod) with you to position the Lumecube as you wish,
- you never use additional lighting.
How much does it cost?
I recommend the classic Lumecube, which is more powerful and not much more expensive than the Air version. It is available from specialist retailers such as photo equipment shops and sells for around 93 euros (September 2019). The Lumecube Air version, less powerful but more compact, is sold for around 85 euros.
For use in the studio or for creative lighting, the Professional Lighting kit is the most interesting with its two cubes and their accessories (all are doubled). This Lumecube Professional Lighting kit is sold for about 300 euros.
To find out more about Lumecube, the creative accessory system and other examples of use, visit the distributor’s website for France.
The Lumecube range at Miss Digital …
The Lumecube range at Camara …



Discussion about this post