
home
>
Blog
>
Photography
>
I never do well in my photos: how to improve them?
I never do well in my …
Being a novice or with years of preparation, many times the perfect image that we see before our eyes is not portrayed in the same way in our final photo. I know you’ve asked yourself, “Now what do I do with the result?”
Photography, like retouching, are disciplines that complement each other; but today, we will talk a little more about the second. We can perform wonders with a single click and I want to leave you with some practical ways to improve a photograph within Photoshop and enhance the result.
Learn how to make cool selfies with your phone
1. Use the brush as a concealer
Retouching works for many things, but its best known use is to correct. Fewer shadows, a little more blur? Take it for granted!
If you are not so familiar with the thousands of options Photoshop offers you can start with something very basic: the Story Brush (Y). This will help you focus the places where you only want the effect very quickly.
– First, open your image and make the effect or adjustment you want. In my case I used curves to raise the lights.
– Second, go to your “Story” window and select the square next to the effect, then go back one step (as in the image).

– Then, with the History Brush in your tool window, paint the surfaces you want to have the effect.
– Finally, don’t forget to adjust the opacity or the blending mode (Soft Light or Lighten). This helps you correct basic and specific elements.

2. Modify the colors
You have the perfect shot, but it is not the color you needed or you just don’t like it as much because of how some garment or prop that appears in the photo looks. In fact, in Photoshop you can vary the tone and this tip will surely make it easier for you.
– First, you must select the area where the element you need to change color is.
– Second, in the “Menu” bar you enter “Selection-Range of colors”.
– A window will appear, with the dropper select the color you want to change. For example, here I selected yellow and was adding tones according to what I saw in the preview.
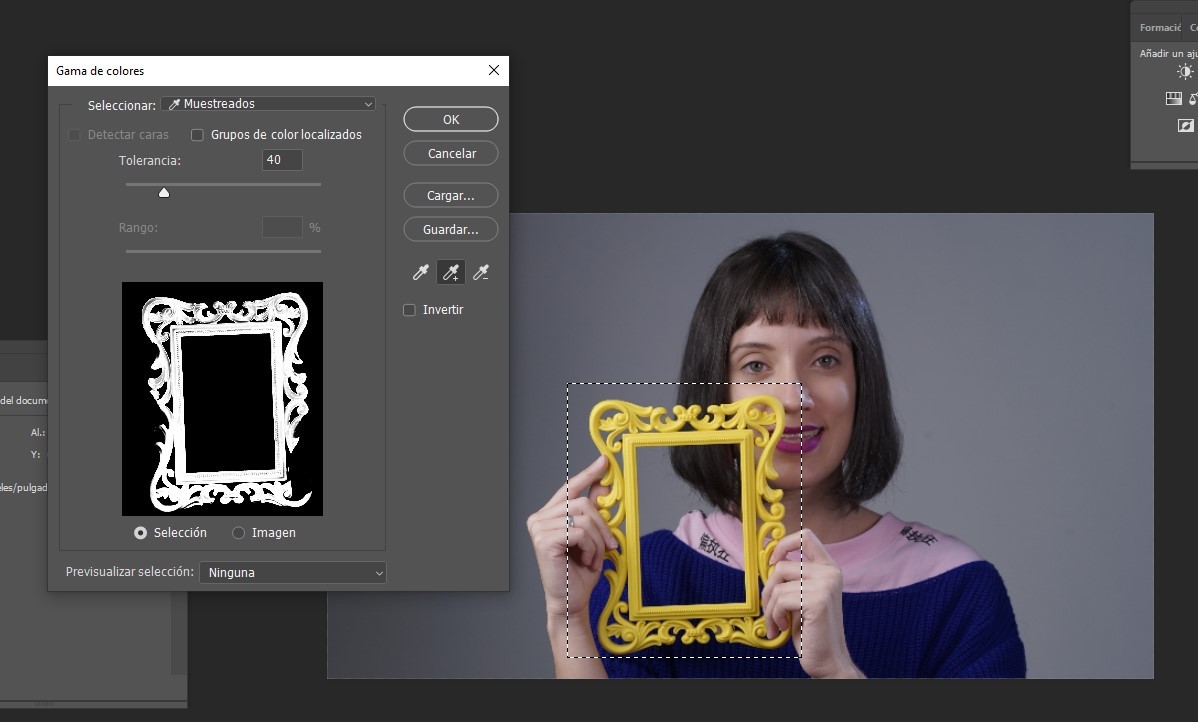
– Then, in “Layers” you create an adjustment layer of “Hue and Saturation”.
– Finally, you only change the tone to the color you want and that’s it.

3. Add texture to the skin
The natural thing is that we have textures on our skin and it may be that makeup or overexposure have removed that element in our photography; but good news, we can still get it back.
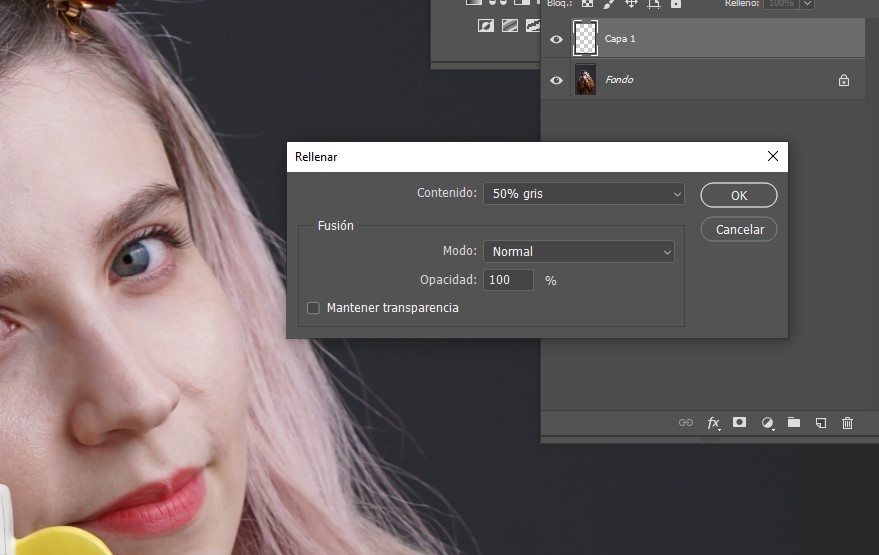
– First, you create a new layer on top of your photo, inside you enter “Edit-Fill”.
– Second, in the window that opened you change the content to 50% gray and click “Ok”.
Get a Premium Membership and keep learning from home
– Third, you enter “Filters-Noise-Add Noise”. You add an amount of 20% and accept.
– Fourth, you enter “Filters-Stylize-Relief” again. Inside you must adjust the angle of the relief with the direction of the light in the photo, then click “Ok”.
– Fifth, the layer where you make the adjustments must be placed in a soft light blending mode.

– Finally, you can select a “Layer Mask” on your layer with the texture, and use the eraser to remove the parts where you don’t want the effect.
4. Get the best apps
If we are honest, time is almost never on our side. Therefore, if the desire to upload a photo is stronger than your patience to get to your house and edit it, it will help you to have a battalion of applications on your cell phone.
There are numerous apps, that if I mention all of them I would never finish this note, but I share my favorites and the ones that have saved me more than one opportunity: Snapseed, Lightroom and VSCO.

They are intuitive and with many tools to investigate. Be curious and order them on your cell phone to have better control of which one helps you the most, either by improving the lights or adding textures.
Download these 8 exclusive Lightroom presets for free
These are just four quick and effective tips to get a change in your photos and improve them; However, the challenge lies in your creativity and how you can use the tools thousands of times and in different ways for unique results.
Hope this retouching approach has been helpful and you start applying it. Do not forget that you can review our Photo Retouching courses to investigate more on the subject.


Discussion about this post