You’ve just invested in a Nikon Z 6 or Z 7 and you don’t know how to set up a Nikon hybrid to get off to a good start? The user manual is hundreds of pages long but you didn’t take the time to read it all?
You’re not alone. With the arrival of the Nikon Z 6 and Z 7 since the end of 2018, I receive more and more questions on this subject so I decided to share with you my experience, not as important yet as the one I can have with SLRs, but enough to help you get started.
This article has been updated after the arrival of firmware 2.0 which brings the Eye-AF feature. Bookmark it to find it quickly as well as “how to set up a Nikon SLR”.
This tutorial covers the Nikon Z 6 and Z 7 hybrids, which have identical ergonomics and controls. You can learn more about the difference between these two bodies here : Nikon Z6 vs Z7, which one to choose.
The Nikon Z 6 and Z 7 hybrids have the same menus, so I make no distinction below. Consult your manual if you can’t find the right setting in the list.
Note : These settings are personal to me, I adopted them based on my settings for Nikon SLRs and my practice with other brands’ hybrids for several years. There are possible variations according to your practice and your needs, moreover the firmware update of the Nikon hybrids can bring modifications which suppose to change this palette of settings. I keep this list up to date with new features such as Eye-AF for autofocus.
I can’t go into the details of every menu here, function by function. You should know that to set up a Nikon hybrid, I do, as for DSLRs, a reset of the user settings when I take a new camera, before applying my personal settings. The settings I’m not talking about here are therefore set to the default values.
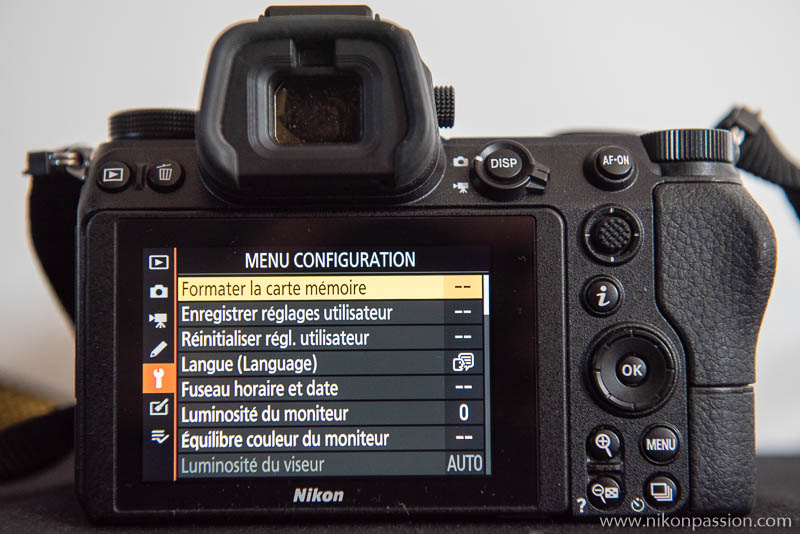
setting up a Nikon hybrid: the setup menu
This is the first set of settings that I customize. Here’s what I configure:
- time zone and date I adjust the date and the time zone for France, if you forget like me to change the time zone during a trip, know that it is possible to change these values for each of your photos with an adapted software (I do it in Lightroom).
- limit monitor mode selection I don’t use the rear screen of a hybrid very much to limit power consumption, so I uncheck the auto select and viewfinder priority options. I prefer to manually select the viewfinder or monitor mode, which limits the rear monitor’s untimely ignition.
- clean the image sensor : clean when stationary, in order to be as reactive as possible when starting up (important in street photo)
- image caption I enter the address of my personal website which will be added to the EXIF data carried by each photo.
- copyright information I add my photographer’s name and the address of my website for the same reasons (you can indicate an email address or a phone number)
- beep options I systematically disable all sound signals, I don’t want to be noticed when I use it.
- photo if card not present : LOCK, to avoid the classic gag of photos made without a card …
All other settings remain at their default values.
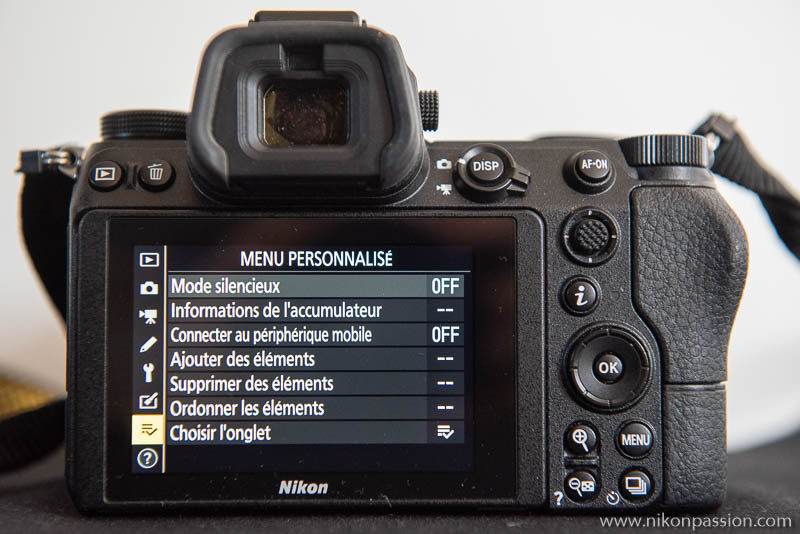
setting up a Nikon hybrid: the Custom menu
I add here the functions that I access most often:
- low-noise mode if there is no dedicated button, I put this entry in first position – see below the customization of the I menu
- battery information a key data with hybrids that consume more energy than reflex cameras, this display allows me to have more details than the symbol displayed in the viewfinder before the beginning of a long sequence for example.
- Setting the Picture Control for the rare times when I do JPG, I find the access faster via this menu than via the Shooting menu (in RAW the Picture Control is of course not useful for me)
- connect to the mobile device To quickly transfer my images to a smartphone, I can toggle between ON and OFF very quickly without going through the other menus. I always disable the permanent connection to the smartphone to avoid unnecessary power consumption, so “Send if off” remains OFF.
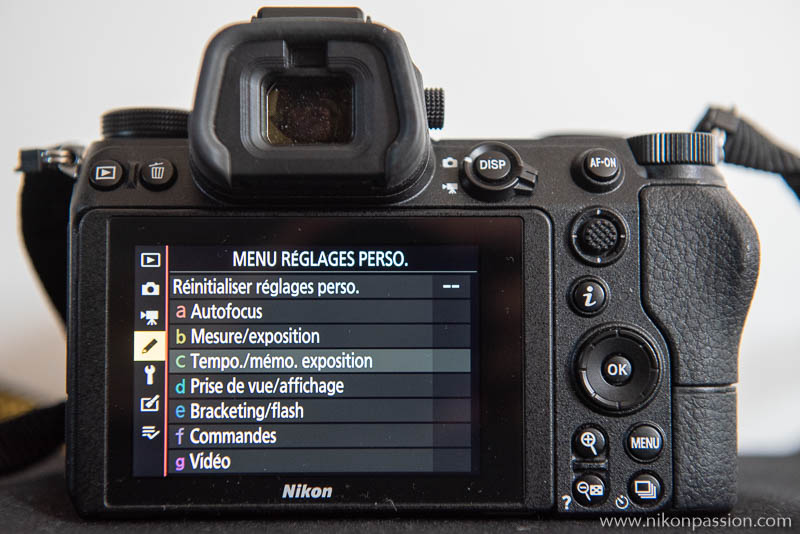
setting up a Nikon hybrid: the personal setup menu
This is the most important menu for me because it defines the behavior of my box and it’s the one that takes me the longest to develop. To set up a Nikon hybrid, I take my SLR settings and adjust them according to the specifics of the hybrid.
Autofocus
The autofocus settings of Nikon Hybrid cameras differ from those of Nikon SLRs. Please take care to understand what each function is used for, applying the settings of an SLR will not give the best results.
These inputs define the behavior of the autofocus module. I adopt settings that correspond to my practice :
- MAP tracking with Lock-On Long (5), for dance and action photography this is the value that suits me best because of the nature of the dancers’ movements, it prevents the AF from changing the subject too quickly.
- Face detection AZ auto zone I use the “Face Detection/Eye On” value to access the Eye-AF function, coupled with the auto area AF (auto area AF)
- AF point rotation ON, I always found it ridiculous to have to press several times for the selected collimator to “go around the screen” when all you have to do is activate this function.
- Low light AF : OFF, when the light is bright enough I disable this function, activating it makes the autofocus more sensitive in low light but makes you lose reactivity because the AF then works in a different way.
- AF assist illuminator OFF, I can’t stand that assistance light disturbing my subject…
Measurement/exposure
- Sensitivity/exposure increment 1/3, I like to control my exposure setting with precision, especially on a hybrid where the electronic viewfinder gives me the real image.
Exposure Tempo/Memo
- trigger memo OFF, I control the exposure manually, I don’t need this function.
- turn-off time 10 mn everywhere, I hate that the screen or the viewfinder turns off when I didn’t choose it (I have special needs during the tests, you can set a shorter delay if it suits you)
Shooting/Display
- image sequence ON, this allows me to keep a chronology of photo numbers when I switch from one card to another.
- apply settings to screen view ON : ON, it’s the very principle of the real-image aiming of hybrids, no question of deactivating it.
- grid display OFF, I don’t like to have lines in the viewfinder when I’m shooting, especially with a hybrid that displays more information than an SLR.
- underscoring : Peak 2, and Red color, it is the focus peaking which allows to focus in manual mode.
Bracketing / flash
Everything is set by default in this category, I don’t use the flash much.
Orders
- customize the menu I I set the silent mode in the first place on the left, then the automatic bracketing, the rest is set to the default values.
- definition custom settings I assign the change of metering mode to the Fn1 button, the focus mode to Fn2, the AF-ON to AF-ON, the exposure compensation to the multifunction ring when I take pictures of shows (I disable otherwise because the lack of notch is penalizing)
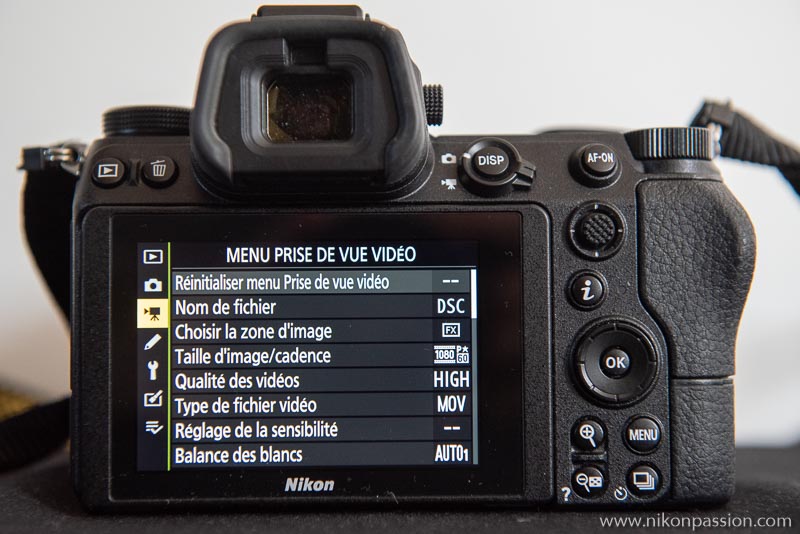
setting up a Nikon hybrid: the movie shooting menu
I don’t use the video function very much, I didn’t customize this menu.
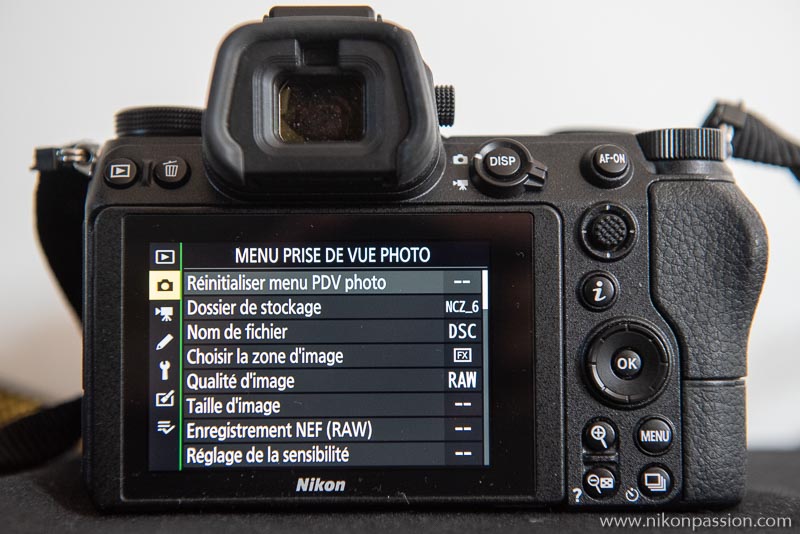
setting up a Nikon hybrid: the shooting menu
As its name suggests, this set of settings allows me to define the behavior of my camera during the shooting.
- picture quality RAW, it’s my default format, I can convert RAW very quickly in Lightroom and don’t feel the need to duplicate with JPG, I do it very punctually from the Retouch menu if I need to retrieve the JPG on my smartphone via the Snapbridge application
- picture size I choose the largest size by default, I always prefer to have the best possible files even if it means reducing their size in post-processing.
- NEF registration 14-bit lossless compression type”, for the same reasons as the previous choice.
- sensitivity adjustment I set the ISO-Auto values to 6400 ISO max and 1/250 min.
- white balance Auto1″, this setting is enough for me since I’m doing RAW, in the studio I do a manual balance measurement in the PRE position.
- Setting the Picture Control : Standard, here too the RAW saves me from having to worry about this setting, however I sometimes switch to “Saturated” to make a few JPGs to share quickly during a trip.
- color space : Adobe
- Active D-Lighting Normal”, I let the box manage without the applied value being too important, I prefer to adjust in post-processing with the localized processing tools of Lightroom
- ISO noise reduction : NORM, for the same reasons as above
- vignetting control Normal”, there too I use post-processing if necessary but it’s rare, I like to leave the images with the particular character of each lens like vignetting (but there are few corrections to make to the Z lenses).
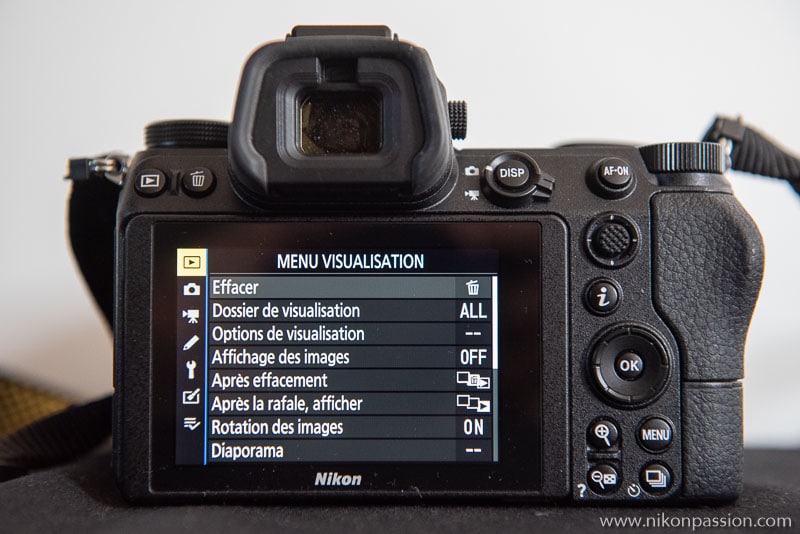
setting up a Nikon hybrid: the View menu
These settings allow you to customize the display of photos on the rear panel of the body once they are taken.
- view options I tick “none” (image only), “shooting data”, “overview”, this allows me to switch between the display using the rear pad.
- image display : OFF, I use the back screen if I want to see a picture, turning off this display saves battery power
- image rotation : OFF, I hate to see the portrait images in small on the screen, I prefer to turn the camera.
As I mentioned earlier, the Fn1 key allows me to switch from matrix to spot metering with my fingertip without leaving the viewfinder eye.
The Fn2 button allows me to change the AF modes using the two thumbwheels.
I don’t need the depth-of-field test since it’s useless on a hybrid that displays the real image in the viewfinder.
I regret the lack of exposure compensation button lock that would allow me to correct by turning the rear dial without first pressing the associated button. I attribute this correction to the multifunction ring or a function button but it is not as quick or intuitive.
Properly setting up a hybrid may require displaying multiple pieces of information in the viewfinder, but be careful not to overdo it as this can make you overly dependent on the settings to the detriment of observing your subject.
I favour the display of the histogram in the viewfinder in order to correct the exposure in real time before shooting, I can thus avoid the saturation of the highlights that is difficult to catch up with in post-processing.
Autofocus settings are one of the most sensitive subjects with Nikon hybrids. If you’re coming from the DSLR, you’ll have to relearn how to set the autofocus to adjust a Nikon hybrid, as the settings used on a Nikon hybrid cannot be transposed without modification.
For static subjects or slow motion, I prefer the single-collimator AF-S mode, I adjust its size according to the size of the subject.
In street or reportage photography, I use AF-S with Dynamic Detection Zone, the AF focuses on the closest subject or a face if it detects it.
For fast-moving subjects I’m using AF-C mode with a dynamic detection zone. If I want to follow the subject (e.g. a person walking) I press the Ok button to activate subject tracking. I then move the rear pad to select the area and lock it with a new press on Ok. The AF remains locked on the selected area. It’s an operation close to 3D tracking without being the equivalent of it yet.
As autofocus evolves with firmware updates, these choices may change with new firmware.
What configurations do you use and why? Specify the type of housing.
You use an SLR? Here’s how to set up a Nikon SLR.
Learn more about Nikon hybrids on the brand’s website.



Discussion about this post