
You have time to spend at home and you don’t know what to do with your pictures? You don’t have anything to photograph through the window, no close relative who lends himself to the game of portraiture? Why not try taking pictures of objects?
Taking pictures at home: photographing objects
If there’s a subject who won’t ask you why you want to photograph it, or how long it will last, it’s an object.
You don’t have to hurry or take into account the possible fatigue of the other, an object will only cost you a minimum of precaution so as not to damage anything.
In two previous articles, I invited you to photograph a portrait in NB or with silhouette effect without leaving your home, this time I invite you to photograph an object.
You don’t need expensive accessories, just make do with what you can afford. Having a small corner that you can dedicate to this shooting session is however an advantage, if you can afford it.
Learning how to take pictures of objects, besides the fact that it occupies your time, also allows you to highlight everything you have to sell: photo equipment, clothes, shoes, tools, DIY … The more attractive your photos will be, the more your ads will seduce. Take a good look at how you react when you browse ads and the photos don’t show the object to its best advantage, you’ll pass quickly. Don’t make this mistake when you are the seller.

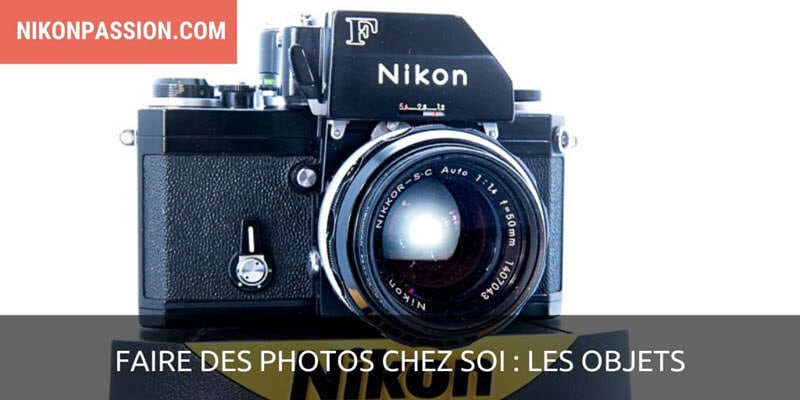
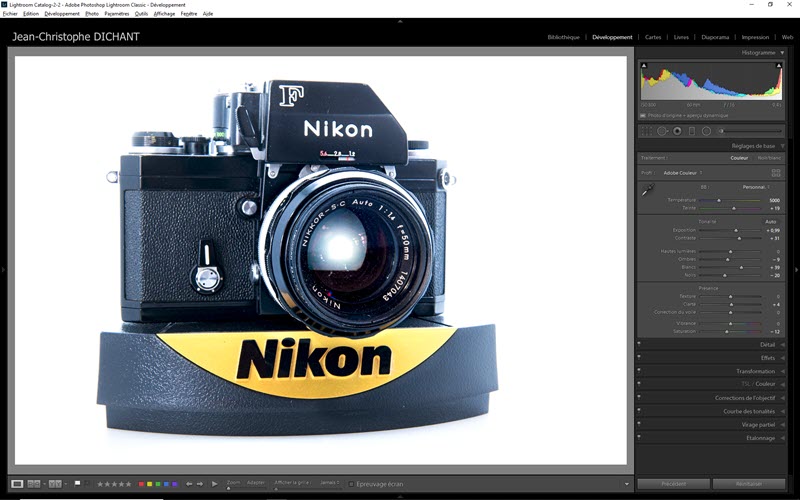
Nikon D750 + AF-S NIKKOR 24-70 mm f/2.8 to 60 mm
0.4 seconds. – f/16 – ISO 800
Preparation
I have a series of Nikon SLRs in my office window, and my Nikon F Apollo is enthroned in a beautiful position on its base. Overhauled a few years ago (thanks Photo Suffren), in perfect working order, it still looks great. While I was testing a lighting system, the Lumecube, I chose to photograph my “F”. I don’t intend to sell it, but I’m not displeased with having a nice picture.
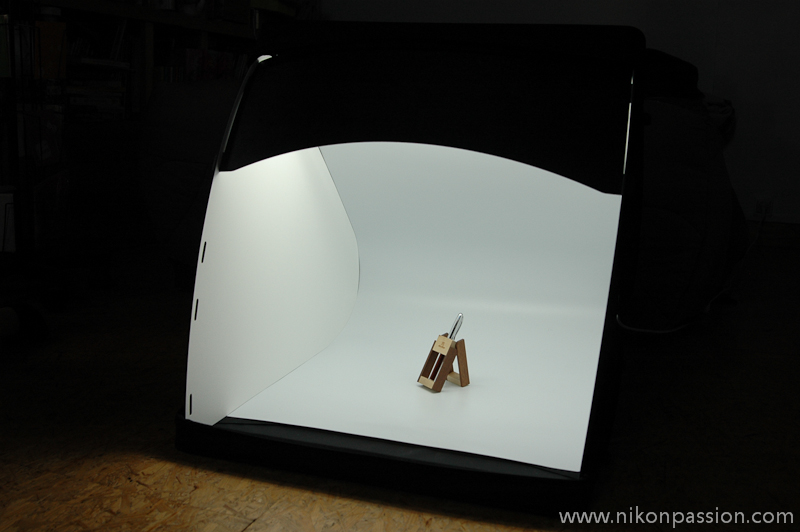
To make this picture, I placed the SLR on its base in my packshot studio (I use it to make the illustrations for my articles). This portable studio consists of a suitcase that unfolds to become a closed speaker, with two daytime color tubes providing lighting. The inner sides of the studio are white and several covers allow me to hide the front side according to my needs. Mine is no longer available for sale but you can find equivalent models on all online stores (for example here).
If you don’t have such a studio, nothing is lost. Find a large white sheet, a tablecloth, a sheet, anything that can be easily fixed with clothes pegs for example. If you have a large sheet of soft plastic, it’s even better, the thicker the material, the better the final result.
Hang as you can this surface that will become the bottom of your “studio”.
Place a desk lamp on each side of the object to create a roughly balanced light. That’s what I get in the studio with the two tubes.
Depending on the type of lamp you are going to use, LED or halogen for example, you will have to correct the colour temperature, this is normal. Make your photos in RAW format to have enough room for adjustment in post-processing.
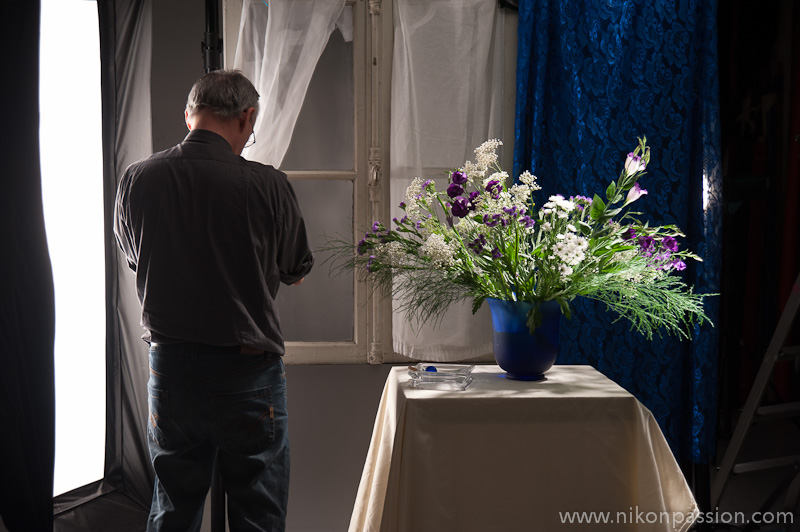
If you do not have anything large enough at hand, place the object facing a window and illuminate it so that the lamp is directed towards the object. By overexposing, you will have a (roughly) white background and enough detail to give the final image a satisfactory appearance.
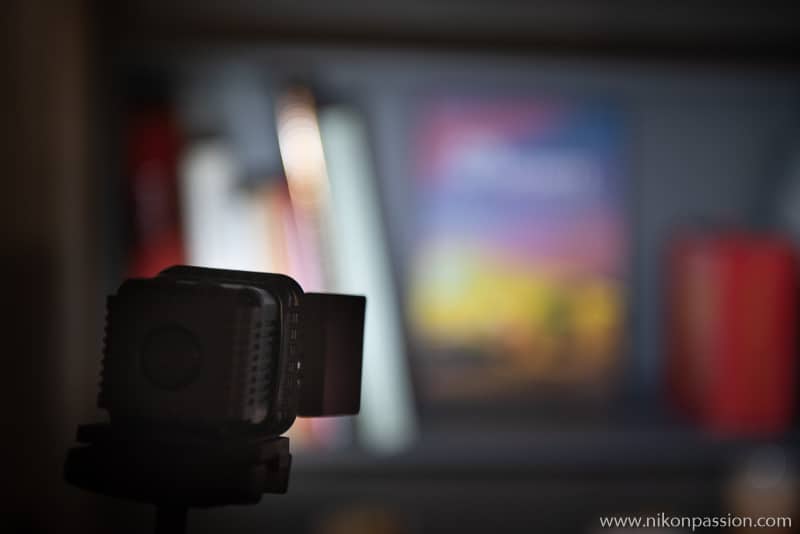
another example of lighting depending on the configuration available to you
the softbox on the left can be replaced by a light window
You can very well choose a background of another color, even very colorful, it will be even easier if the object lends itself to it. Be careful not to choose a background that is too present, as your object will no longer be sufficiently visible.
a colored background, be careful not to have too much of it on the final photo
To learn more about the possibilities offered by this type of shooting, I refer you to the previously published Packshot tutorial.
The shooting
To highlight the shapes of the body, I photographed it from an angle. This allowed me to render the volume whereas a front view tends to flatten the object. I moved my tripod so as not to have too visible a reflection, the Nikon F has a grainy surface, it was simple. If you are photographing a shiny object, make sure you don’t have a direct reflection from the lamp in the lens. Move the tripod to find the right position, but don’t change the position of the lamp once the lighting is set.
The focus is on the front of the lens, I wanted to make sure that the mentions are perfectly legible.
The light appearing at the bottom of the lens is that of a small battery-powered lamp placed behind the camera, illuminating the viewfinder. It is hidden by the body.
The small f/16 aperture allowed me to extend the depth of field so as to have a satisfactory sharpness on the body of the housing, and less on the upper knobs.
The ISO 800 sensitivity, which the D750 handles very well, gives an exposure time of 0.4 seconds. I shot with the self-timer to avoid camera shake due to possible camera shake when shooting on a tripod.
Treatment
This type of shooting requires appropriate post-processing as you will need to correct any imperfections in your lighting.
The RAW format you will have used allows you to correct what needs to be corrected.
Here I first set the white balance to that of my lighting, 5000K, which is the equivalent of daylight. If your lamps do not have the same color temperature, which is likely, use the dropper of your software and place it on a white area (here the inscription Nikon) to set the balance to the right value.
Depending on the type of lamp used, you may need to correct a color cast, it is the tint slider that allows this.
I then overexposed the image to “whiten the background”, I wanted this very white aspect contrasting with the black of the case.
The lighting quality not being ideal (it’s not professional quality lighting), I then adjusted the exposure on the body with a radial filter (in Lightroom), then compensated on the right edge to balance the whole.
Another radial filter allowed me to accentuate the sharpness on the lens, and to slightly push the blacks to highlight this area.
Finally I pushed the yellow and orange sliders a few points to highlight the Nikon mention of the support.
Several variants are possible from the same image depending on whether you want to highlight one area rather than another, or depending on the color of your object if necessary.
Photographing objects: in conclusion
This picture can perfectly illustrate an advertisement, it shows the Nikon F from its most beautiful angle. The white background makes it possible to focus the viewer’s eye on the object rather than on an unsightly or overly colourful background.
This image would also have its place to illustrate a catalogue, I realized the hundreds of photos illustrating the book of the historian Patrice Warin on tobacco objects from the Great War by applying the same technique.
With a bit of patience and a lot of trial and error, by testing different background materials and varying the lighting, you can achieve a similar result, even if you don’t have a packshot studio. Use your creativity to create interesting lighting and a background that highlights your objects, and you’ll get pleasant images.


Discussion about this post