
In winter, garden birds can struggle to find food to survive. Installing a feeder will help them and give you a lot of pleasure in observing the various birds that frequent it. Photographing birds at the feeder is also an opportunity even if you don’t have a very powerful telephoto lens, as you can get up close to your subjects.
This photo tutorial is brought to you by Stéphane Lebreton, reader of Nikon Passion, naturalist and photographer for many years. The Loire and the other natural environments in its vicinity (forests, meadows, ponds, etc.) allow it to diversify subjects and practices: flora, birds, mammals, insects, landscapes.
Stéphane appreciates the sharing of experiences: between friends as within a photo club and on the web. Find him on his Affut et billebaude site as well as on his YouTube channel “Affut et billebaude, behind the scenes of nature photography”.
How to set up a bird feeder for photographing birds
Find a feeder
Finding a commercial feeder is simple: most garden centers offer them and associations such as the League for the Protection of Birds (LPO) sell them by mail order.
You can also easily make one with salvage material: open a window a few centimeters above the bottom of a plastic bottle, place food on the bottom and hang the bottle up to have a feeder that costs you nothing!
For food, sunflower seeds are suitable for many species. You will find them in supermarkets or in garden centers. Be careful, however, the feeding must remain winter, take precautions not to harm the birds. You will find a lot of advice on the LPO website.
Install your feeder
Once you have your feeder, set it up in an open place and set up supports on which the birds will rest and where you can photograph them: branches, stones, bark, etc.
Be careful, if the feeder is placed too close to existing branches, the passerines may not pass through the supports you have prepared. In addition, a clear branch allows for better bokeh in the background. Take care of the aesthetics of these added supports because they can bring a lot to your shots such as degrading their quality if disturbing or not harmonious elements appear in your photos.
Define the location where you are going to position yourself by considering the following criteria:
- find a place to be as hidden as possible, at a distance of 3 or 4 meters from the supports,
- the background must be natural, without disturbing unattractive elements (fence, house, pole or electric wire, etc.),
- anticipate the lighting of the scene according to the time of shooting: full lighting, side lighting, backlighting… to be able to play with the light during the shooting.
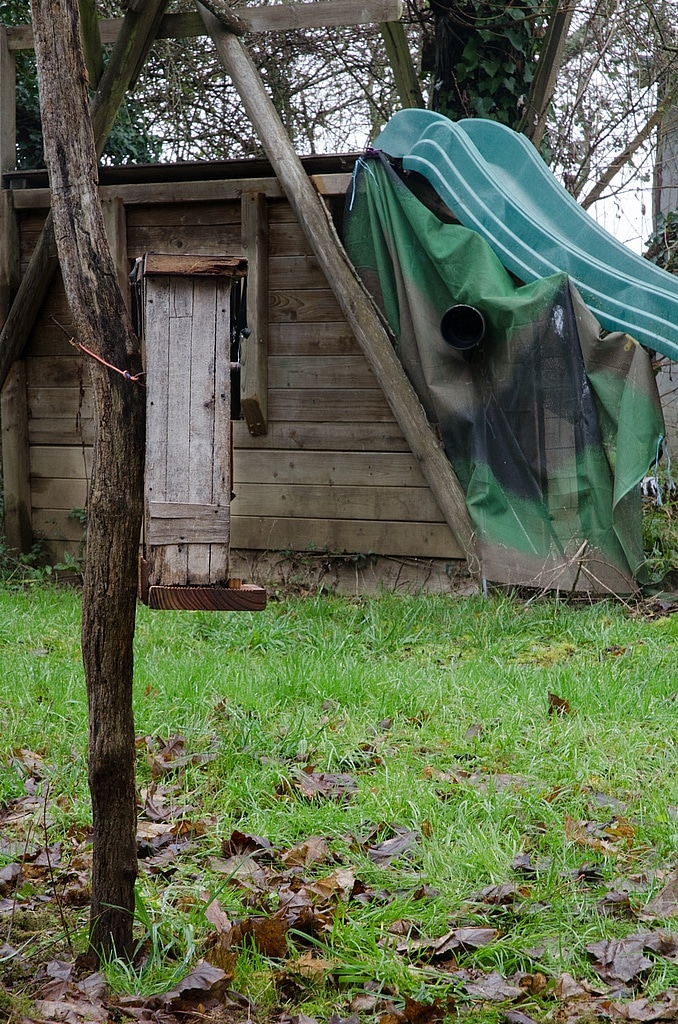
How to photograph birds while hiding under the children’s slide! Photo (C) Stéphane Lebreton
To hide in a garden, use the existing elements: behind a low wall, behind shutters, under the children’s slide. With fabric or camouflage netting, hide the spaces that could show your silhouette. Ideally only the objective should be apparent.
If you don’t have a garden, you can try your luck on a balcony: most of these tips can be applied, but the constraints will be greater. Also think about transforming your car into a lookout if you have no other option!
Photographing birds: the shooting
When the time comes, make yourself comfortable because you will probably spend more than an hour without moving. Put your equipment on a tripod to ensure the stability of the whole and to avoid cramps in the arms!
Also check that the feeder is powered …
Before the birds return (or you are strong if you did not scare them away when you arrived!), Pre-set your equipment:
- adjust the tripod and aim in the direction of the priority support,
- focus on this support to be more responsive as soon as a bird arrives,
- check the exposure settings: sensitivity, depth of field, exposure time.
Choose a wide aperture for smooth bokeh, or just close up a notch if your lens quality is better. The birds are very fast, do not hesitate to set your exposure time to 1/500 of a sec., Unless you want to play with blur.
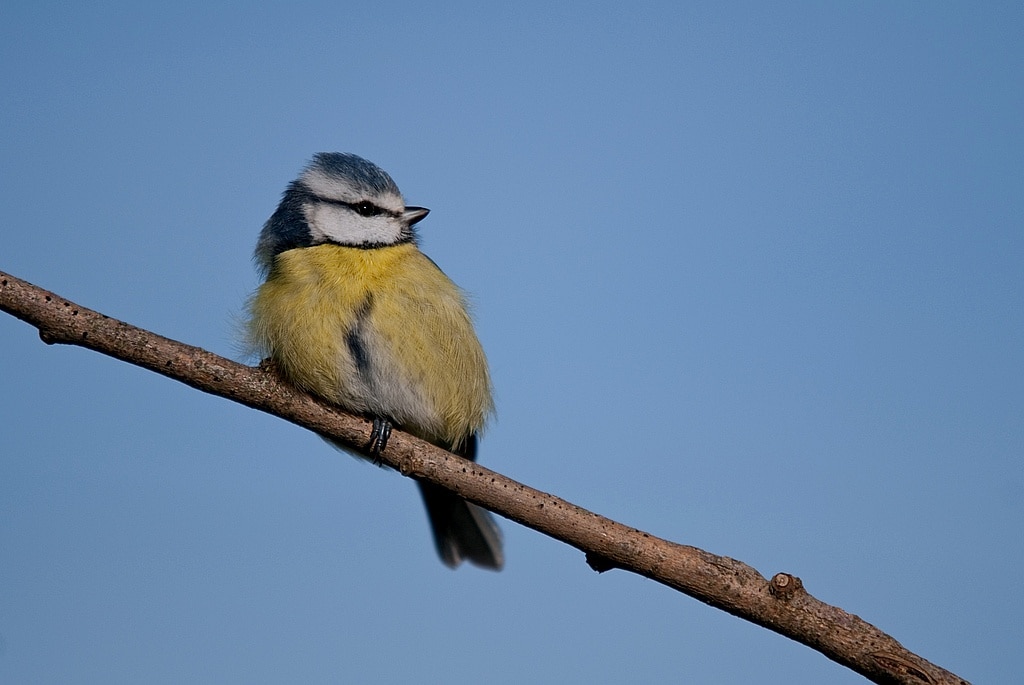
the blue tit is very assiduous at the feeder – photo (C) Stéphane Lebreton
1/500 sec. – f / 5 – ISO 100 – 300 mm
When the birds arrive, do not rush, let them gain confidence. If you need to move your goal, do it very slowly. Start with a first trigger and observe the reaction. When the serenity has returned, start again. Little by little, the birds will forget this unusual noise and continue their activity.
If you are using a mirrorless camera, switch to electronic shutter mode, then you will not make any noise when the shutter is released.
Photographing birds: the variations
Some species like to feed on the ground, such as sparrows or finches. This can be an opportunity to try shots at ground level using the vegetation in the foreground for an aesthetic blur effect (find out more in the book “the secrets of animal photography”).
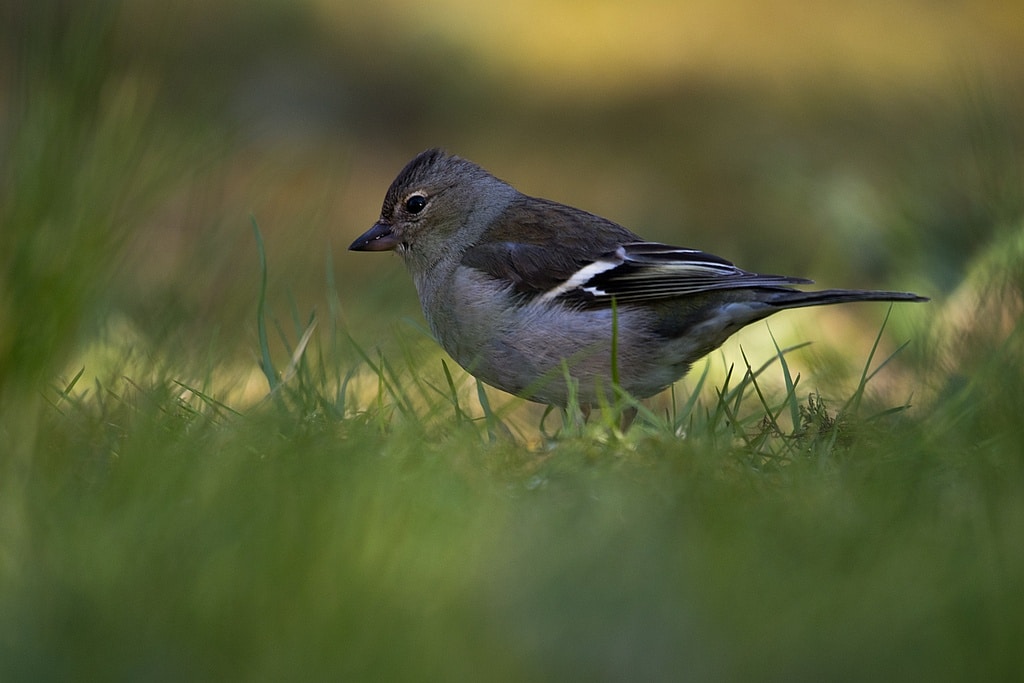
a shot at ground level for this female chaffinch – photo (C) Stéphane Lebreton
1/200 sec. – f / 5.6 – 320 ISO – 500 mm
Other species than passerines can come and enjoy your feeder: the Turkish dove, the jay of the oaks, the spotted woodpecker …
The jay is very fierce: absolute silence and great slowness in gestures are essential.
For the Great Spotted Woodpecker, you can install a vertical support reminiscent of the dead branches on which it usually comes to look for insect larvae. One trick is to drill small holes in the branch and drop a few seeds there for it during the days leading up to it so it gets used to coming.
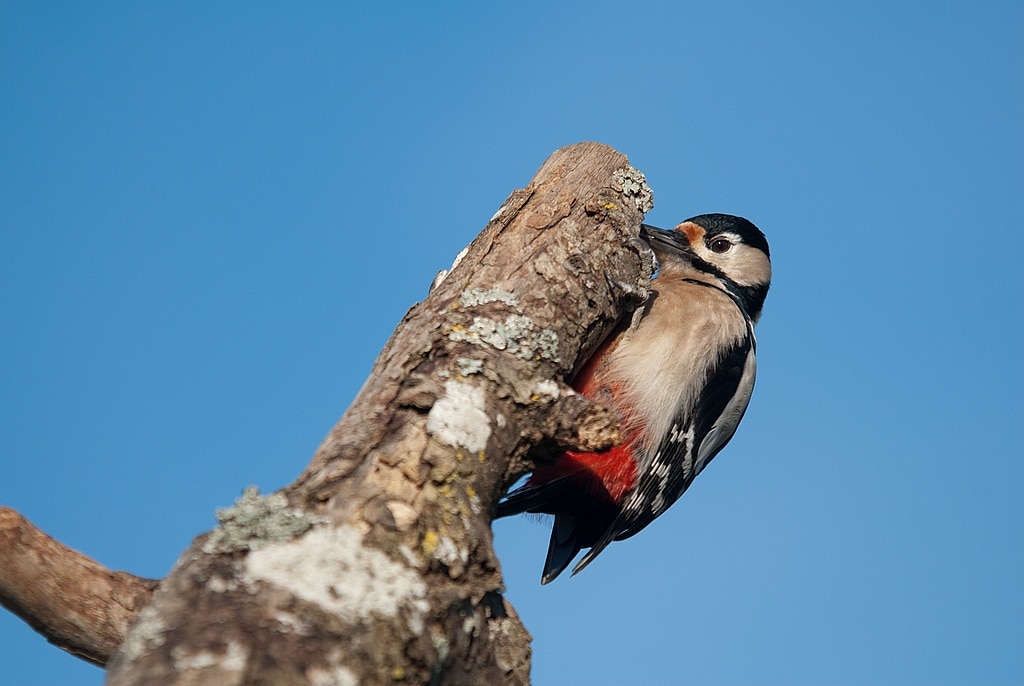
the great spotted woodpecker is also attracted by the seeds of the feeder – photo (C) Stéphane Lebreton
1/1000 sec. – f / 5 – ISO 100 – 220 mm
Finally, to vary attitudes, try photos of birds in flight. You must then anticipate the arrival of the bird and do not hesitate to use burst mode!
Ready for the bird feeder and bird photography?
Photographing birds at the feeder is an easy way to photograph sparrows in winter. Installation is simple and does not require time-consuming identification or specific equipment. A telephoto lens of medium focal length (200 or 300mm) may suffice.
Many species can frequent the feeder, allowing you different types of shots.
For once in animal photography, the triggers will be numerous, so plan on a sufficient memory card and time to sort it out!
Do you already take pictures of birds at the feeder or at home? Which photo are you most proud of?
In winter, garden birds can struggle to find food to survive. Installing a feeder will help them and give you a lot of pleasure in observing the various birds that frequent it. Photographing birds at the feeder is also an opportunity even if you don’t have a very powerful telephoto lens, as you can get up close to your subjects.
This photo tutorial is brought to you by Stéphane Lebreton, reader of Nikon Passion, naturalist and photographer for many years. The Loire and the other natural environments in its vicinity (forests, meadows, ponds, etc.) allow it to diversify subjects and practices: flora, birds, mammals, insects, landscapes.
Stéphane appreciates the sharing of experiences: between friends as within a photo club and on the web. Find him on his Affut et billebaude site as well as on his YouTube channel “Affut et billebaude, behind the scenes of nature photography”.
How to set up a bird feeder for photographing birds
Find a feeder
Finding a commercial feeder is simple: most garden centers offer them and associations such as the League for the Protection of Birds (LPO) sell them by mail order.
You can also easily make one with salvage material: open a window a few centimeters above the bottom of a plastic bottle, place food on the bottom and hang the bottle up to have a feeder that costs you nothing!
For food, sunflower seeds are suitable for many species. You will find them in supermarkets or in garden centers. Be careful, however, the feeding must remain winter, take precautions not to harm the birds. You will find a lot of advice on the LPO website.
Install your feeder
Once you have your feeder, set it up in an open place and set up supports on which the birds will rest and where you can photograph them: branches, stones, bark, etc.
Be careful, if the feeder is placed too close to existing branches, the passerines may not pass through the supports you have prepared. In addition, a clear branch allows for better bokeh in the background. Take care of the aesthetics of these added supports because they can bring a lot to your shots such as degrading their quality if disturbing or not harmonious elements appear in your photos.
Define the location where you are going to position yourself by considering the following criteria:
- find a place to be as hidden as possible, at a distance of 3 or 4 meters from the supports,
- the background must be natural, without disturbing unattractive elements (fence, house, pole or electric wire, etc.),
- anticipate the lighting of the scene according to the time of shooting: full lighting, side lighting, backlighting… to be able to play with the light during the shooting.
How to photograph birds while hiding under the children’s slide! Photo (C) Stéphane Lebreton
To hide in a garden, use the existing elements: behind a low wall, behind shutters, under the children’s slide. With fabric or camouflage netting, hide the spaces that could show your silhouette. Ideally only the objective should be apparent.
If you don’t have a garden, you can try your luck on a balcony: most of these tips can be applied, but the constraints will be greater. Also think about transforming your car into a lookout if you have no other option!
Photographing birds: the shooting
When the time comes, make yourself comfortable because you will probably spend more than an hour without moving. Put your equipment on a tripod to ensure the stability of the whole and to avoid cramps in the arms!
Also check that the feeder is powered …
Before the birds return (or you are strong if you did not scare them away when you arrived!), Pre-set your equipment:
- adjust the tripod and aim in the direction of the priority support,
- focus on this support to be more responsive as soon as a bird arrives,
- check the exposure settings: sensitivity, depth of field, exposure time.
Choose a wide aperture for smooth bokeh, or just close up a notch if your lens quality is better. The birds are very fast, do not hesitate to set your exposure time to 1/500 of a sec., Unless you want to play with blur.
the blue tit is very assiduous at the feeder – photo (C) Stéphane Lebreton
1/500 sec. – f / 5 – ISO 100 – 300 mm
When the birds arrive, do not rush, let them gain confidence. If you need to move your goal, do it very slowly. Start with a first trigger and observe the reaction. When the serenity has returned, start again. Little by little, the birds will forget this unusual noise and continue their activity.
If you are using a mirrorless camera, switch to electronic shutter mode, then you will not make any noise when the shutter is released.
Photographing birds: the variations
Some species like to feed on the ground, such as sparrows or finches. This can be an opportunity to try shots at ground level using the vegetation in the foreground for an aesthetic blur effect (find out more in the book “the secrets of animal photography”).
a shot at ground level for this female chaffinch – photo (C) Stéphane Lebreton
1/200 sec. – f / 5.6 – 320 ISO – 500 mm
Other species than passerines can come and enjoy your feeder: the Turkish dove, the jay of the oaks, the spotted woodpecker …
The jay is very fierce: absolute silence and great slowness in gestures are essential.
For the Great Spotted Woodpecker, you can install a vertical support reminiscent of the dead branches on which it usually comes to look for insect larvae. One trick is to drill small holes in the branch and drop a few seeds there for it during the days leading up to it so it gets used to coming.
the great spotted woodpecker is also attracted by the seeds of the feeder – photo (C) Stéphane Lebreton
1/1000 sec. – f / 5 – ISO 100 – 220 mm
Finally, to vary attitudes, try photos of birds in flight. You must then anticipate the arrival of the bird and do not hesitate to use burst mode!
Ready for the bird feeder and bird photography?
Photographing birds at the feeder is an easy way to photograph sparrows in winter. Installation is simple and does not require time-consuming identification or specific equipment. A telephoto lens of medium focal length (200 or 300mm) may suffice.
Many species can frequent the feeder, allowing you different types of shots.
For once in animal photography, the triggers will be numerous, so plan on a sufficient memory card and time to sort it out!
Do you already take pictures of birds at the feeder or at home? Which photo are you most proud of?


Discussion about this post