
You are using a wide angle lens and find that your photos are tilting too often. The trees and poles are not vertical, the images are distorted on the periphery and you do not understand where it is coming from. You may have even tried to straighten these photos in suitable software, but you are not satisfied with the result.
Here’s why you have this problem and how to fix it in seconds.
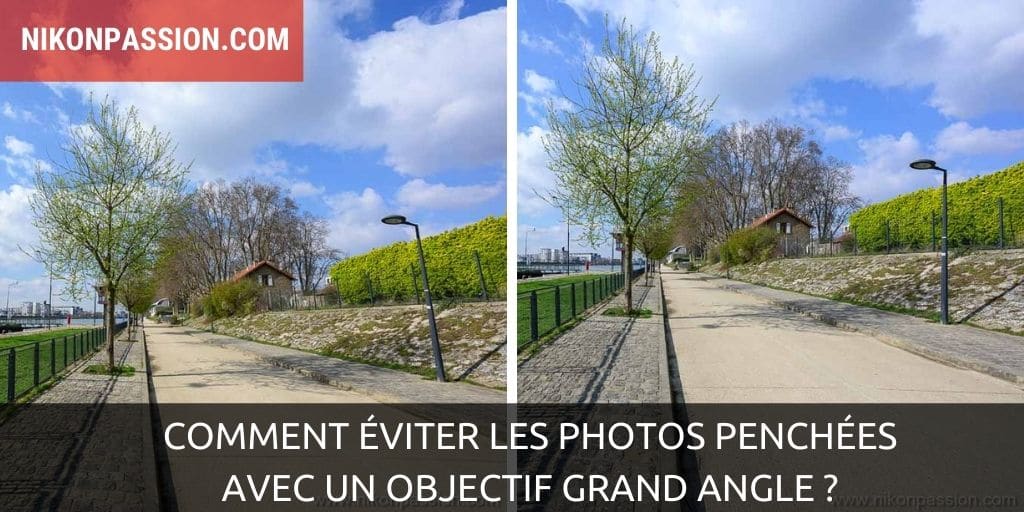
How to avoid tilted photos with a wide angle lens?
A wide angle lens is a lens, zoom or fixed focal length, with a short focal length. It is commonly accepted that a lens is wide angle from 28mm and below, for example 24, 20 or 14mm with a full frame body with 24 x 36 sensor. In APS-C consider a lens to be large angle at 18 mm and less (16, 14 or 10 mm).
The hallmark of such a lens is its wide frame, the viewing angle is large, and you can include a lot of the scene in your shot.
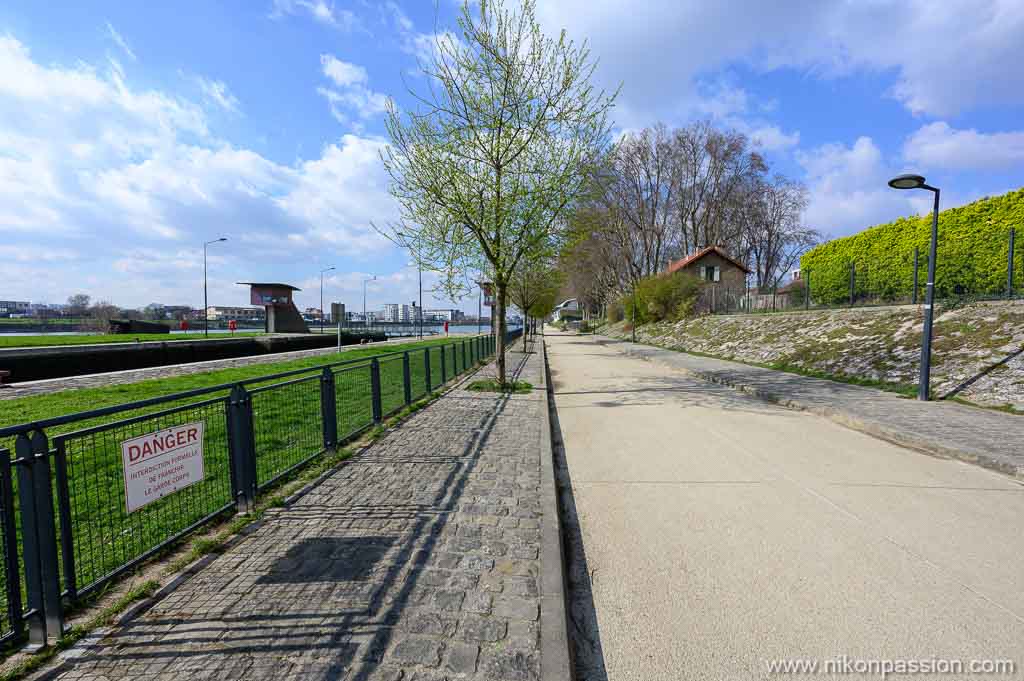
The main disadvantage of a wide angle lens is that it distorts the outlook if used improperly. This translates, as you can see in the photo below, to tilting verticals, inward or outward of the photo.
The shorter the focal length, the more pronounced the effect.
The photo is however well framed, the horizon is straight, the tree in the center of the image is vertical. But not the lamppost on the right nor the fence posts on the left.

On this other photo it is the opposite effect, the lamppost leans outwards just like the posts of the fence.
In this third photo, the lamppost is vertical, the fence posts too and all the other elements are well represented in space.
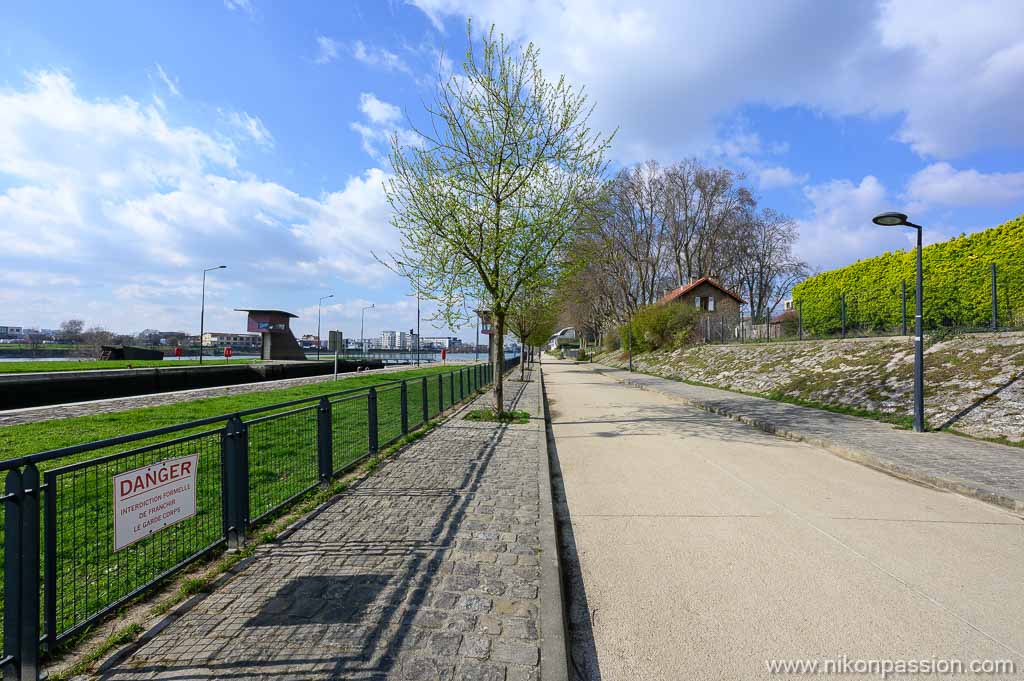
However, between these three photos I have not changed either place or setting. Only a few tenths of a second have passed.
So how is this possible?
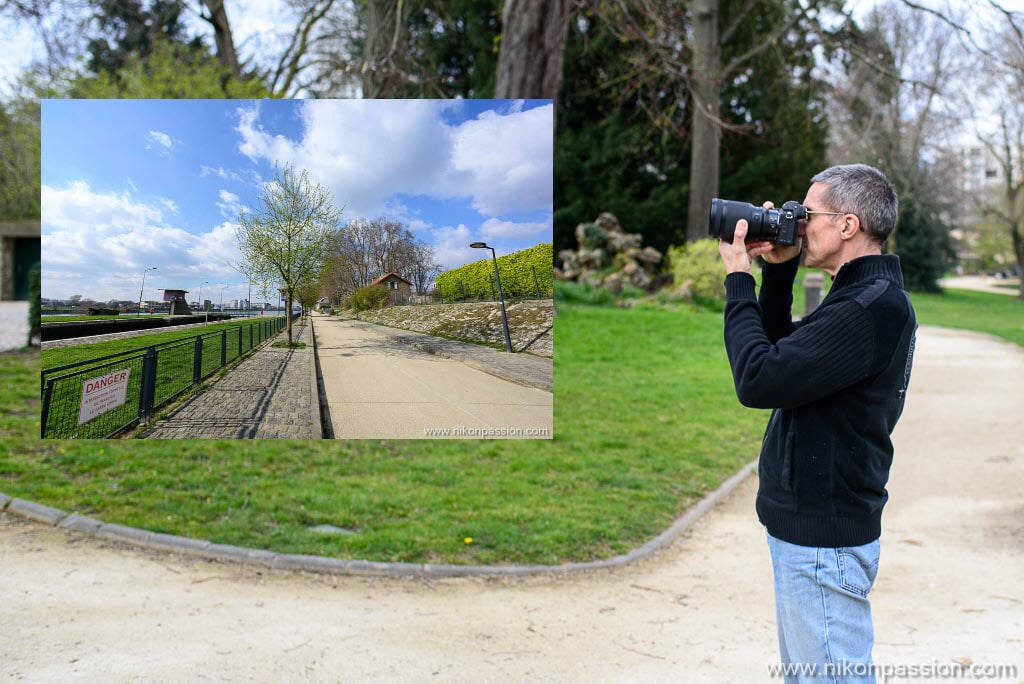
What changed between these three photos is the way I held my camera.
To avoid tilting photos with a wide-angle lens, keep the camera perfectly parallel to the ground.
The camera and lens assembly should not face up or down, even if the orientation is weak.
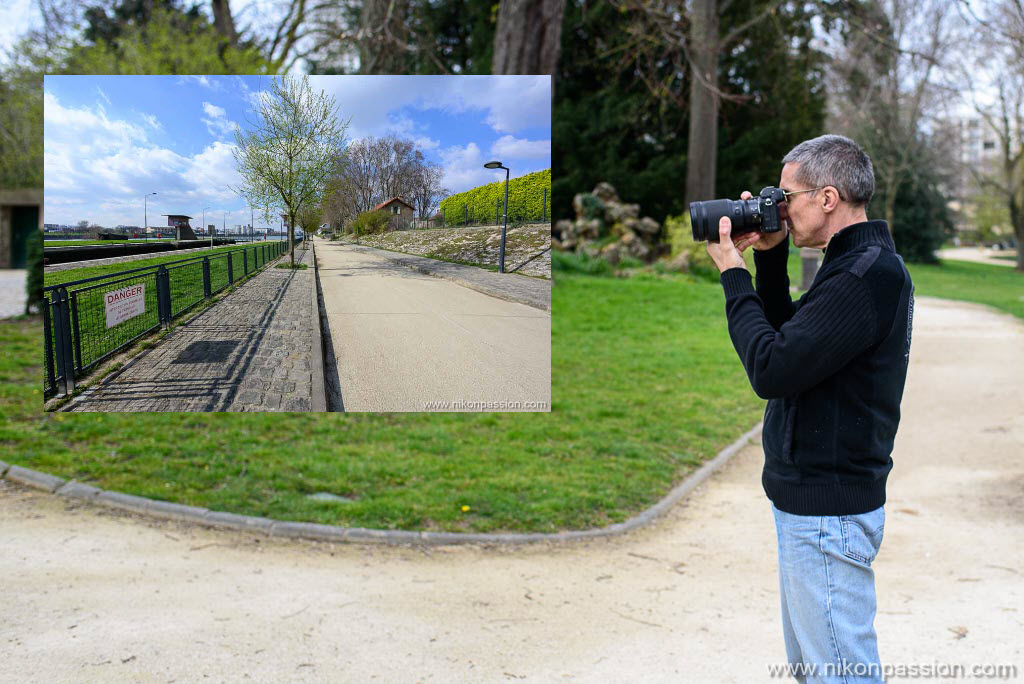
Here is the grip that gave the first photo with perspectives that go inward (the result appears in superposition). The camera tilts up.
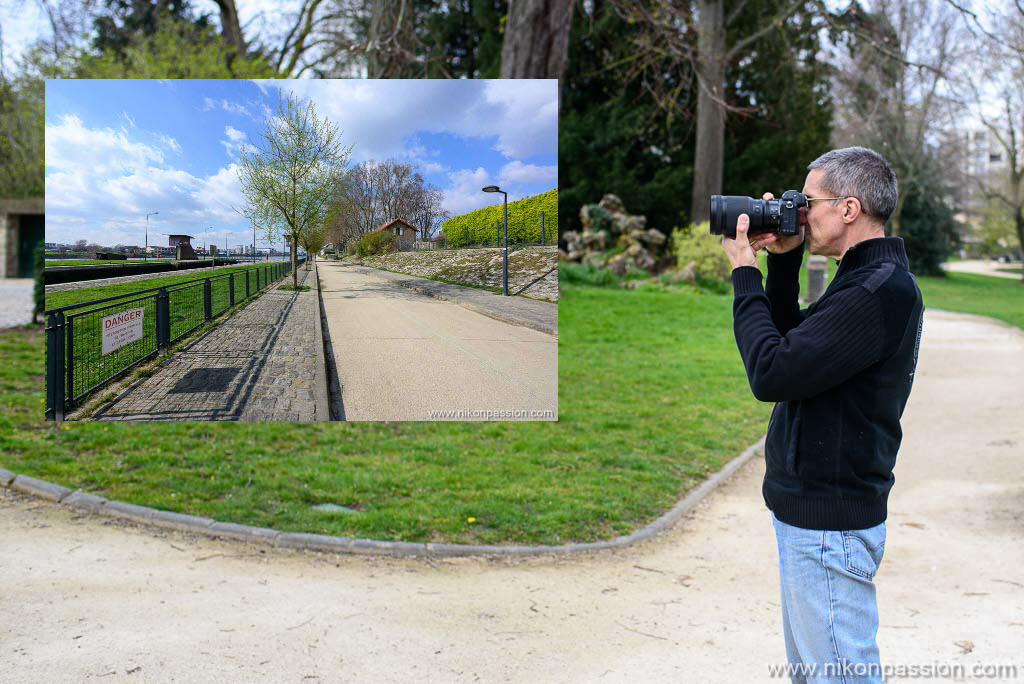
Here is the holding in hand which gave the second photo with perspectives which go outwards. The camera tilts down, less than in the previous photo but enough to cause an unwanted effect:
Here is finally the good grip, which gives you a photo without the perspectives leaning to one side or the other. The camera is parallel to the ground:
Try it, you will quickly see the difference!
Note that this is valid whatever the focal length, you will see the same effect at 50mm however the optical laws mean that the perspectives do not tilt as much and that on the final image you do not see a difference most of the time.
But get into the habit of holding your camera parallel to the ground all the time, that’s best.
Why straightening photos in post-processing is not the solution
You might think this is not critical because good photo editing software can straighten out the outlook with just a few clicks. It’s true, except for one important detail.
Straightening the outlook in post-processing causes the photo to be cropped. You lose the initial framing.
The photo below is the one with the outlook tilting inward, which I straightened using Lightroom Classic’s “vertical transform” feature. In order to avoid the white edges resulting from this straightening, the software has cropped the photo, I have no other choice.
Notice the difference in framing shown by the red arrows on the top photo, compared to the well-framed photo below.
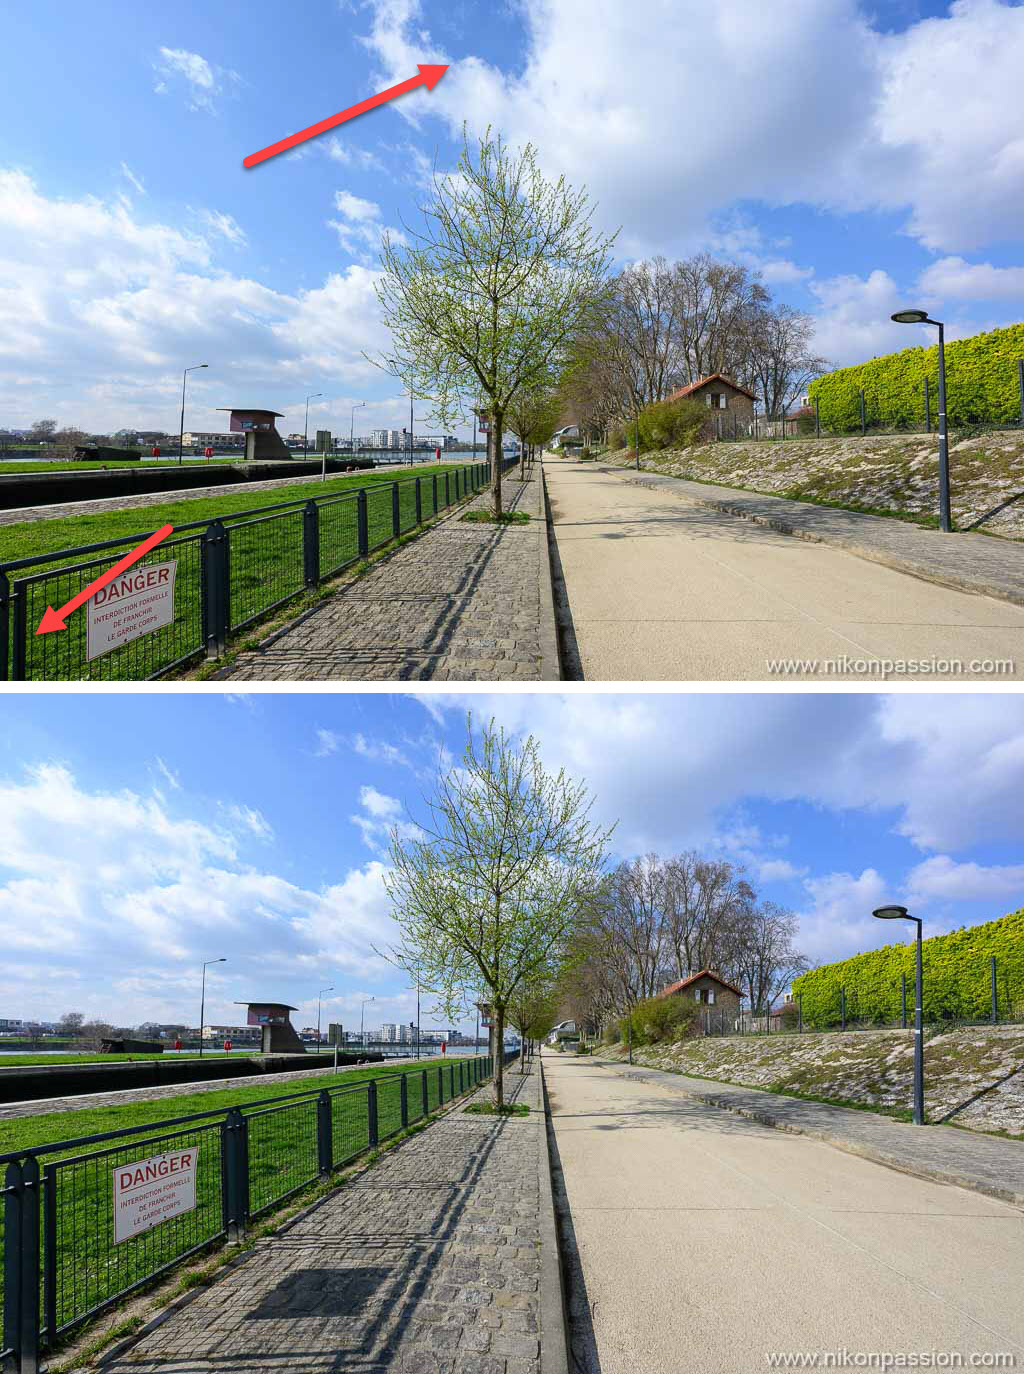
top photo straightened and cropped
bottom photo correctly framed when shooting
If you had something important in the foreground, like the shadow of the floor panel here, it would disappear with the straightening.
On this last illustration, I have superimposed the photo whose perspectives tilt outwards, once straightened and cropped, on the “correct” photo.
The arrows show you the two areas mainly affected by this recovery.
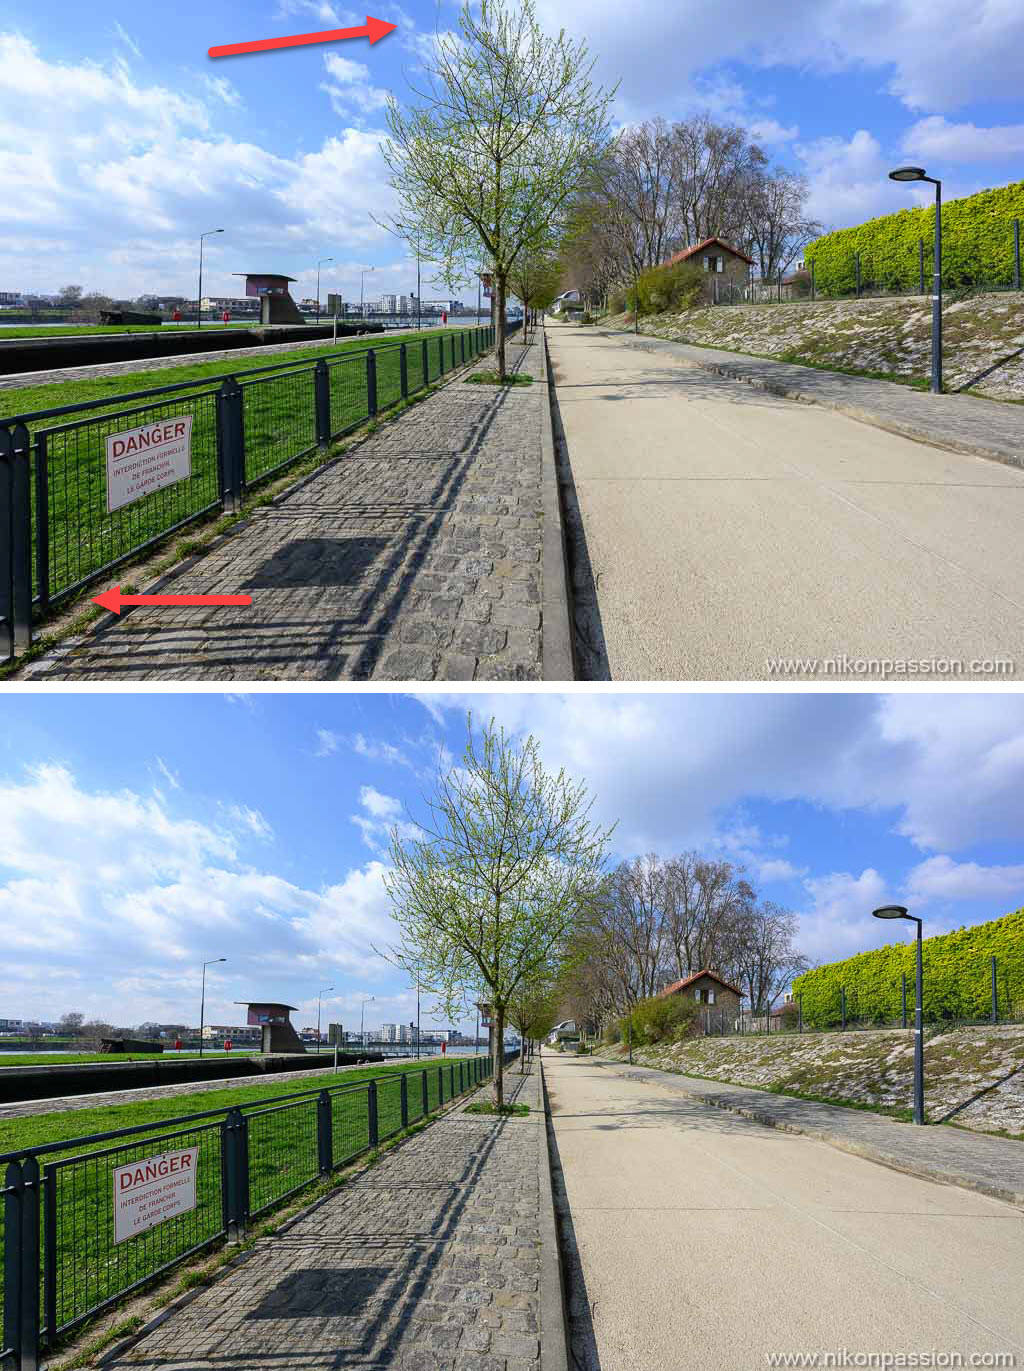
top photo straightened and cropped
bottom photo correctly framed when shooting
The effect of the crop is less noticeable but I lost an interesting part of the shadow of the grid as well as the top of the tree.
For further
Avoiding tilted photos with a wide angle lens is not difficult. You just need to learn how to position your camera correctly before you shoot. You will save time in post-processing since you will not have to straighten your photos, moreover your initial framing will be preserved.
Straightening the outlook is not the solution, but it remains a relevant operation if a photo requires it. Sometimes a slight straightening makes it possible to give a different look to the photo without the imposed cropping being annoying. So remember that it is possible.
To learn more about perspective management, cropping, and why all of this is happening to you, read this complementary topic which will give you even more precise information.
You are using a wide angle lens and find that your photos are tilting too often. The trees and poles are not vertical, the images are distorted on the periphery and you do not understand where it is coming from. You may have even tried to straighten these photos in suitable software, but you are not satisfied with the result.
Here’s why you have this problem and how to fix it in seconds.
How to avoid tilted photos with a wide angle lens?
A wide angle lens is a lens, zoom or fixed focal length, with a short focal length. It is commonly accepted that a lens is wide angle from 28mm and below, for example 24, 20 or 14mm with a full frame body with 24 x 36 sensor. In APS-C consider a lens to be large angle at 18 mm and less (16, 14 or 10 mm).
The hallmark of such a lens is its wide frame, the viewing angle is large, and you can include a lot of the scene in your shot.
The main disadvantage of a wide angle lens is that it distorts the outlook if used improperly. This translates, as you can see in the photo below, to tilting verticals, inward or outward of the photo.
The shorter the focal length, the more pronounced the effect.
The photo is however well framed, the horizon is straight, the tree in the center of the image is vertical. But not the lamppost on the right nor the fence posts on the left.
On this other photo it is the opposite effect, the lamppost leans outwards just like the posts of the fence.
In this third photo, the lamppost is vertical, the fence posts too and all the other elements are well represented in space.
However, between these three photos I have not changed either place or setting. Only a few tenths of a second have passed.
So how is this possible?
What changed between these three photos is the way I held my camera.
To avoid tilting photos with a wide-angle lens, keep the camera perfectly parallel to the ground.
The camera and lens assembly should not face up or down, even if the orientation is weak.
Here is the grip that gave the first photo with perspectives that go inward (the result appears in superposition). The camera tilts up.
Here is the holding in hand which gave the second photo with perspectives which go outwards. The camera tilts down, less than in the previous photo but enough to cause an unwanted effect:
Here is finally the good grip, which gives you a photo without the perspectives leaning to one side or the other. The camera is parallel to the ground:
Try it, you will quickly see the difference!
Note that this is valid whatever the focal length, you will see the same effect at 50mm however the optical laws mean that the perspectives do not tilt as much and that on the final image you do not see a difference most of the time.
But get into the habit of holding your camera parallel to the ground all the time, that’s best.
Why straightening photos in post-processing is not the solution
You might think this is not critical because good photo editing software can straighten out the outlook with just a few clicks. It’s true, except for one important detail.
Straightening the outlook in post-processing causes the photo to be cropped. You lose the initial framing.
The photo below is the one with the outlook tilting inward, which I straightened using Lightroom Classic’s “vertical transform” feature. In order to avoid the white edges resulting from this straightening, the software has cropped the photo, I have no other choice.
Notice the difference in framing shown by the red arrows on the top photo, compared to the well-framed photo below.
top photo straightened and cropped
bottom photo correctly framed when shooting
If you had something important in the foreground, like the shadow of the floor panel here, it would disappear with the straightening.
On this last illustration, I have superimposed the photo whose perspectives tilt outwards, once straightened and cropped, on the “correct” photo.
The arrows show you the two areas mainly affected by this recovery.
top photo straightened and cropped
bottom photo correctly framed when shooting
The effect of the crop is less noticeable but I lost an interesting part of the shadow of the grid as well as the top of the tree.
For further
Avoiding tilted photos with a wide angle lens is not difficult. You just need to learn how to position your camera correctly before you shoot. You will save time in post-processing since you will not have to straighten your photos, moreover your initial framing will be preserved.
Straightening the outlook is not the solution, but it remains a relevant operation if a photo requires it. Sometimes a slight straightening makes it possible to give a different look to the photo without the imposed cropping being annoying. So remember that it is possible.
To learn more about perspective management, cropping, and why all of this is happening to you, read this complementary topic which will give you even more precise information.


Discussion about this post