Since the arrival of the Nikon D850, the term focus stacking has been part of every conversation. Focus stacking is great, focus stacking is essential, focus stacking … what is focus stacking ?
This shooting technique, which only a few experts used before, has become the favourite of many amateurs. Here’s what focus stacking is, how to take pictures and process them.
Focus stacking: definition and use
Focus stacking: shifting
The expression focus stacking is the combination of two English terms, focus for focusing and stacking for stacking. You have to add the term shifting, you’ll see why.
When you take a close-up, macro, or close-up shot, the depth of field is limited. It depends on the focal length, aperture, and focusing distance. The shorter the focusing distance, the shallower the depth of field.
If you use a large aperture because the light is missing, the depth of field is even shallower.
In the end your photo is well exposed but lacks depth of field, the subject is sharp in front but not behind.
One solution is to close the diaphragm, e.g. to f/22. But this low aperture does not always ensure correct exposure, and it is not the one that gives the best image quality.
Another solution is to move away from the subject, but the focal length of your lens may not be sufficient to frame the subject in a tight shot.
The ultimate solution is then to use the focus stacking technique.
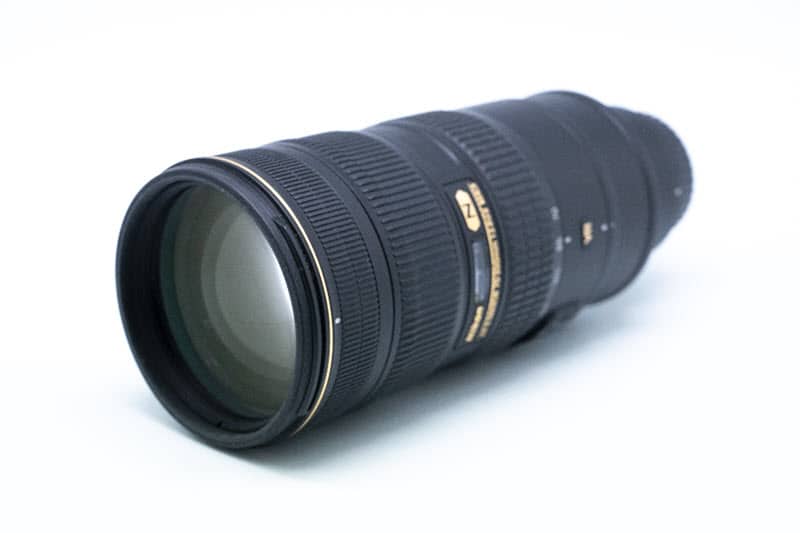
without focus stacking, f/8, limited depth of field
only the front of the subject is clear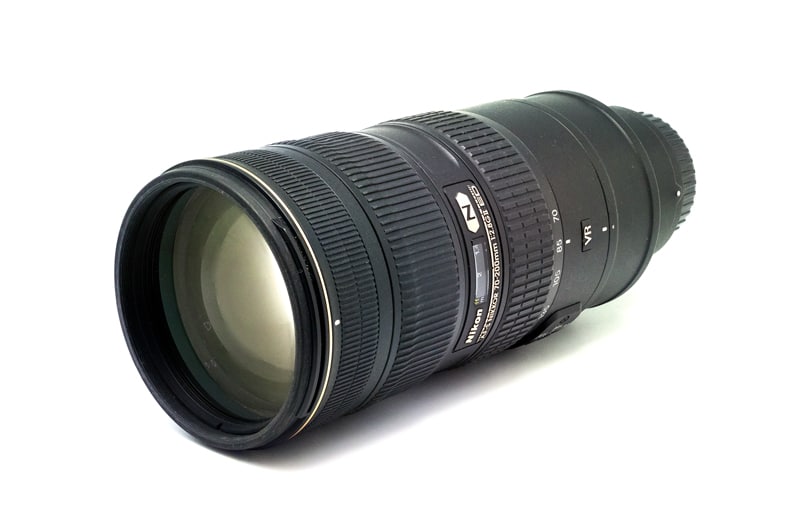
with focus stacking, f/8, 20 shots, large depth of field
the whole point is clear.
Focus stacking consists of taking a series of photos of the same subject in the same lighting conditions, shifting the focus by a small amount between each photo.
By doing so, you change the area of sharpness and depth of field for each photo.
In the end, all areas of your subject are in focus, but in multiple shots, not just one.
Strictly speaking, we should talk about focus shifting, since you have shifted the focus from one photo to another and you haven’t yet stacked anything (shifting vs. stacking).
Focus on stacking
Now we come to the second phase, stacking, because you’re going to have to stack all these photos to keep only the sharpness area, and delete the rest. This slicing, once merged, gives you a final image that’s sharp everywhere, since you’ve only used the sharp areas of each photo.
In Practice
You’re facing two difficulties:
- Shift the focus by a very small amount between shots,
- merge the final images.
Needless to say, it is impossible to adjust the focus between two photos with your eye to have a small AND constant gap between each photo.
Don’t even try, doing it on 3 photos could still pass, but focus stacking can require dozens of photos!
Once your images are done, you will need to use specialized software to overlay them, keeping only the useful areas and creating the final image.
Focus stacking: Nikon has solved part of the problem for you
The Nikon D850, and subsequent models such as the Z 6 and Z 7 hybrids, have introduced a new feature that solves the problem of shifting for you.
The camera is capable of taking a series of pictures by shifting the focus very slightly between two images, applying the same shift each time automatically.
All you have to do is tell the camera how many pictures you want to take and how much focus shift you want between shots.
You enter these settings in the menu, frame, trigger and … wait.
The camera will automatically take a series of shots, shifting the focus by the value indicated in the menu until it reaches either the number of shots required or a focus set at infinity (beyond this point it will not be able to continue to vary the focus).
Your focus stacking shot is finished.
That’s it? That’s it? No.
Read it again: ” Nikon has solved part of the problem for you”.
Which implies that something is missing. And that’s normal because a camera can’t process it, you have to:
- take the right pictures
- pile them up
- use the net area of each
- create a photo resulting from the merging of the previous ones
For this you will have to use an image processing software.
The best known for focus stacking is Helicon, it allows all kinds of adjustments when stacking and in particular the management of frame shift that can occur from one picture to another if the subject moves slightly.
The other well-known software you may already have is Photoshop (accessible at no extra cost with the Lightroom subscription).
How to do focus stacking with a Nikon camera?
Before you start shooting, you need to choose the settings so that the camera takes the pictures as you want them.
Start with a still subject with the camera on a tripod. This avoids having to deal with subject movement that can affect focus. If the subject moves forward or backward even slightly, your series will no longer be consistent, you will have to multiply the images and adjust the shifts when merging, it is more complex.
To take the picture illustrating this subject, I used my packshot studio, the Nikon Z 6 on tripod, the NIKKOR Z 24-70 mm f/4 zoom open at f/8.
Which opening to choose?
You don’t need to worry about depth of field and therefore aperture selection since focus stacking allows you to get the desired depth of field regardless of aperture.
Choose the one that gives the best image quality for your lens. F/8 is a suitable value in most cases.
I fixed the white balance so that it doesn’t vary during the shooting. Although RAW allows you to adjust it in post-processing, the less I have to do the better it is …
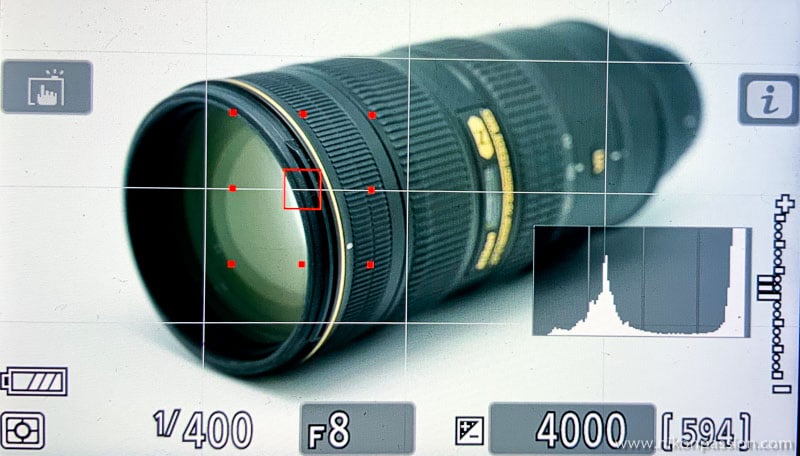
Focus on the foreground of the subject.
I focus in AF-S mode with the smallest available area in the foreground of my subject. It is important to focus on the foreground because you will then “recoil” to the last one, so don’t start in the middle or you won’t get a sharp picture “in front”.
In the Shooting menu, go to “Shifted Focus Shooting”.
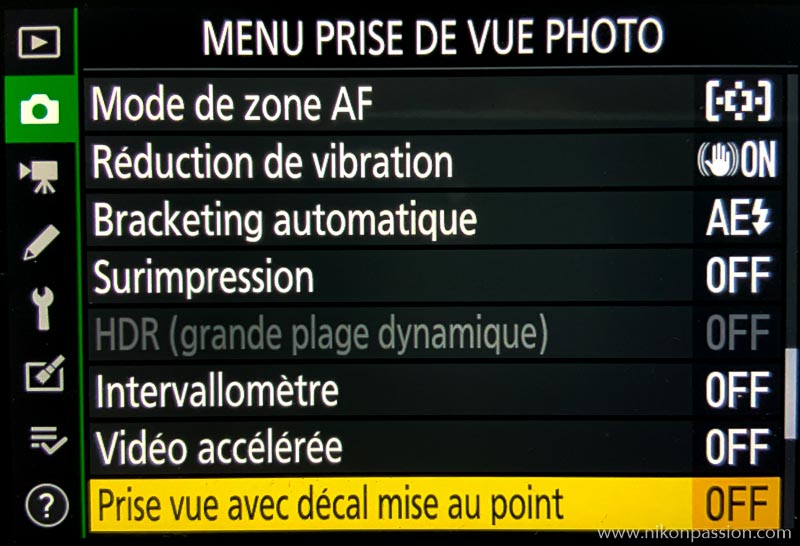
Press to enter the focus shift adjustment menu.
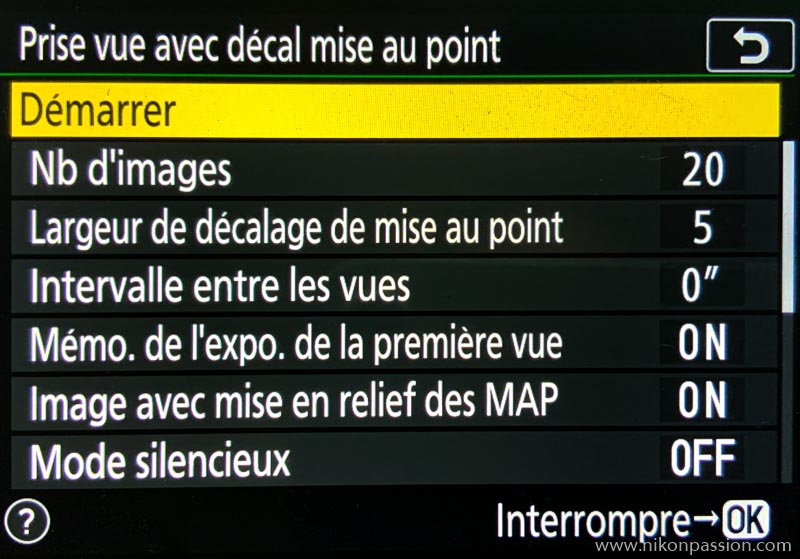
Do not press Start yet, take time to adjust the various settings.
Number of images
The number of images in each series is variable between 1 and 300, so choose the appropriate number depending on your subject. If the subject is very long, or moving, multiply the pictures. If it is shorter and fixed, 10 to 20 shots will suffice.
Make a few tries to find the right value. For the photo of the article, I chose 20 photos.
Focus shift width
This is to indicate the amount of focus shift between each frame. You will also have to do some tests to find the right value. It consists in covering the whole subject from the first to the last shot, without taking too many unnecessary pictures. The smaller the variation step, the more pictures you will have to take and vice versa.
For the photo of the article I chose a shift of 5, an average value that I recommend you not to exceed, a too big shift could deprive you of essential photos, a too small one multiplies them unnecessarily.
Note that if infinity focus is reached before the intended number of shots is taken, shooting stops. There is no point in continuing since the focus cannot be varied.
Interval between views
Here you will tell the camera if you want it to take all the pictures without interruption, or if you prefer it to wait a certain amount of time between each picture.
Choose the value zero to make the sequence as fast as possible.
Increase the delay if you use a flash, it should have time to recycle.
Take into account the recording speed of your card to avoid saturating the buffer. With an XQD card there is little risk.
Memo. of the exhibition from the first view
This function allows you to set the exposure before starting the sequence, while maintaining this value for all photographs.
I advise you to activate it, it avoids you to work in manual, or to have to correct the exposure on several photos.
Image with MAP highlighting
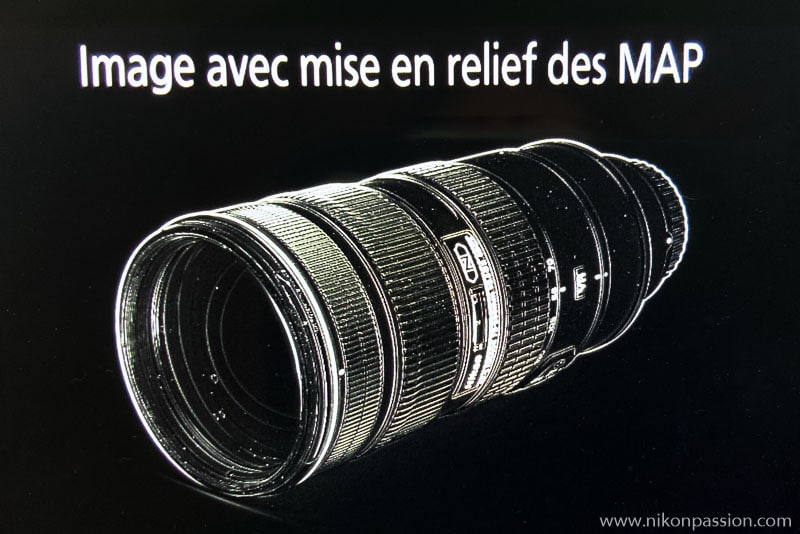
the illustration indicates that the entire subject has been covered, the white areas are within the sharpness range of the entire photo.
This function has a very particular use, it appeared with the Z 6.
Once your series is complete, you can display a “technical” picture on the back screen that shows the area covered by the autofocus during the series. You can instantly see whether your subject is fully covered or not.
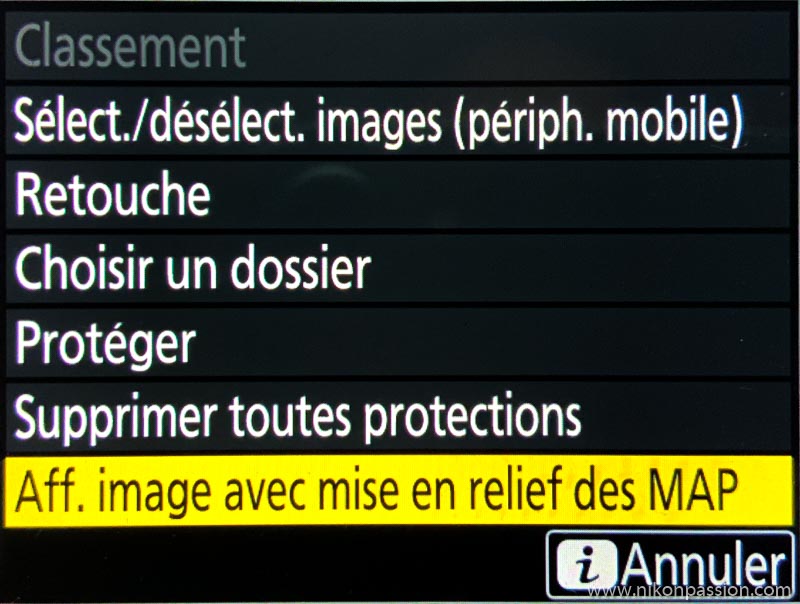
view mode key I
To display this image well hidden, after shooting is finished, press the View button, then press the I button (for Info) and then press the “Display Image with MAP Highlight” button.
This photo cannot be copied to your computer, it must be viewed on the screen only.
Silent mode
As the name implies, activating the silent mode allows you to shoot with the electronic shutter, without noise. It’s up to you to decide whether you need it or not.
Storage folder at startup
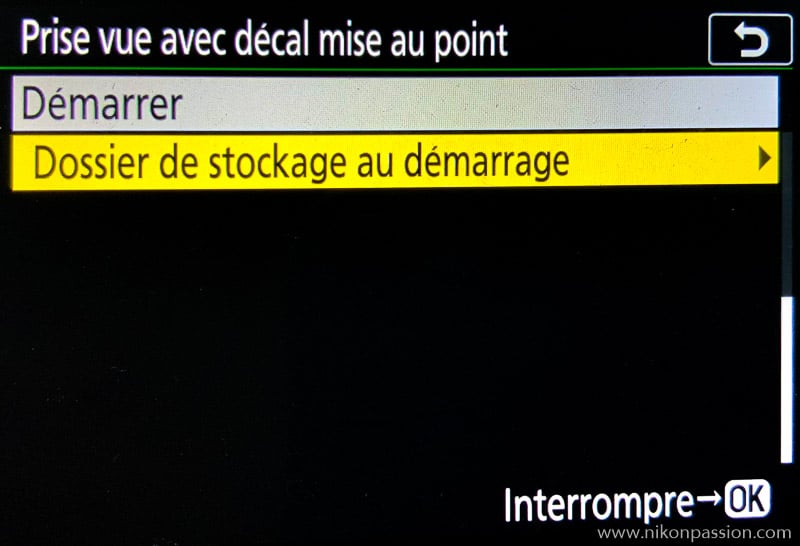
You can set a particular folder on the card to store the photos in each sequence.
If you are only doing focus stacking sequences, there is no need to choose a folder, just format the card before shooting.
Otherwise, choosing a folder makes it easier to find the series when transferring to the computer.
How to do focus stacking with Photoshop?
Here are all the steps to be carried out to obtain the final photo resulting from your focus stacking shot, with Photoshop.
Copy the photo series to a folder on your computer
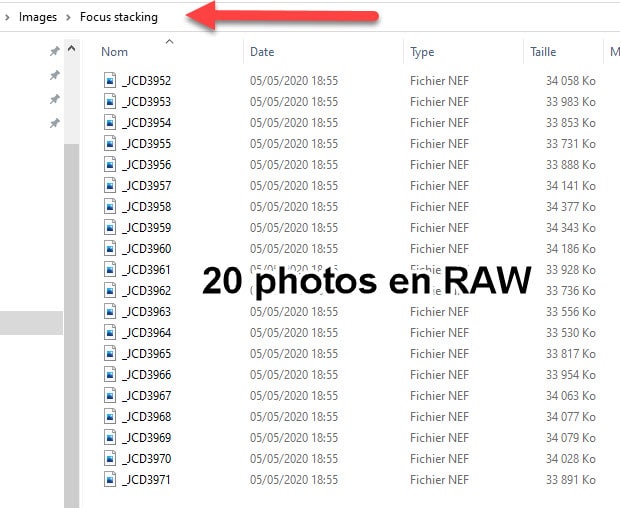
Open the photos one after the other to check whether or not to keep them all. If the focus difference between two photos is too small, you can delete every other one, for example, so if in doubt, keep them all.
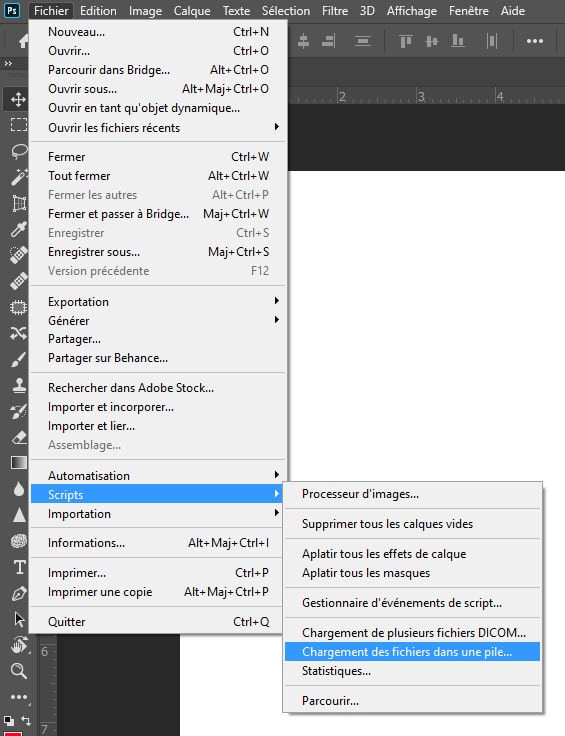
Launch Photoshop and create a new document, no matter how big it is, you only need it to access the scripts.
In the File menu, click on “Script” then “Load files in a stack …”.
Change the “Folder” option to “Use:”.
Designate the folder that contains your photos
Click on Ok
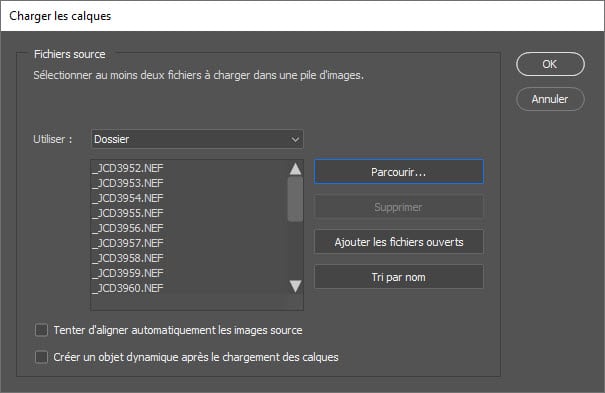
Photoshop will create a new document that will contain as many layers as there are photos in your folder. These layers appear little by little in the layer list, they are stacked. This may take some time depending on the number of photos and the performance of your computer.
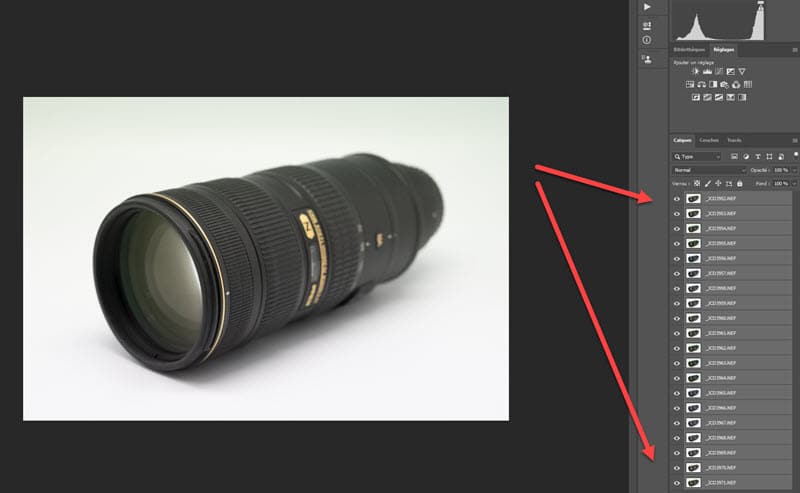
You will now proceed with the merger.
Click on the top layer, then click on the SHIFT key and the bottom layer to select them all.
In the Edit menu, click on ” Automatic layer merge “, choose the ” Stack images ” method.
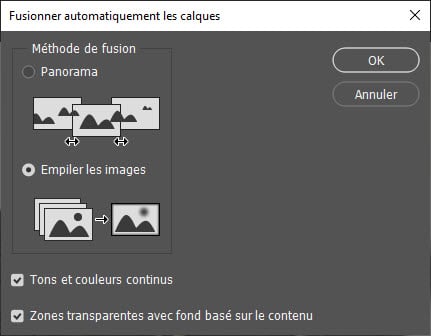
Validate and wait until Photoshop has finished processing, it will take several minutes depending on the number of photos and the performance of your computer.
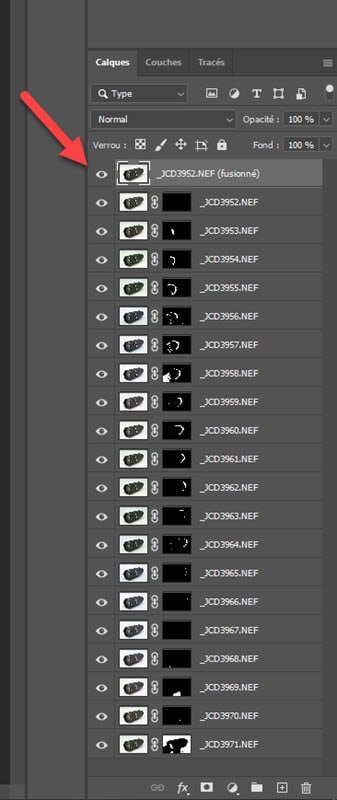
Once this operation was completed, Photoshop created a new layer, at the top of the stack, containing the final photo.
You can apply the necessary corrections and cropping to this photo to enhance it before saving it. This is your final image.

the final image resulting from the merging of 20 photos with focus shift
In conclusion
Doing focus stacking with a Nikon camera has become very simple since this function was added to the camera body menu.
If yours does not have one, you must compensate for the lack of the automatic focus shift. For example, use a macro rail with a graduated distance scale, the Neewer Pro or the Novoflex Castel-Q may be suitable.
Do you have any extras to bring, any special tips? Share them via comments.



Discussion about this post