It may seem almost unreal to us at a time when 3 billion of our pockets contain cameras, and 1200 billion pictures are taken a year, but it wasn’t always like that.
There’s about 180 yearsPhotography was born, and it would allow a formidable historical testimony and the artistic expression of many photographers. And also to read this article today 😀
If today it is above all digital, for most of its history, it has relied on a technique very similar to that of its invention, which is grouped under the term “…”.analogical photography“.
I started using film seriously in 2018, late in my practice, but today, it’s probably the most important part of my work. which is mostly what I do. So I’ve decided to share with you everything I’ve learned about silver photographyin a large and very complete dossier that will be spread over numerous articles and videos.
We’ll see a lot of things practices that you can use if you want to get started, but in this first introductory article, we will first look at what exactly is silver photography The following is a brief overview of the technology: how it was invented, what the technology is based on, and why it should continue to be used in today’s digital world.
A bit of history: how was photography invented?
Definition of photography
Well, for starters, What’s photography?
(And yes, have you ever wondered? 😉 )
Here is the LTRC’s definition:
A set of techniques for obtaining permanent images by means of an optical device producing a real image on a photosensitive surface.
Photography is therefore a technique whose purpose is to obtain a permanent image…and it does so by means of two elements:
- A optical apparatus imaging
- A sensitive surface in light of which record this image (today the sensor, yesterday the film, the day before yesterday the glass plate, as we will see).
The optical device
You may be surprised, but the first part, the optical device, is actually known and mastered for an extremely long time it’s the famous darkroomor “camera obscura” in Latin (later to become “camera” in many languages).
And when I say extremely long, I mean since… Aristotle! That is to say, since 4th century BC !
He had observed his operating principle, which is that when you drill a tiny hole in a black box, it projects an inverted image of reality outside.
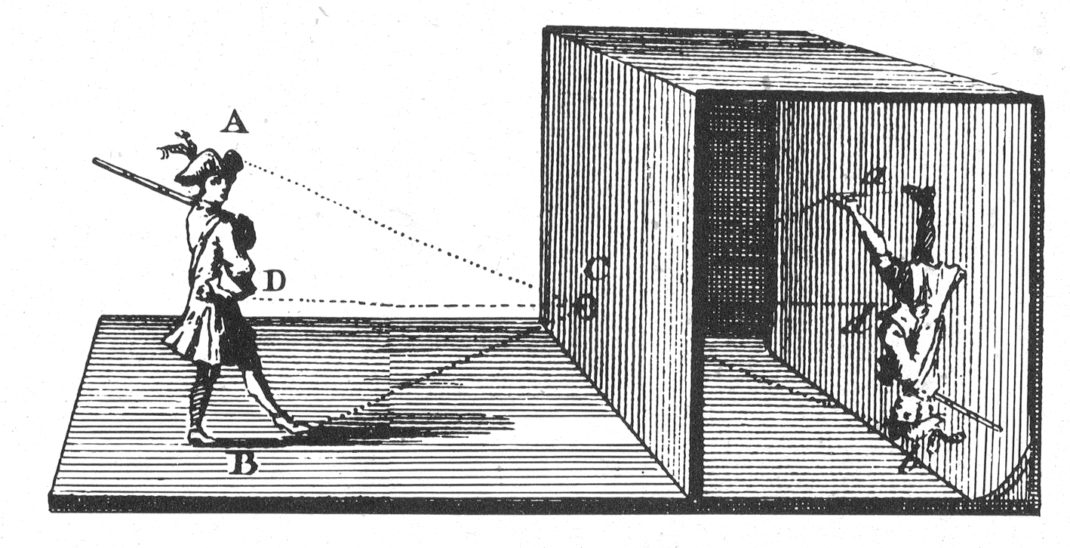
The Persian scientist Ibn Al-Haytham had given one detailed description in the 9th centuryand Leonardo da Vinci had also taken an interest in the issue. The device was also subsequently improved with the addition of a lens.
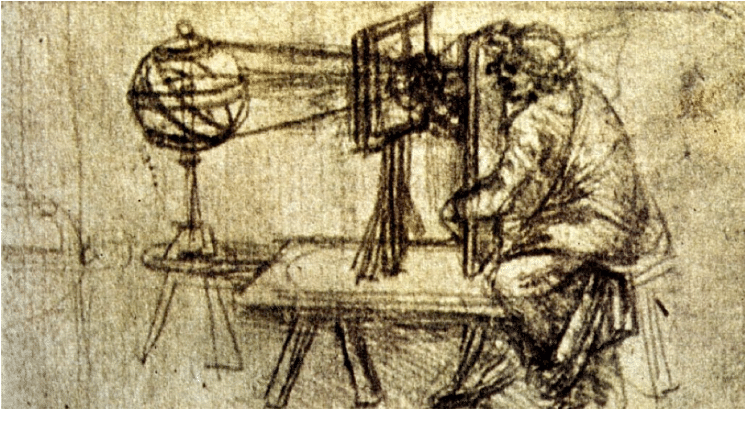
But here’s the thing, projecting an image through an optical device is fine, but… it doesn’t allow you to record it. It will be necessary to wait for advances in the field of chemistry to invent photography.
The effects of light on silver chloride were known as early as the Middle Ages, but getting an image that didn’t degrade quickly was another matter, and we had to wait until the 19th century for that.
The light-sensitive surface
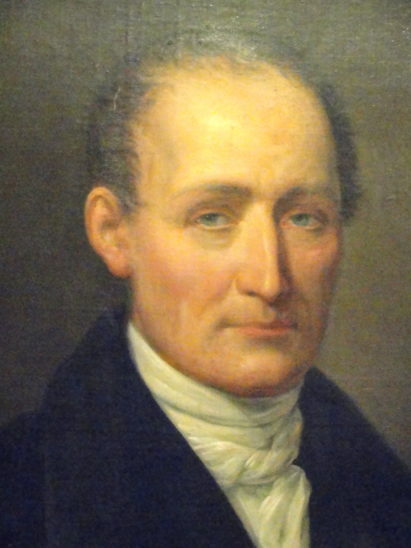
Nicéphore NiepceA French engineer began experimenting with different techniques at the beginning of the 19th century. He managed to fixing images from 1812 by placing silver salt at the bottom of a darkroom, but they are not stable and eventually blacken and disappear.
He continued his experiments, and realized that a way had to be found to interrupt the action of the light-sensitive product to prevent this blackening, and to fix the image. And he ends up arriving at what is today considered to be the world’s first photograph, this image of his property, which required several days of exposure!
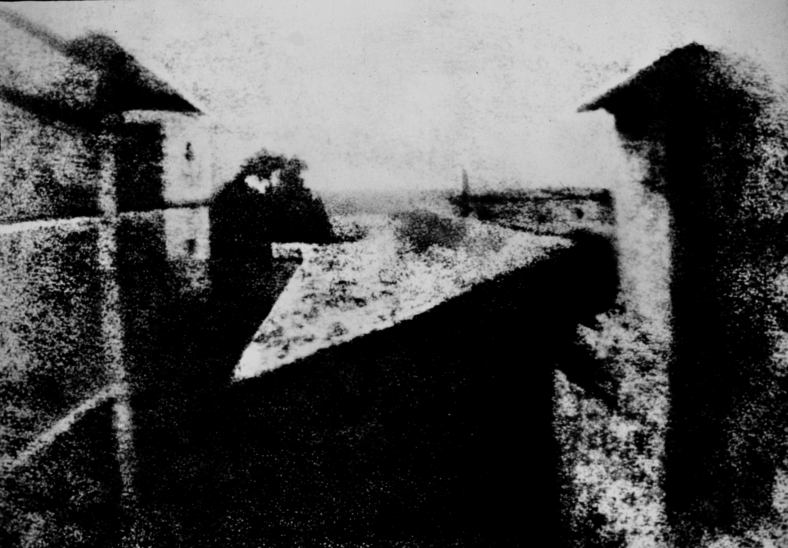
There’s been a lot of trial and error to get to this point, of course, but it’s certainly the first stable image taken from nature that has ever reached us….
At this stage, there are two main problems:
- the shutter speed is extremely long
- and the image missing sorely needed accuracy.
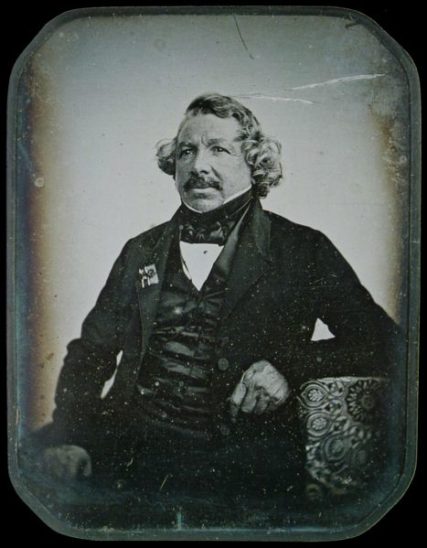
That’s where Louis Daguerrewhich is partnering with Niepce to improve the process. Niepce died shortly afterwards in 1833, and Daguerre continued to improve the photographic process. (still called “heliography” at the time).
I’ll pass on the technical details, but in particular he finds a product that is more sensitive to light, which reduces the exposure time to a few dozen minutes.
In 1839it comes to the process known as the daguerreotypewhich is an improvement of the Niepce process.
The daguerreotype is a copper plate covered with a layer of silver. It is exposed to iodine vapours, which combine with silver by chemical reaction to create silver iodide, which is sensitive to light. When exposed to it, the plate records an “invisible image”called thelatent image it’s there, but we don’t see it yet.
The next step is the reveal by exposing it to mercury vapour, which combines with silver iodide in proportion to its exposure to light.
There you go, you’ve got a daguerreotype!
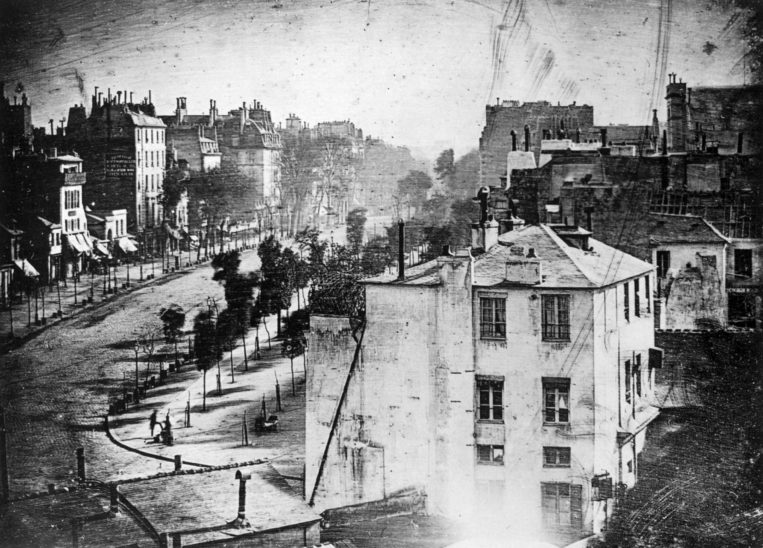
It’s a speedy success during its presentation in Paris, because it is completely unexpected for the public. The French state will therefore buy the patent by paying Daguerre and Niepce’s son, and decides to place it in the public domainthat is… to give it to the world!
One can even still read the minutes of the session of the Academy of Sciences where they simply decide to give such a revolutionary process, which seems quite incredible today!
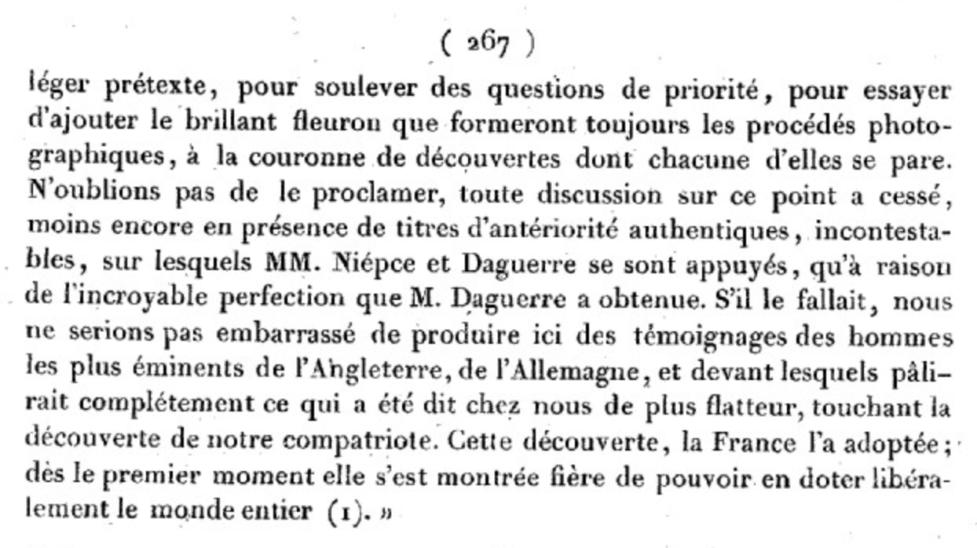
As a result of this passage into the public domain, from many people are taking over the process to improve it…and he knows a fast-paced development in several areas:
- Shortening the exposure time (which soon allows the portrait)
- Improvement of the image stability over time
- Simplification of the process
The invention of the negative
Let’s avoid too much chauvinism: in parallel to Niepce and Daguerre, other engineers were working for a similar purpose.
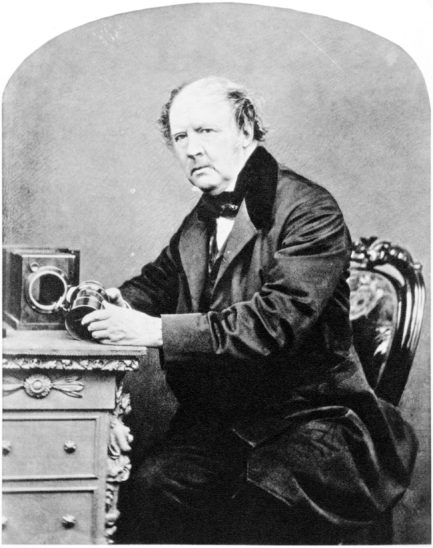
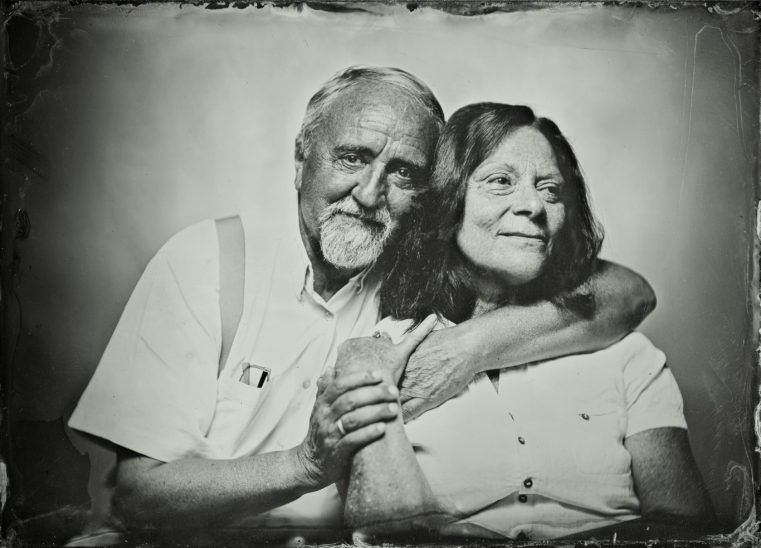
William Talbota British scientist, is developing a different process, which creates an negative portrayal. Contrary to the positive image of the daguerreotype, its technique makes it possible to reproduce the image several times on papermuch less fragile than the daguerreotype. It was less popular at the time because of its lower quality, but it is always the same principle that is used in modern silver photography..
Others will invent more sophisticated processes, such as the wet collodion, l’ambrotype and the ferrotype for example.
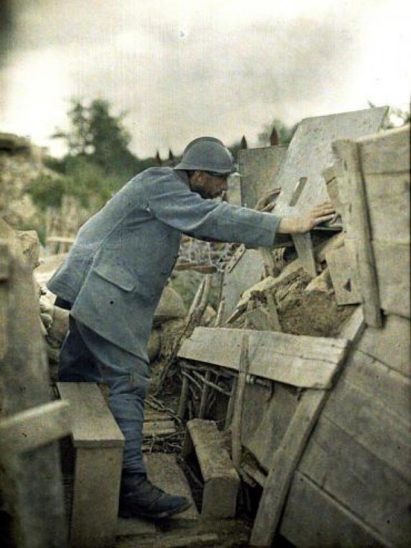
It should also be noted in passing that the first colour process was invented by the Lumière brothers at 1903 It’s called theautochromeand it works from… potato starch. Yes yes, potatoes. That’s what we were made with. First World War colour photos you may have seen before.
The silver process today
So how does silver photography work today? The one with film that you put in cameras that look pretty much like stuff you’re familiar with?
And of course the principle, we’re still very close to the principle invented in the 19th century…which has just been upgraded since then.
General Principle of Modern Silver Photography
The black and white film
A filmit’s just a shrink wrapcovered with a emulsion. It’s a gelatine which contains silver halide crystals i.e. silver ions (+) and Bromine or Iodine ions (-). Each crystal contains several billion !
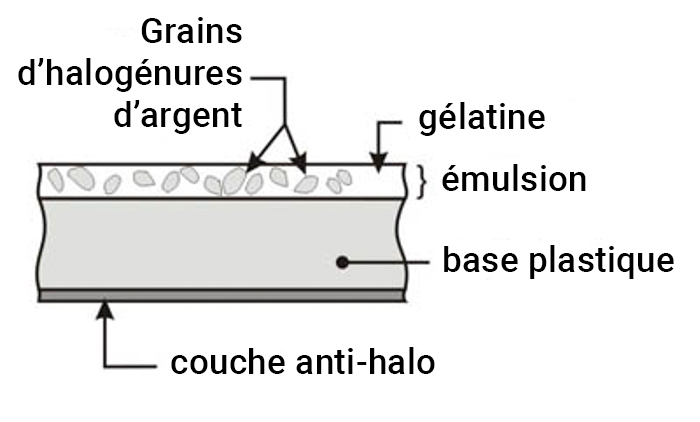
When we expose this film to lightthe silver ion picks up an electron and becomes a silver atom. In each crystal, there are zero to about 10 silver atoms that are going to form. In French: c’est très peu, et invisible à l’oeil nu. Remember when we were talking about the daguerreotype: there’s a image latentwhich must then be revealed.
And so that’s when we get to the essential stage of the development.
Black and white development
(Note: here the goal is just to explain you the principle, not the practical details to do it yourself, we’ll see that in a dedicated article 😉 )
The purpose of development is therefore:
- to have an image visible (for the moment it is latent, I remind it again 😉 )
- that the film does not deteriorate over timewhich requires both that he be more sensitive to lightbut also that he’s chemically inert (i.e. no more chemical reactions occur over time).
When you develop the film, it obviously has to be done… in complete darkness while he’s still sensitive to light. Otherwise, all our crystals will react to the light, and erase the latent image! Goodbye grandma’s pictures!

To avoid that, we’re going to run the film through a product called the revealing. As its name suggests, it allows you to reveal the latent image.
I’ll pass on the chemical details (we’ve done enough of that today), but basically it’s gonna react with silver salts to convert them to metallic silver (which is black in color). Light has done this before, but only a few atoms, remember.
Simply put, the role of the developer is that it becomes visible to us. And the more the emulsion has reacted to light, the faster the developer will act.
What you need to understand is that the more a crystal has been exposed to light, the more the developer will turn it into silver…. And so, the darker it gets.
That’s why it’s called a negative the parties who were originally clear in what you photographed were therefore highly exposed in the light, and will be dark on the film. Fortunately, all you have to doreverse to regain a “positive” image.

(Note that there is a process that can be used to obtain a black and white positive, but this is anecdotal, I won’t go into those details).
Then, after a certain amount of time (depending on the film, the developer used, etc.), we will stop the chemical reaction. Indeed, if we don’t do it, the developer will turn everything into metallic silver until it’s not possible anymore, and then your film will be all black : that’s not the point ^^
So we’re going to use a product called “stop bath“, which will stop the action of the developer. It is a bit his sworn enemy: the stop bath is acid, the developer is basic (simple), so they cancel each other out.
Last step: we’re going to use a product called the fixer and allows dissolve all silver salts that were not developed by the developer. This is to prevent them from continuing to react in the future, when you show them to your mother in broad daylight.
Then we washes the film to prevent the fixer from sticking to it. Demineralized water can be used… (Limestone is evil, the Ch’tis know)or add a wetting agent (basically soap) to go faster and avoid any water on the film.
And then that’s it! You have to wait for it to dry, and then you can do prints, scans, all that. We’ll see about that later in this file, don’t worry 🙂.
Colour negative film and C-41 development
You may have noticed that since the daguerreotype, we’ve made some progress with cool stuff like cars, planes, internet and… color photography.
So there are colour films. I’m not going to go through the whole thing again just to keep you from going too long.
To summarize roughly, it’s the same principle, with two major differences:
- There’s several layers sensitive to different colours (thanks to filters and all)
- In each layer, the silver salt crystals are coupling-relatedwhich will then allow dye to development.

Next, development uses a process called the C-41 (that’s his little name, some are Jean-Michel, he’s C-41, what do you want).
There have been others in history, but this is the one we use most today.
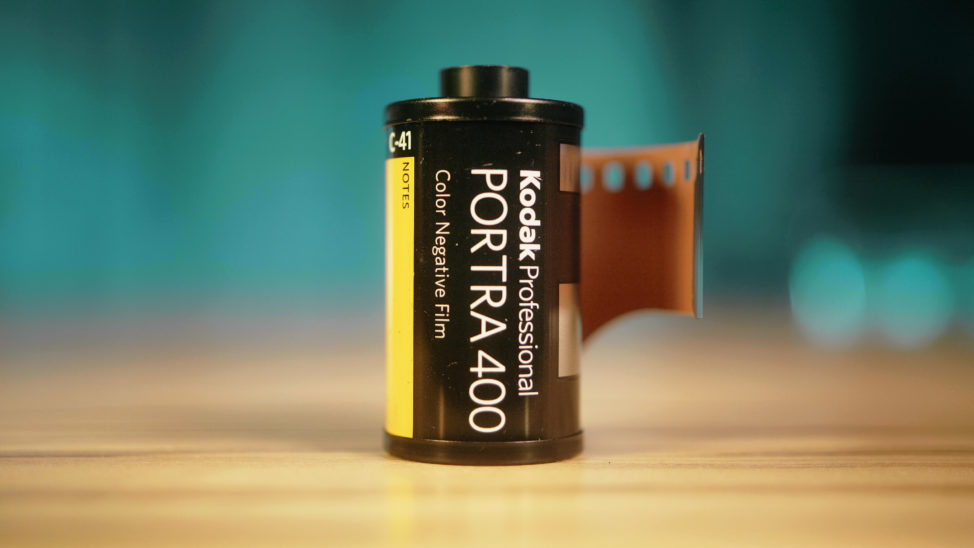
It’s a bit more complex than black and white development (more products), but I’m not going to go into detail about that now, I just wanted you to understand the general principle.
Colour positive film and the E-6 process
There are also processes that can be used to obtain an film positivethat is to say directly the image with the “right colors”, without having to invert them.
It’s called the reversal filmsor slides.
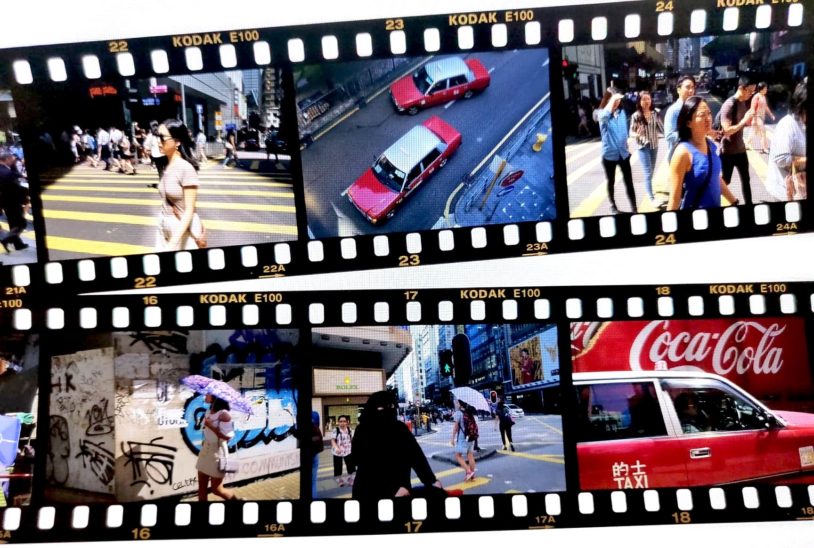
(thanks Richie for the picture!)
We all have a family member who made us sit in front of a screen to project the 1456 slides of his last vacation, remember 😀.
Well, that’s it.
The current process is called E-6and we can also note the process K-14 of the famous films KodachromeThe new system, used by many great photographers, is no longer possible since 2010 as the chemistry is no longer produced. For the anecdote, Kodak gave the last film to the famous Steve McCurry, who tells the story on his blog.

There’s a nice movie on Netflix with Ed Harris and Elizabeth Olsen, which is simply called Kodachrome.
Instant films
I’m not going to go into too much detail, but you probably know about the existence of instant films, with the famous Polaroid who popularized them.
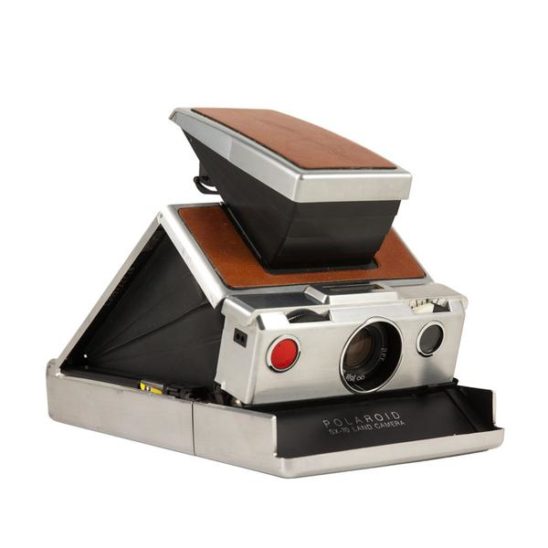
This process made it possible to have in the same pack the sensitive surface, the development chemistry, and the paper to make a “print”.
Polaroid a stopped all production in 2008format, and the snapshot now survives mostly with the Instax from Fujifilm. I won’t probably talk about it anymore in this series, because the Instax is more aimed at the general public, with the idea of a fully automatic and informal photo between friends, than at passionate photographers like us (even if it’s not forbidden to do it, eh).
Yes I know, there are still instant films for Polaroid cameras produced by Impossible Project, but this article is not meant to be an encyclopedia 😉.
Don’t worry, we’ll talk about it in detail when I explain how to choose your film, but I just wanted you to know about it for now 🙂.
The 3 film formats
Beyond the silver process itself (silver salts that react to light, all that), and the emulsions themselves (black and white negative, colour negative, colour positive), these films can have different formats. Different sizes if you prefer.
I’ve made a little video to introduce them to you, and show you a little bit how it loads into a camera, basically:
The 35mm format (135)
The most common, but also the most recent, is the 35mm format it comes from the cinema, but has been adopted for photography above all. from 1925 with Leica.
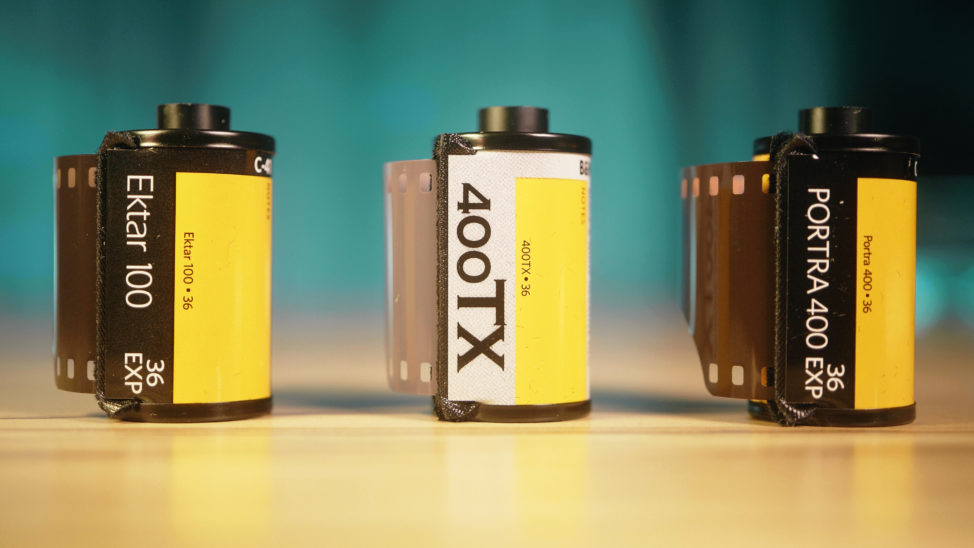
It takes the form of plastic cartridges containing a strip of film, making it possible to make 36 poses. Each negative measures 24x36mmThis is exactly like the “Full Frame” sensors of digital cameras, which have taken over this format (in particular to be able to keep the same lenses, and because of its popularity and the public’s habit of using it).
But when we originally started using it as a photo, we called it “small size“, because the size of the negative was much smaller than it had been before!
The large format (film shot)
You remember, the daguerreotype was made on copper plates their dimensions were variable, but the first photograph of Niepce is about 16x20cmto give you an idea. Much larger than our 2.4 x 3.6cm negative!
Even today, photographs taken with a camera as they were then are called “large-format photographs“. The film is called “film shot” because it’s not really a “film”: you can just take a picture with it.
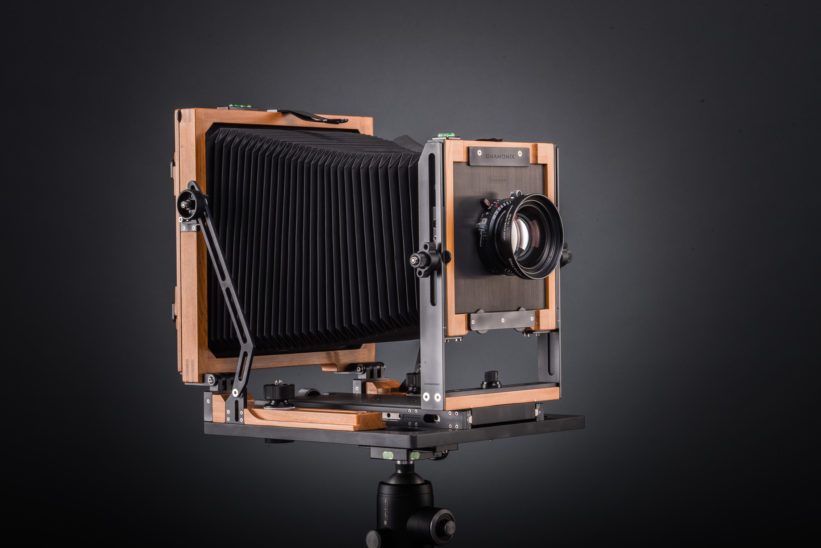
(Chamonix 57W-d)
The most common dimensions today are the 4×5 and the 8×10. And beware, these are not dimensions in centimeters, but in inches! The surface is therefore respectively about 10x12cm and 20x24cmwhich is absolutely huge (respectively 14 and 55 times larger than 35mm!).
This format allows a absolute quality unbeatable digitaland is still used today by artists, for example Gregory Crewdson who you can discover in this episode of my series Incredible Photographers:
The medium format (120)
Finally, in between, there is the medium size. It’s a film (called the film 120)which comes in the form of a roll that many people have never seen (when I ask for a manual control at the airport, it always arouses curiosity!).
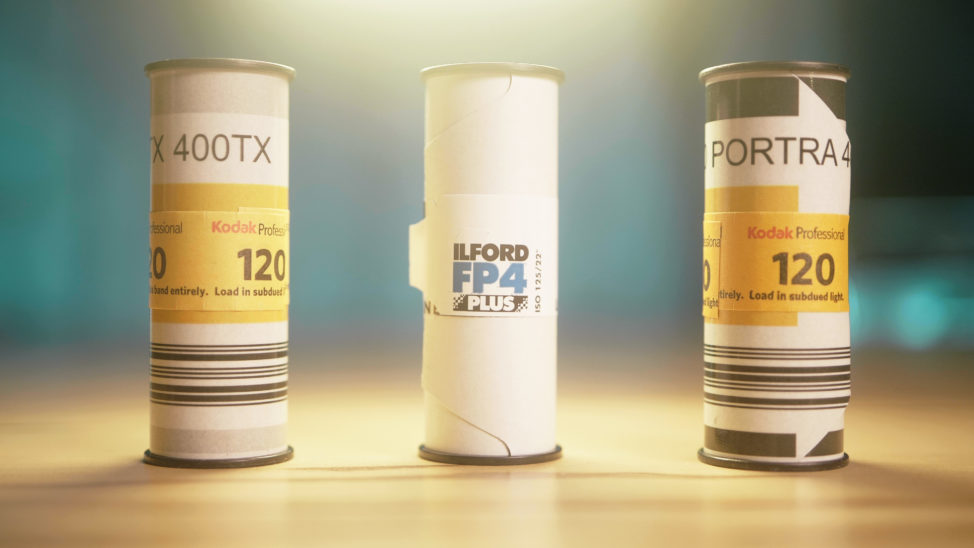
There are many models of medium format devices, the most common formats are as follows:
- 6 x 4.5cm (area 3.1 times larger than 35mm)
- 6 x 6cm (4.2 times greater)
- 6 x 7cm (4.9 times greater)
There are also 6×8, 6×9, and even 6×12 or 6×17 for panning!
This format allows you to have a compromise between a relatively large negative size (up to 5 or 6 times more makes a very big difference), some devices who keep a reasonable size (as opposed to the rooms that you have to use with tripods and everything), and a facilitated development (120 film can be processed at home as easily as 135 film, and by machine in most labs).
We will talk about it again, but the medium format remains one of the major advantages of silver photography today.
Isn’t digital better?
I’m not gonna get into a digital versus film debate here: both have their advantages and disadvantagesand then I will explain the reasons I see for using film today, which are not only technical, but also concern the effects it has on the way you take pictures.
Having said that, I want to make something clear right away, because I know that for some people who started directly with digital, there might be the belief that silver photography is outdated or of lesser quality.
Gold that’s not at all the case..
Still today, film does some things better than digital. :
Firstly, in terms of dynamic that it is possible to record (the difference between high and low lights), the film (about 13 EV of dynamic range) has just been surpassed by the best digital sensors (which are almost at 15 EV).
That said, in practice, the film reacts differently to light. Digital, if you really burn out the high lights of the image, you won’t be able to catch up on any more detailseven with a professional box at 5000€. But in silver, the film is much more forgiving of small mistakes.and in particular the overexposure. Professional films even allow you to overexposing by several stops without having any major consequences on the image.
(Pentax 67II, Portra 400)
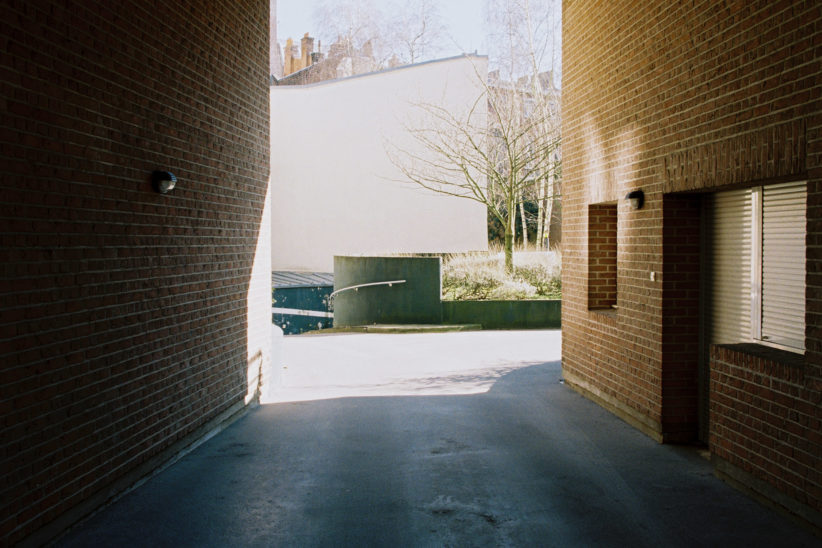
In addition, the medium-format cameras are still largely burying digital in terms of image quality. (in the broadest sense). To speak in digital equivalent, the silver medium format theoretically allows to have the equivalent of 60 to 120 Megapixelswhile the large format makes it possible to reach 300 to 1200 Mpx !
In practice, It depends on the quality of the scanbut it’s still a level of quality unsurpassed by digital today (although some medium digital formats at prices inaccessible to the average person are beginning to approach them).
That’s why photographers who produce very detailed images that can be shot in very large format still photograph with the camera, like for example Andreas Gursky, whom I mentioned in this video :
And without even mentioning the “quality” (knowing that that of a mid-range digital camera is sufficient for the majority of uses), an larger surface like that of the medium size provides a special depth of fieldThis is impossible to obtain digitally with a Full Frame sensor.
Finally, one of the advantages of the film is that it is paradoxically more future-proof than a digital file. As long as you have the negative, you have the original of your photo. No risk of hard drive failure or mishandling.
What if your 8MP files of a few years ago are today obsoletes, of the decades-old negatives can still be scanned with modern technology to produce high-quality images.
This being said, if these reasons for using film are perfectly valid (especially if your photographic work requires very large prints), what really pushes me to photograph with film is in less technical aspects.
Why do silver today?
Warning: the goal is not to tell you that you MUST use silver. You guys do what you want, right?if you’re not interested, that’s okay. I just want to explain to you why I’ve come to do the same.
The rendering of the film
The first reason I do so much film is the special rendering of the film (especially my favourite film, the Portra 400)..
I tried, but I’ve never been able to get the same tones (dark and light tones) and the same colors in digital. However, there are several players on the market that offer Lightroom presets that are supposed to mimic the rendering of the film. But it’s never the same.
It’s hard to describe it until you’ve tried it, but I think there are two things I can describe objectively:
- The highlights renderingThis is due to the way the film reacts to it: even with a very bright sky behind someone, the fade between highlights and midtones is much better as digital to me. There’s a velvety that you can’t find anywhere else.

(Pentax 67II, 105mm f/2.4, Portra 400)
- The color appearance Each film has its own personality, but once you’ve found the one(s) you like best, it’s hard to go back. In fact, with my favourite film and a correctly performed scan (we’ll come back to that), I usually have only NO alterations to be made to get the colors I want. It’s very restful.
(Nikon F3, Portra 400)
The medium format: its rendering and quality
I was talking about it above: medium format silver is still unbeatable in many aspects.
The quality one is always appreciable, but honestly as long as you don’t make a huge print run, the difference isn’t that big.
On the other hand, given the enormous size of the sensitive surface… (almost 5 times the area of the 24×36 for my Pentax 67)it is possible to obtain a depth of field effect that we can’t find any other way.
You know it if you read me a little: I don’t think a good picture has to have bokeh.. Absolutely, we don’t give a damn.
But the medium format allows to obtain a real separation between subject and backgroundincluding if he’s photographed in full-length.

But you get the idea: the background stands out in a special way.
(Pentax 67II, 105mm f/2.4, Portra 400)
And it’s still a valuable option to have. It gives you a rendering right away dreamlike and formerwhich can make sense for some projects.
A different rhythm to the shooting
It probably won’t have escaped your notice: a photo film has only a limited number of frames : 36 photos for the 35mm, and even between 10 and 15 for the medium format.
On top of that, a good part of the film cameras have not no autofocus (even if there are very good and cheap autofocus cameras, we’ll come back to that in the article on the choice of equipment). And I’m not even talking about 😉 bursts.
These two factors combined make the pace of shooting is changing enormously. We’re doing more caution before you triggerWe think about everything (settings, focus, composition), and as a result I have the feeling that there is a larger percentage of photos that we select. That doesn’t mean there’s more in total, but let’s say it gives a different rhythm.
In some cases, I prefer this rhythmand in others it’s more of a handicap. I’ve also talked about it in a video, where I explain in detail in which cases I choose film or digital:
A return to the sources of the photo
For most of its history, photography has only been silver. Digital has only recently appeared on a historical scale, and so the vast majority of major works in photography have been made with film cameras.
That doesn’t mean at all that we can’t do major works digitally. In fact, many photographers have already taken advantage of the tool.
But there’s something a little bit magic using the same tools as those who took the photograph.
The love of beautiful objects
If the film cameras are not all beautiful, and digital cameras not all ugly, it must be recognized that the fleet of silver equipment contains some design wondersboth in the sense of aesthetics (= Fucking beautiful), that in the sense functional (design serves function).
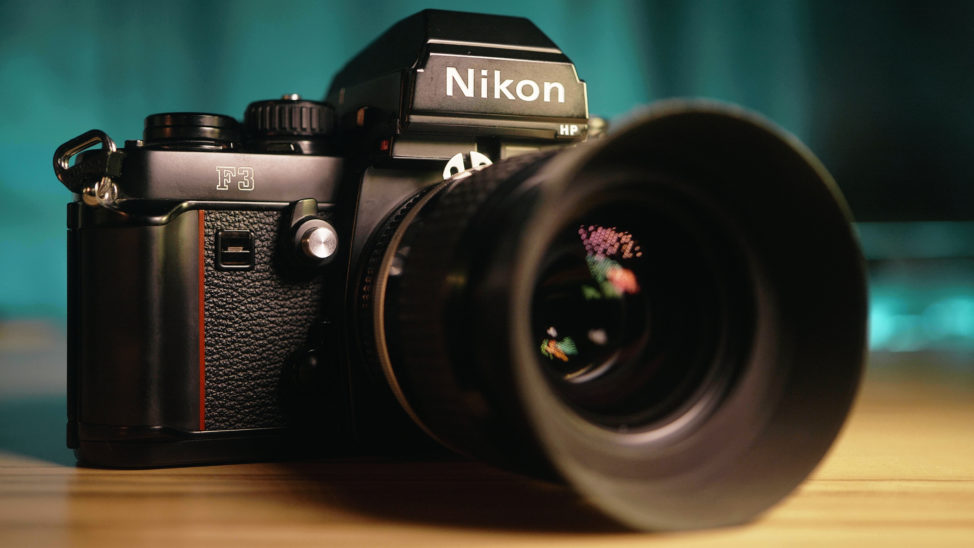
It depends on your design sensibility of course, but personally… I get more pleasure out of holding a beautiful object in my hands… that something without charm (as long as it does the job of course). And in film, I do not sulk my pleasure.
Well, I hope this article has given you an good overview of the origins of silver photography, its main principles, and its use today.
Well, if it made you want to get into it, that’s good, because… the following items of this file will allow you to Understand the differences between film and digital (and what it changes when you shoot and afterwards), how to choose your silver camera, how to choose your photo film, how to develop your filmand how the scanner.



Discussion about this post