Sorting your photos, classifying, referencing and processing them is one of the indispensable operations in digital photography. A successful workflow goes one step further, as it allows you to publish your photos, and the loop is then closed. In the article below you will discover an example of a complete workflow, from shooting to publication, using Lightroom software.
This workflow can be implemented with other software, such as Luminar 3 or Capture One Pro, simply follow the given steps.
Workflow is the set of operations you need to perform from shooting to publishing your photos, if you go that far, so that your photos are :
- sorted
- classified,
- referenced,
- saved,
- processed,
- published,
- archived.
Each photographer has his or her own way of proceeding, especially for the post-processing stages when this is the case.
In terms of publication practices are multiple, I present here the modes of publication that I use, from the web to books and videos.
This method can be adapted to your practice and the software you use. I chose the Lightroom environment because this software allows me to do everything without manipulating the files, but this is the case with some other software as well, you have the choice (see the photo software buying guide).
As soon as the shooting is over, you should think about retrieving the photos that are on your cards. The quicker you do it, the easier it is to save them. If you wait too long to empty a card, you run the risk of accidentally deleting photos or losing the card.
I usually empty every card used during a session as soon as I get home, even though I know I don’t have the time to manage and process the photos immediately. But the files are saved and the card can be used again very quickly. This first step is essential for me, it consists in securing the files, on several disks.
1- Importing photos into the Lightroom catalogue
I slide each affected card into my card reader and use a Lexar Professional Workflow that supports CF, SD, micro-SD, and XQD formats because I often use different card readers. You can be satisfied with a reader that supports only the formats you’re interested in.
Avoid transferring files via USB cable, it is slow and copy errors are common.
When importing into the catalog, Lightroom automatically performs the following operations:
- copy files from the map to the import folder on my computer,
- creating a backup copy of these files on an external hard drive,
- creation of dynamic previews which then save me from having to access native files (faster),
- photo referencing (reading EXIF data).
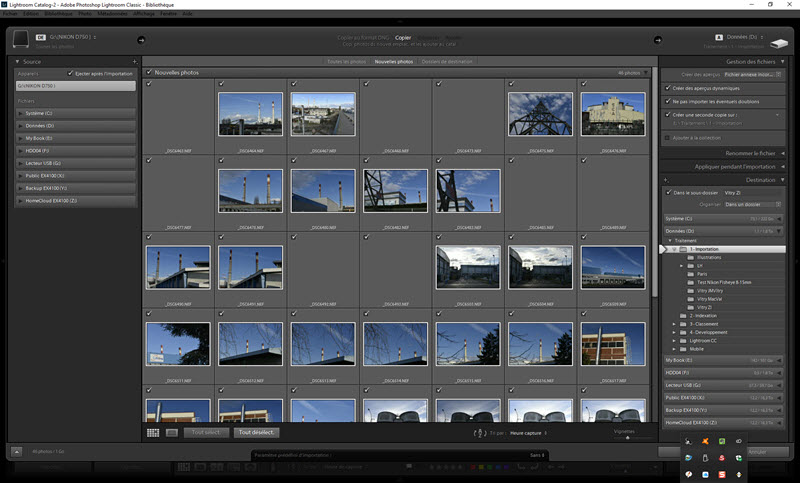
my import screen in Lightroom Classic CC
2- Sorting the photos
Before doing another operation, including processing, I make sure that all my files are copied and duplicated. I use the Syncback software to make backup copies on my external disks and on the NAS (I’m using a WD EX4100).
Then I put away my cards that I don’t format. I will do that when I’m going to use them again.
To sort these newly imported photos, I use the shortcuts in the Lightroom Library module :
- I go through each photo (magnifying glass mode),
- I press the X button to mark the photos to be deleted (blurred, duplicates, obvious framing errors, trial and error, etc.),
- I press the U button to mark photos “to review” and the P button to mark photos “to keep”,
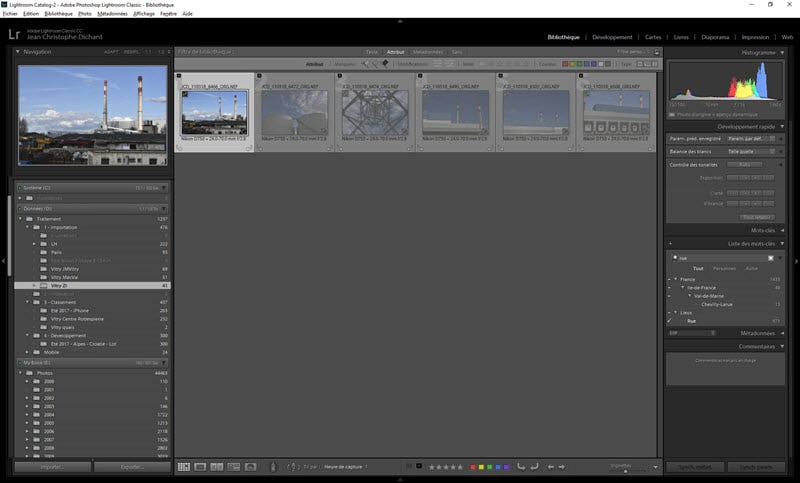
sorting example: delete rejected photos in Lightroom
Once this first review is complete, I display the photos “to be deleted” using the associated filter, and I delete them permanently. My backup software will delete these files from the external disks the next time I make a mirror copy.
Attention at this stage, if you do not use the recycle bin of your computer, the files are permanently deleted.
3- Indexing of photos
I now move the remaining photos to the index sub-folder. I use this principle of several sub-folders to find my way around when I don’t have time to finalize my workflow in one go, so I know at all times at which stage a photo is at.
At this stage, I assign keywords to the photos according to the following criteria:
- what (e.g. “show”)
- which (e.g. “names of visible persons”),
- where (for example “France” and then “Auvergne”.)
- subject (e.g. “city”)
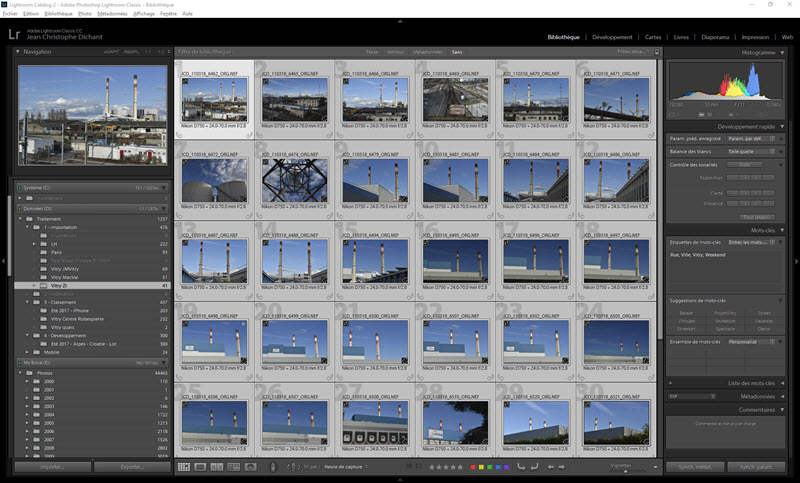
adding keywords to a series of photos
These keywords will allow me later on to search all my photos to find those that interest me.
Note that Lightroom also offers a face detection system that avoids having to manage the keywords “people” manually. Lightroom CC is able to search for photos that are not indexed beforehand, which is one less step to take.
Depending on the case, I may assign a geographical location to a batch of photos, for this I select them and drag them into the Maps module. The photos coming from my smartphone, via synchronization with the Lightroom CC Mobile application, are already located and appear automatically on the map.
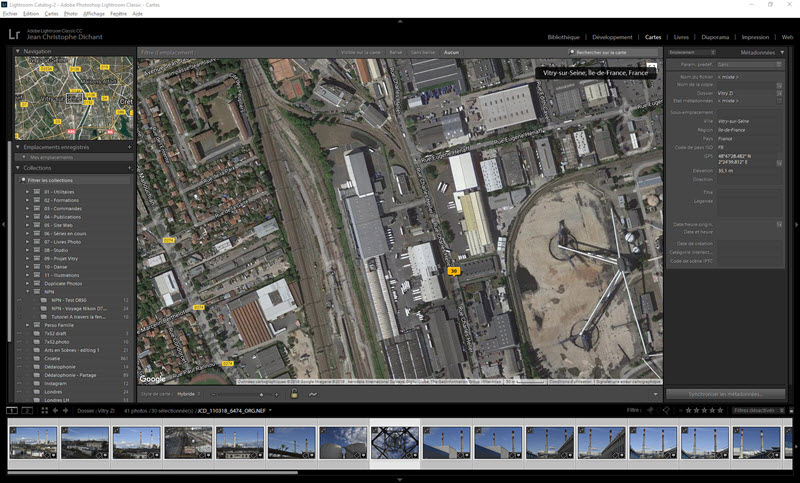
example of photo geolocation in the Maps module
4- Filing of photos
The last step in my “photo management” workflow is to assign a score to each photo so that I can identify the best or most suitable ones for my needs. This is how I do it:
- I give the first photo a grade of 3 (this average value allows me to identify poorer and better photos),
- I assign a score between 1 and 5 to each photo, with the first one in mind as a reference,
- I then move the photos rated 1 and 2 to an archive folder on my main external drive, they can be deleted later when the required photos are published,
- I repeat these operations with the remaining photos graded 3, 4 or 5.
After a few minutes, I went through the whole thing and all I have left are the photos to process, the less interesting ones are archived. I don’t delete them immediately because I sometimes need to find one for specific needs (e.g. a specific request from a dancer).
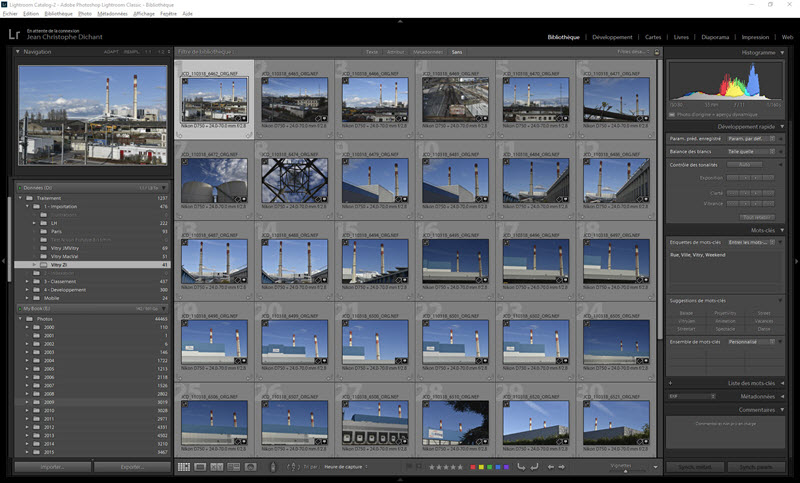
the organization of my sorting and filing files
Sorting and filing operations are completed. To manage a photo shoot of 800 photos, it takes me about 30 minutes to get there.
Before being able to publish or deliver the selected photos, I perform post-processing operations both globally and locally.
1- Cropping
I always check the framing of my photos, to, if necessary, straighten a horizon or remove a detail at the edge of the image that does not interest me.
2- Treatment
If the photo requires it, I apply a global treatment which consists of :
- apply a profile (Picture Control for Nikon or other depending on camera model),
- Adjust the exposure, highlights and lowlights as well as black and white.
If necessary I copy and paste these settings from a photo to all those concerned.
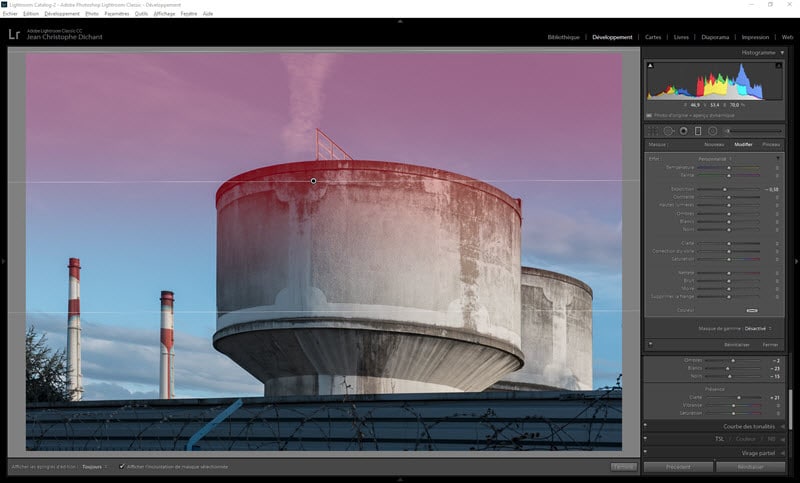
adjusting tone settings in Lightroom
For some photos, for example family photos that I am not going to publish or print in large format, I can use the automatic processing of the Library module. This processing is based on artificial intelligence (Adobe Sensei technology) and gives quick and correct results overall. This allows me to speed up the processing of many photos whose value doesn’t justify spending more time on them.
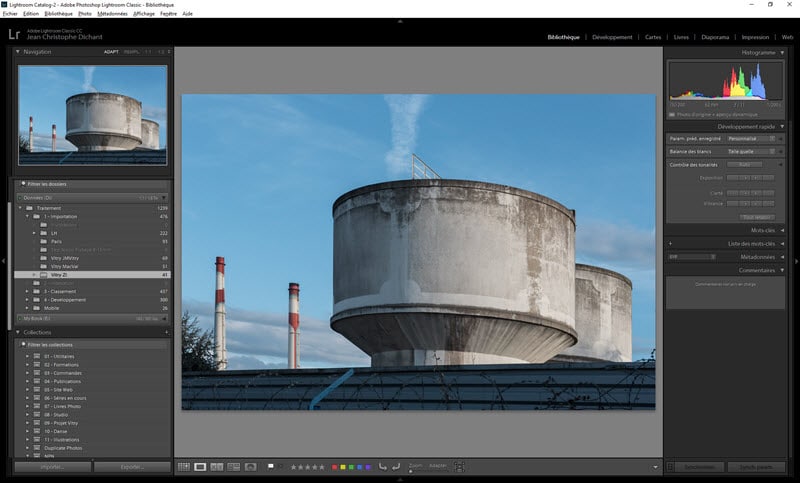
photo processing in automatic mode in Lightroom
Most of my photos can be left there, they don’t need further adjustments. Count between 1 and 2 minutes for each photo you choose.
I apply some localized operations to those that require me to go further:
- lightening or darkening of an area of the photo,
- accentuation and reinforcement of the sharpness,
- removal of a stain or small annoying element.
I use the “graduated filter” and “radial filter” tools for this purpose. I rarely use the brush tool as the other two are flexible to configure.

adapt the rendering of a sky in Lightroom
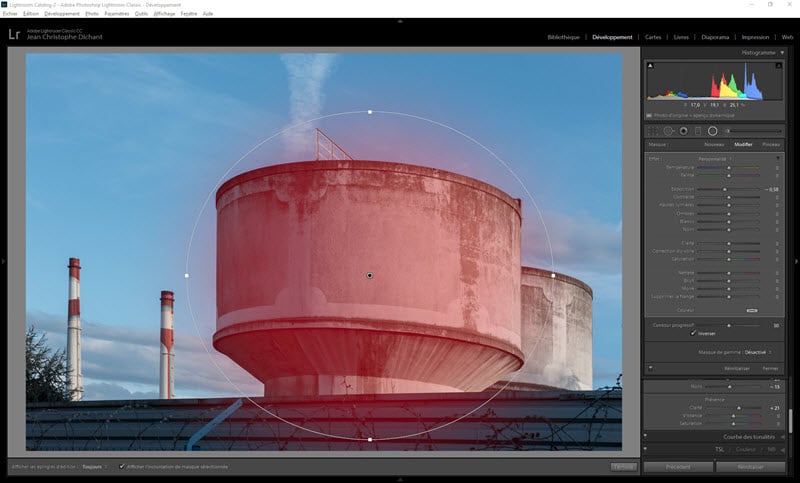
sharpen an area of the image
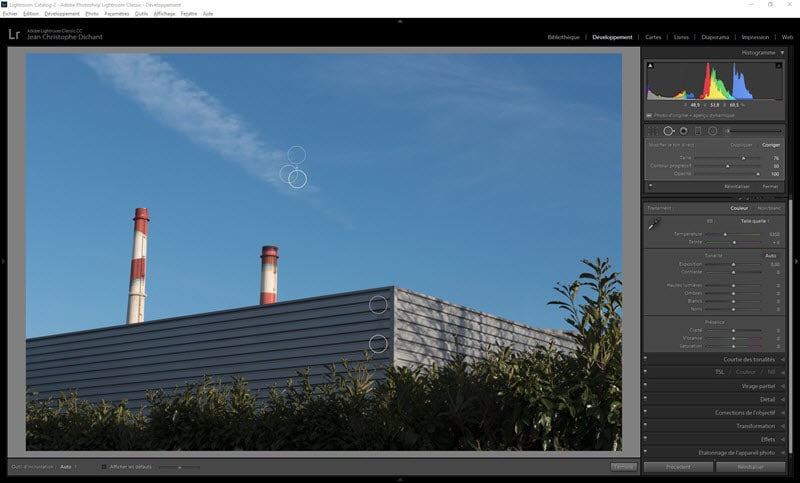
remove a sensor spot
If the need arises, it’s rare, I may have to use the brush tool in coordination with the Graduated Filter and Radial Filter tools, this allows me to avoid using Photoshop to divert.
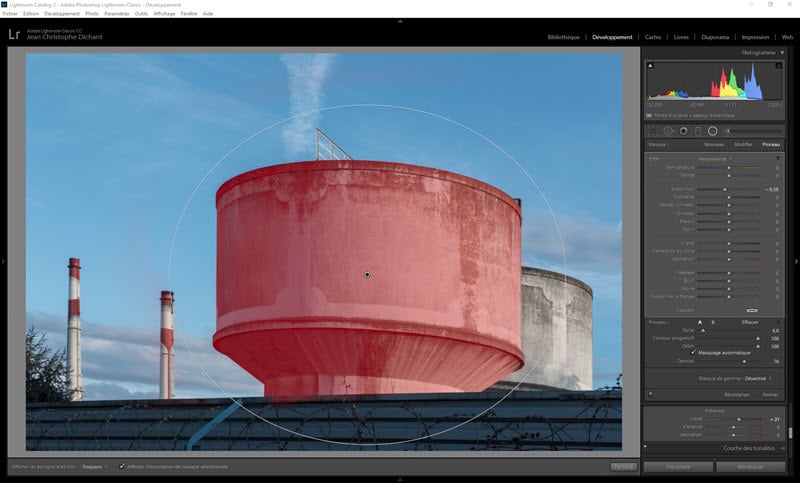
use the brush with the graduated filter and radial filter tools
Once these operations have been completed, all the selected photos are processed and ready to be used. The total processing time for a photo should not exceed 5 minutes for all current images. My exposure prints, which are reprocessed for obvious reasons of colorimetry and exposure timing, require more time but are much less numerous.
My publishing needs differ depending on the nature of the photos:
- web publication for my personal photos (social networks, website),
- Internet lab print run,
- creation of photo books,
- JPG file generation for specific orders and requests,
- creation of private and public web galleries,
- creation of multimedia communication supports.
1- Publication on my personal website
For my personal site, I export the photo to be published using an export template that :
- changes the name of the file to a search engine friendly name,
- resizes the photo to 800 px wide,
- applies a screen sharpness setting,
- retains the metadata (for copyright),
- applies a watermark with the name of my site.
I then publish the photo manually on my site (under WordPress).
2- Publication on social networks
For Instagram (and social networks)…I’m dragging the relevant photos into a synchronized collection. I then access the photo, and those waiting, from my smartphone in the Lightroom CC Mobile application. From there:
- I export the photo from LR CC,
- LR CC applies a watermark with the name of my site,
- LR CC launches the Instagram application (or another as needed),
- I fill in the caption and tags (I’m using PhraseExpress to go faster.).
This method saves me from having to transfer the JPG files exported from Classic CC via a USB key or a shared folder (like Dropbox). It’s fast and reliable, and I can manage the pace of publications from my smartphone.
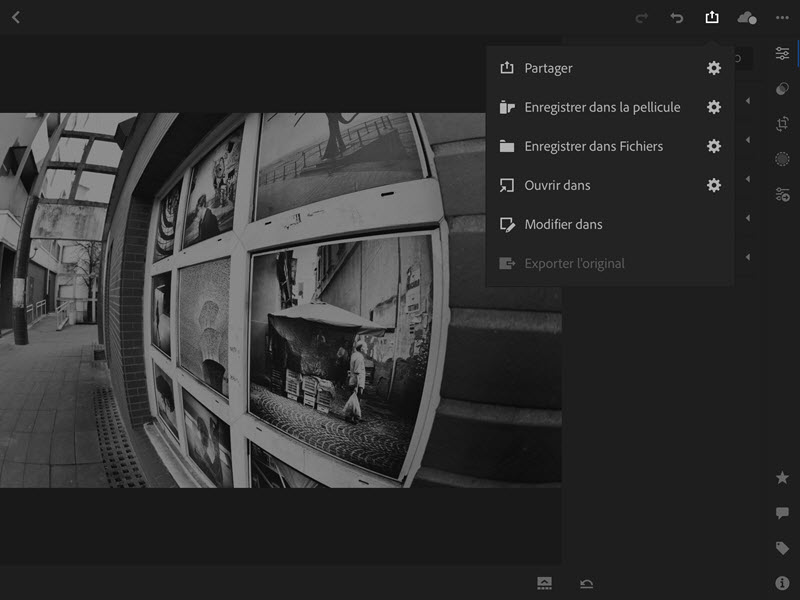
publishing a photo from Lightroom CC Mobile
3- Creation of a book of photographs
When I have completed a series that is important to me, for example a trip or a particular event, I prepare a book of photographs.
To do this, I drag the photos concerned into a Lightroom collection then I sort and finalize the choice of photos from the Library module.
I don’t use the Lightroom Books module, which I find too limited in terms of presentation. I export the finalized photos in JPG format and I use the services of an online lab and its layout software.
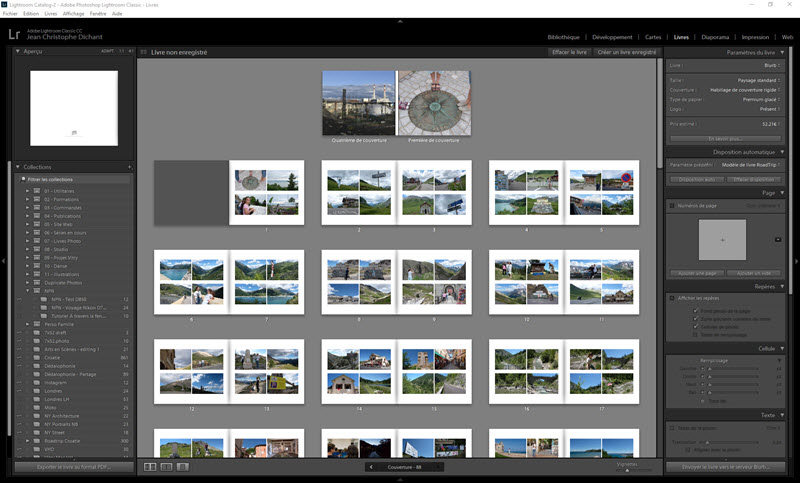
creation of a photo book with Lightroom: the Books module is limited to Blurb and offers a limited number of presentations
4- Creation of a web gallery (private or public)
Depending on the needs, I may have to create a web gallery to share the result of a photo shoot with other people. This is the case for my dance photos that I sometimes submit to dancers and choreographers to allow them to make their choice.
For this I create a collection in Lightroom, I synchronize it with Lightroom CC and the software gives me a sharing link.
I have the choice to do it in private or in public as the case may be, as well as to authorize or not to authorize the downloading of the photos. I only offer it for private photos, so I don’t have to send the files by email. Everyone can remotely retrieve what he or she is interested in. For the orders, I do not propose this possibility, I want to control the diffusion of the files and the formats.
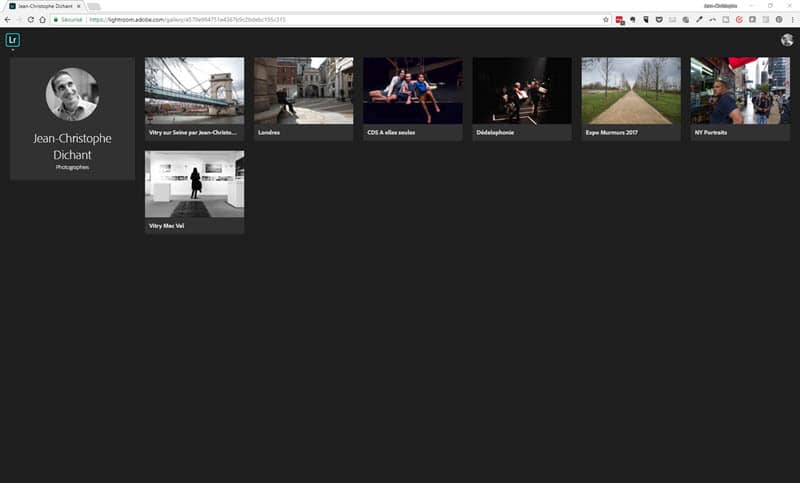
example of web galleries managed by Lightroom CC Web
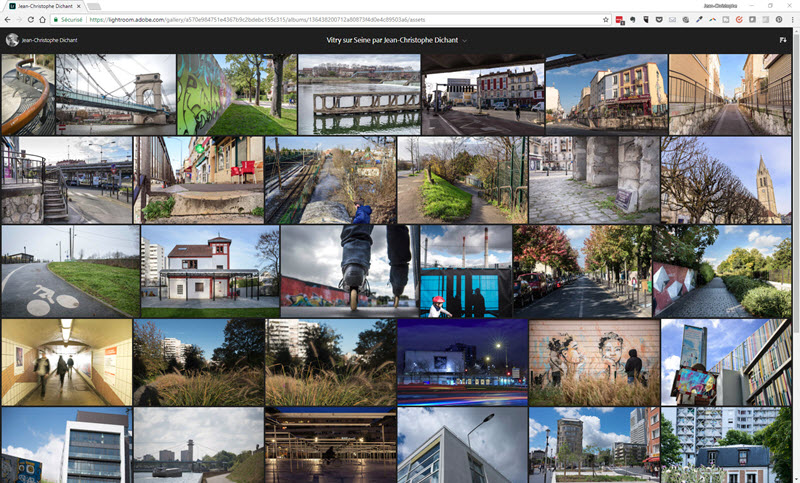
a web gallery with Lightroom CC Web
[[Option under consideration]5- Presentation of the photos on my personal website
For ease of management, I plan to migrate my personal website to the Adobe Portfolio service.
This service makes it possible to create a site, adapt the presentation of pages and photos, and publish photos directly from Lightroom without going through all the manual steps of putting them online.
The site is hosted by Adobe, backed up and secure.
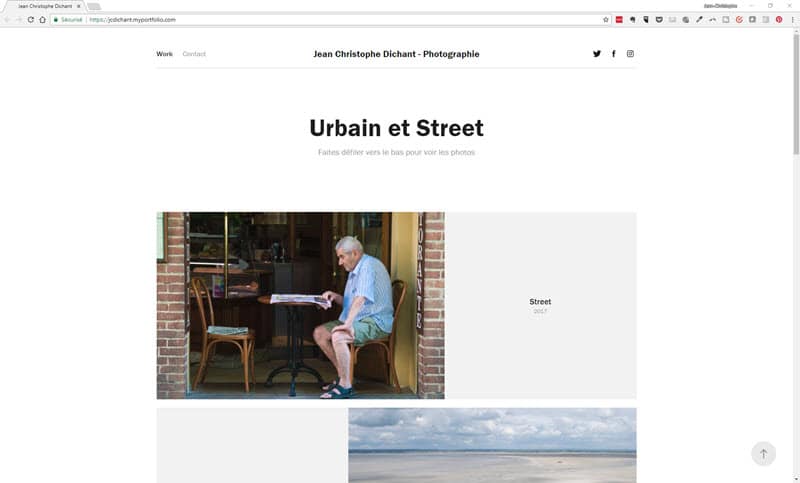
manage a website with Adobe Portfolio
I haven’t yet decided how I’m going to proceed with this configuration because I also need to publish articles on my personal site, and the current version allows me to do it quickly, I know WordPress well and it would take me some time to do it all over again. But it’s an option I’m considering.
6- Creation of a mini website
For special promotional and communication needs, I may be asked to publish a mini website dedicated to a particular event. I did it for the dance company I worked with for two years, we needed to publicize the piece and a mini-site was ideal for them.
In this case I use the Adobe Spark service and the associated mobile application that allows me to create a web page with photos and text in a few minutes.
I can then share this page, independent of any other site, it is hosted on Adobe servers.
It’s a quick and easy way to create a visual communication support adapted to all screens (the page is Responsive, it adapts automatically). The presentation is more pleasant than a web gallery, and the page is created faster than a dedicated website would be.
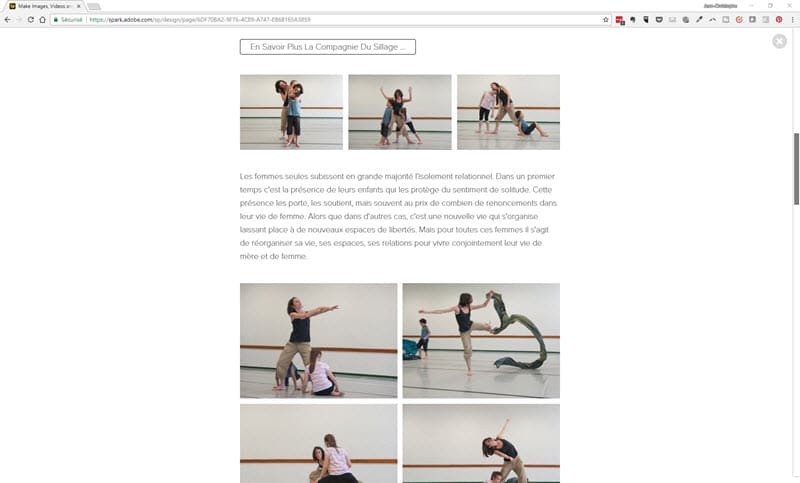
sample web page created with Adobe Spark Page
7- Creating a video slideshow
When I go to visit my relatives I sometimes prepare a video slideshow to show them a series of photos. This is the case when I come back from a trip for example. Drag the finalized file on a USB key, insert the key in a reader (TV, Internet box) and launching the slideshow is still the fastest in many cases because not everyone has a connected TV capable of accessing Lightroom Web and my galleries.
To make this slideshow, I drag the selected photos into a collection, then I switch to the Slideshow module which allows me to manage the presentation and export the whole thing in video format.
If the video is to be made public, for example on Youtube, then I use the Adobe Spark Video application and service instead, which facilitates video editing and presentation.
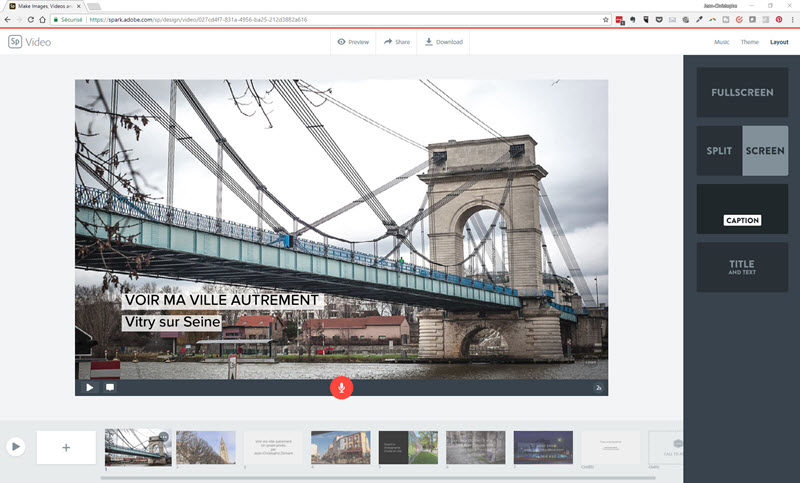
creating a video from photos with Adobe Spark Video
A workflow adapted to your needs will also allow you to perform all the necessary operations for managing and processing your photos. It will allow you to go further by publishing your photos in different formats, to different audiences, without having to excessively – and repetitively – manipulate photo files.
I am refining the above method as the software, and Lightroom in particular, evolves. I always try to save time by reducing tedious operations. By proceeding as indicated, I can manage and process about 500 photos per hour. The publication of the selected photos takes me a few tens of minutes more depending on the chosen format.
This time frame is still adequate to show my photos within 24 hours. This method saves me from filling my hard disks with double or triple files, and I know precisely the status of each photo series.
I detail the first steps of this method, management and processing, in a series of videos available online :
See the videos Management and Processing …
If you have specific questions, it’s via comments that this happens.




Discussion about this post